Wednesday 31 October 2018

Battle of Hereford 1067

In the last of my pre holiday games and in what seems like, but wasn’t intended as, a tour of all my historical gaming genres I decided it was time to see if I had enough figures to mount a reasonable full scale dark age battle. Through necessity this would likely need to be a Saxon vs Norman battle as that is the bulk of my figures. Anyway step up Eadric the Wild, living in and around Hereford and Shropshire like any good Anglo Saxon he wasn’t happy with William simply taking over and fought a series of raids and battles, around the welsh borders. He allied with the welsh which is even better so I could squeeze in some welsh type mercenaries. Surprisingly little seems to pop up on the Internet about this period, however, it appears he fought and lost a battle at or close to Hereford Castle in 1067 to William fitz Osbern, who the Duke had made Earl of Hereford. This was enough for me....
Eadric the Wild has amassed his Forces on a small rise close to a village on this, his left flank, is his only cavalry a contingent of mercenary welsh light cavalry, the rest of his ‘rebel’ army is a mix of infantry and small units of welsh skirmishers
Earl Osbern as befits his status has several units of the dreaded Norman heavy cavalry
Well armoured Infantry and a couple of small units of cross bowmen
Eadric is here to teach in invader a lesson so orders his army forward
Worryingly Norman heavy cavalry can be seen on the flank
On his left flank the welsh cavalry using hit and run tactics hold the cavalry back for a while
Annoyingly for Eadric the wood in the centre of the battlefield forces his attack line to break up slightly
The first unit of knights has been chased away but ominously a second unit is advancing to the charge
The battlelines have met in the centre, some unlucky morale rolls (seem to be a regular feature at the moment) mean a couple of key units fail to get stuck in for the Anglo-Saxons, but this central clash will be key to the outcome 
Good to see those Norman knight fleeing the battlefield 🙂
Eadric has stabilised his left flank but as the centre weakens he is forced to move troops across to support
Encouraged by Eadric himself the centre is holding
But then suddenly the centre unit collapses !
Another Saxon unit is pulled away from the left flank but it is holding just
As I guess one might expect the central part of the battle field turns into a massive melee but the Saxons are being overpowered and out flanked
Eventually the Saxons are trapped and surrounded their defeat is inevitable and the majority of  Eadric’s troops begin to run. Easric manahea to get away so will fight another day
Earl William inspects his newly conquered village, not sure how the residents would take their new overlord?

A splendid run out for the Dark ages collection, obviously I need to get the movement trays painted. We played with Kinhs of war which worked reasonably well, at the end of the day they are mainly men in armour/mail so there isn’t huge subtlety in the combat.

Tuesday 30 October 2018

On a similar theme : Heavy Arab Cavalry

So on a similar theme these guys were also part painted before the holiday and have been finished off this week. They are not bad for plastic tat as Mr B would say 🙂 (Gripping Beast for those interested) and I can now add them to my gradually growing Arab force. Not quite ready for a battle yet but I probably need a collective photo to see where I am upto. The random joy of doing what you enjoy, means I paint up some of these units knowing that one day without much real planning I will have an army to fight a battle with 🙂
I am not hugely happy with the shields as although attempting randomness they all came out a bit too similar, but they are colourful.

Monday 29 October 2018

Leading from the front : ACW

When I came across this chap on eBay I didn’t really have any option other than to buy him, he was nearly finished when I headed over to Tennessee and despite my post holiday cold he is now ready to lead a confederate Brigade into battle.
Some of you will recognise him as the Salute figure from 2011 I think, not a show I attended that year but he will fit my collection perfectly. Not sure if he is sculpted on a specific individual but given the single cast he is a fine and dynamic figure.


Sunday 28 October 2018

Battle of Lyncestis : 423 BC

The Archidamian War 431-422 BC named after the prominent Spartan King of the period was the central part of the Greater Pelopennesian War between Athens and Sparta. Interspersed with periods of peace these did little other than allow the two sides to reorganise and rebuild the resources to continue prosecuting their war aims. All conflict however, didn’t stop during these periods.

In 423 the Spartan General Brasidas supporting Perdiccas II of Macedonia sought to quell internal Macedonian conflict which as so often occurred pitted lowland loyalists against highland Macedonians under Commander/Warlord Arrhabeus seeking greater autonomy. The battle of Lyncestis took place to the North of Thessaly. Much of the Highland force would have been made up of Skirmishers and Peltasts but according to the sources Arrhabeus has started to convert some of his units to more heavily armoured hoplites (they are loosely called Lyncestians here but in reality were a mix of highland tribes and forces in a loose rebel coalition). F E Ray Jr gives his estimate of the forces in his excellent book Land Battles in Fifth Century BC Greece.

The two armies faced off against each other across a flat valley ideal for hoplite combat. Our set up is based broadly on the Command and Colors scenario, which gives a simple and roughly equal starting point. I didn’t take quite as many photos as usual 😀

The initial set up Macedonians on the left, Lyncestian Rebels on the right
Using their advantage in light troops the rebel Lyncestians surge forward sending a hail of stones and arrows towards the Macedonians
Both armies have cavalry on the flanks
Brasidas, his helots and the rest of the Macedonians weather the storm but then in a cloud of dust begin to march forward
Arrhabeus is close to the right wing of his army
Suddenly on the right wing things have become disorganised this could be an important break through for the rebels
Along the rest of the battle line the Hoplite Phalanx have engaged
But things have turned again on the right flank a couple of poor morale rolls and the rebel Lyncestians have been caught by heavy Macedonian cavalry as the Macedonian infantry turns to crush the right wing, Arrhabeus has to charge in to hold them back
The Rebel left wing is folding back on itself
Somehow the whole line has broken up into individual combats
The weaker and less well trained rebels get crushed on the left wing by more Macedonian cavalry
Brasidas watches on as the final combat reaches an inevitable end !

With the rebel forces fleeing into the hills Brasidas meets Perdiccas but they disagree on any pursuit, this would prove fatal historically as the rebel forces would regroup and when Illyrian allies swopped to supporting Arrhabeus, Perdiccas fled with his army leaving Brasidas to fight a difficult withdrawal.

A fun battle, some very poor morale tests early on meant the rebels weren’t able to make the most of their early charges and soon fell behind meaning inevitably the better trained loyalist Hoplites and their spartan mercenaries would win out in the end. History once again repeated on the table top battlefield 😀

Monday 22 October 2018

Tennessee Battlefield Tour : Summary

So I wanted to do a short summary of my trip in case you all were interested, but mainly for me.


Here is a map of the route and main locations I visited, the majority in Tennessee, but also Mississippi, briefly in Alabama and Georgia. For those interested in such a trip. The distances are not too great but America can be deceiving and it takes longer than you think to drive about. The roads are great and only busy in the major cities. Most of the Parks are free and accommodation is plentiful and cheap (or expensive if you want) Petrol is dirt cheap compared to the UK ! I walked as much of the battlefields as I could but you can do much of it by car. The weather was great October was a good time to visit I had been told that summer is a little too hot as much of the area is forest there is little in the way of wind/breeze to cool things down. Buy some really good insect repellant 🐝

I of course approach things from an open minded historical perspective but did feel slightly uncomfortable not so much at battlefields but in a number of towns where Confederate memorials did feel a little insensitive, many of course were put up about 100 years ago and I understand the conflict this has/is causing. 

I can see me returning in the future Nashville has a wonderful vibe and with or without the Civil War there is plenty to do. The battlefields are on the whole beautifully preserved, almost all have visitor centres and facilities but for some reason none sell food or drinks so don’t expect a cafe on site ? You might get a tin of coke or bottle of water but that’s it.

The companion book for the trip is Company Aytch by Sam Watkins, if you don’t know the book it is one of the most famous first hand accounts by a private who fought in the 1st Tennessee Regiment.
From Tennessee he joined up early and fought in almost all the battles on my trip, it is very much a first hand perspective but it makes fascinating reading when standing in the actual location he is writing about.

Well if you made it this far thanks for following. It will be back to usual soon with more wargaming and we will certainly be seeing some of the Tennessee battles featuring in the future 😀

Tennessee Battlefield Tour Day 10 : Stones River

Those faithful few who have made this far will be glad to know we are near the end and if you hadn’t twigged from the geography my final day involved the drive back North to Nashville via the Stones River battlefield at Murfreesboro. Like Kennesaw locates not far from a major city the park was busier than the more remote locations, it is also not a huge park as the town of Murfreesboro has encroached somewhat on the original battlefield, as I chose to walk it it still took a good three hours to get around....but then it was another lovely cool but sunny day.

Historically the battle took place over New Year 1862/63 with the confederates under Bragg as so often managing to snatch defeat from victory under Gen Rosecrans.
Another good visitor centre although the introductory film was a bit short and didn’t really give a proper run through of the battle
Some nice artillery on display with caisson for a change, nicely set up as I assume they would have been in battle
A shot from the other view these union cannon would have defended against the onslaught in the afternoon of day one
Looking across the cotton field to the south east
Rebels had pushed the union forces two miles back and reached this end of the cotton field before being held back but union troops on the Nashville Pike, 
Looking from the edge of the field, the Nashville pike is directly in the distance where the ground rises up
One of ces the Union Forces held out longest the slaughter pen, a very extraordinary and quite moving place, Union Forces held here for a long time before being pushed back, the cover in the rocks of course very good
Looking roughly south west out side the slaughter pen confederates attacking form the trees in the distance and from the left
McFadden’s lane, many Union troops had encamped along here prior to the first day remember it was the 30 December and very cold
Some good info signs across the battle field
More initial union deployments McFadden Lane in the background
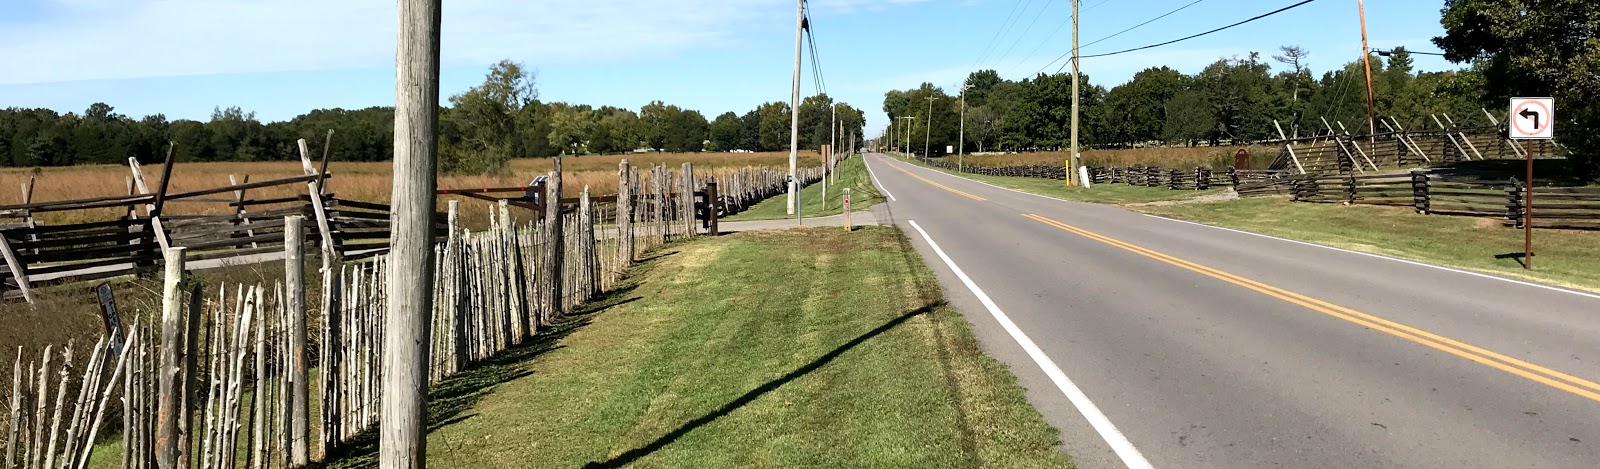
Ok this has no particular historical significance but I am after all a Wargamer,  if you look carefully you can see four different types of fencing ! I have some more terrain to build
Moving over the Nashville Pike we have Hell’s Half Acre and to the left the Round Forest, this area formed the hinge where the union line had been pushed back on itself, but despite numerous assaults Hazen’s Brigade held out here. The accounts of the battle describe a grim scene with the whole area being literally covered in confederate dead at the end of day one !
The Hazel Brigade Monument, I hadn’t realised this was constructed in 1863 by survivors of the Brigade, to commemorate their fallen comrades, this is apparently the oldest civil war memorial obviously constructed well before anybody knew what the outcome would be.
I then walked north to the McFadden Farm
Some of the field preserved on the farm
The location of the ‘grand battery’ which put pay to the confederate assault on the second day of the battle.
The artillery monument on the farm 
Stones River itself by the McFadden Ford
Back on the Nashville Pike, the final defence line of the union forces
And finally I don’t normally photo cemeteries but this is a period location where they have a shot of the cemetery being created back in 1866, of course only Union troops historically confederates were buried in mass graves and not then relocated to National Cemetries.
So that was the end of the battlefields and I headed back to Nashville for a night out, highly recommended if you get the chance 😀

I plan to do one more summary blog of the trip.