Saturday 23 July 2022

The Battle of Teplitz 1762 : Seven Years War

As mentioned on previous post we attended the Pendraken 30th Birthday Celebration last weekend and put on a demonstration battle. 


With a 4 x 6 table Martin had chosen a suitably small battle and perhaps one people won’t know very well the Battle of Teplitz 1762. As always my patience prevents me from writing and exhaustive history of the battle here. The best place of her background should you wish to investigate further is here https://www.kronoskaf.com/syw/index.php?title=1762-08-02_%E2%80%93_Combat_of_Teplitz. In my normal shorthand for those who want to get straight into the action. Both sides have about a Corps, the Austrians slightly more Infantry the Prussians more cavalry. 

The Prussians are on the attack again after initially taking the significant high ground in the area, the Wacholderberg, the Austrian cavalry and then infantry were able to secure the heights forcing the Prussians to retreat. To make a balanced scenario I have allowed the Prussians to bring their cavalry to the battle historically they appear to have stayed back holding the line of retreat open. Also the Prussians have Kanitz small Brigade which doesn’t appear to have been in the battle although listed in the OB.

There is a reasonable map on kronoskaf of the action.

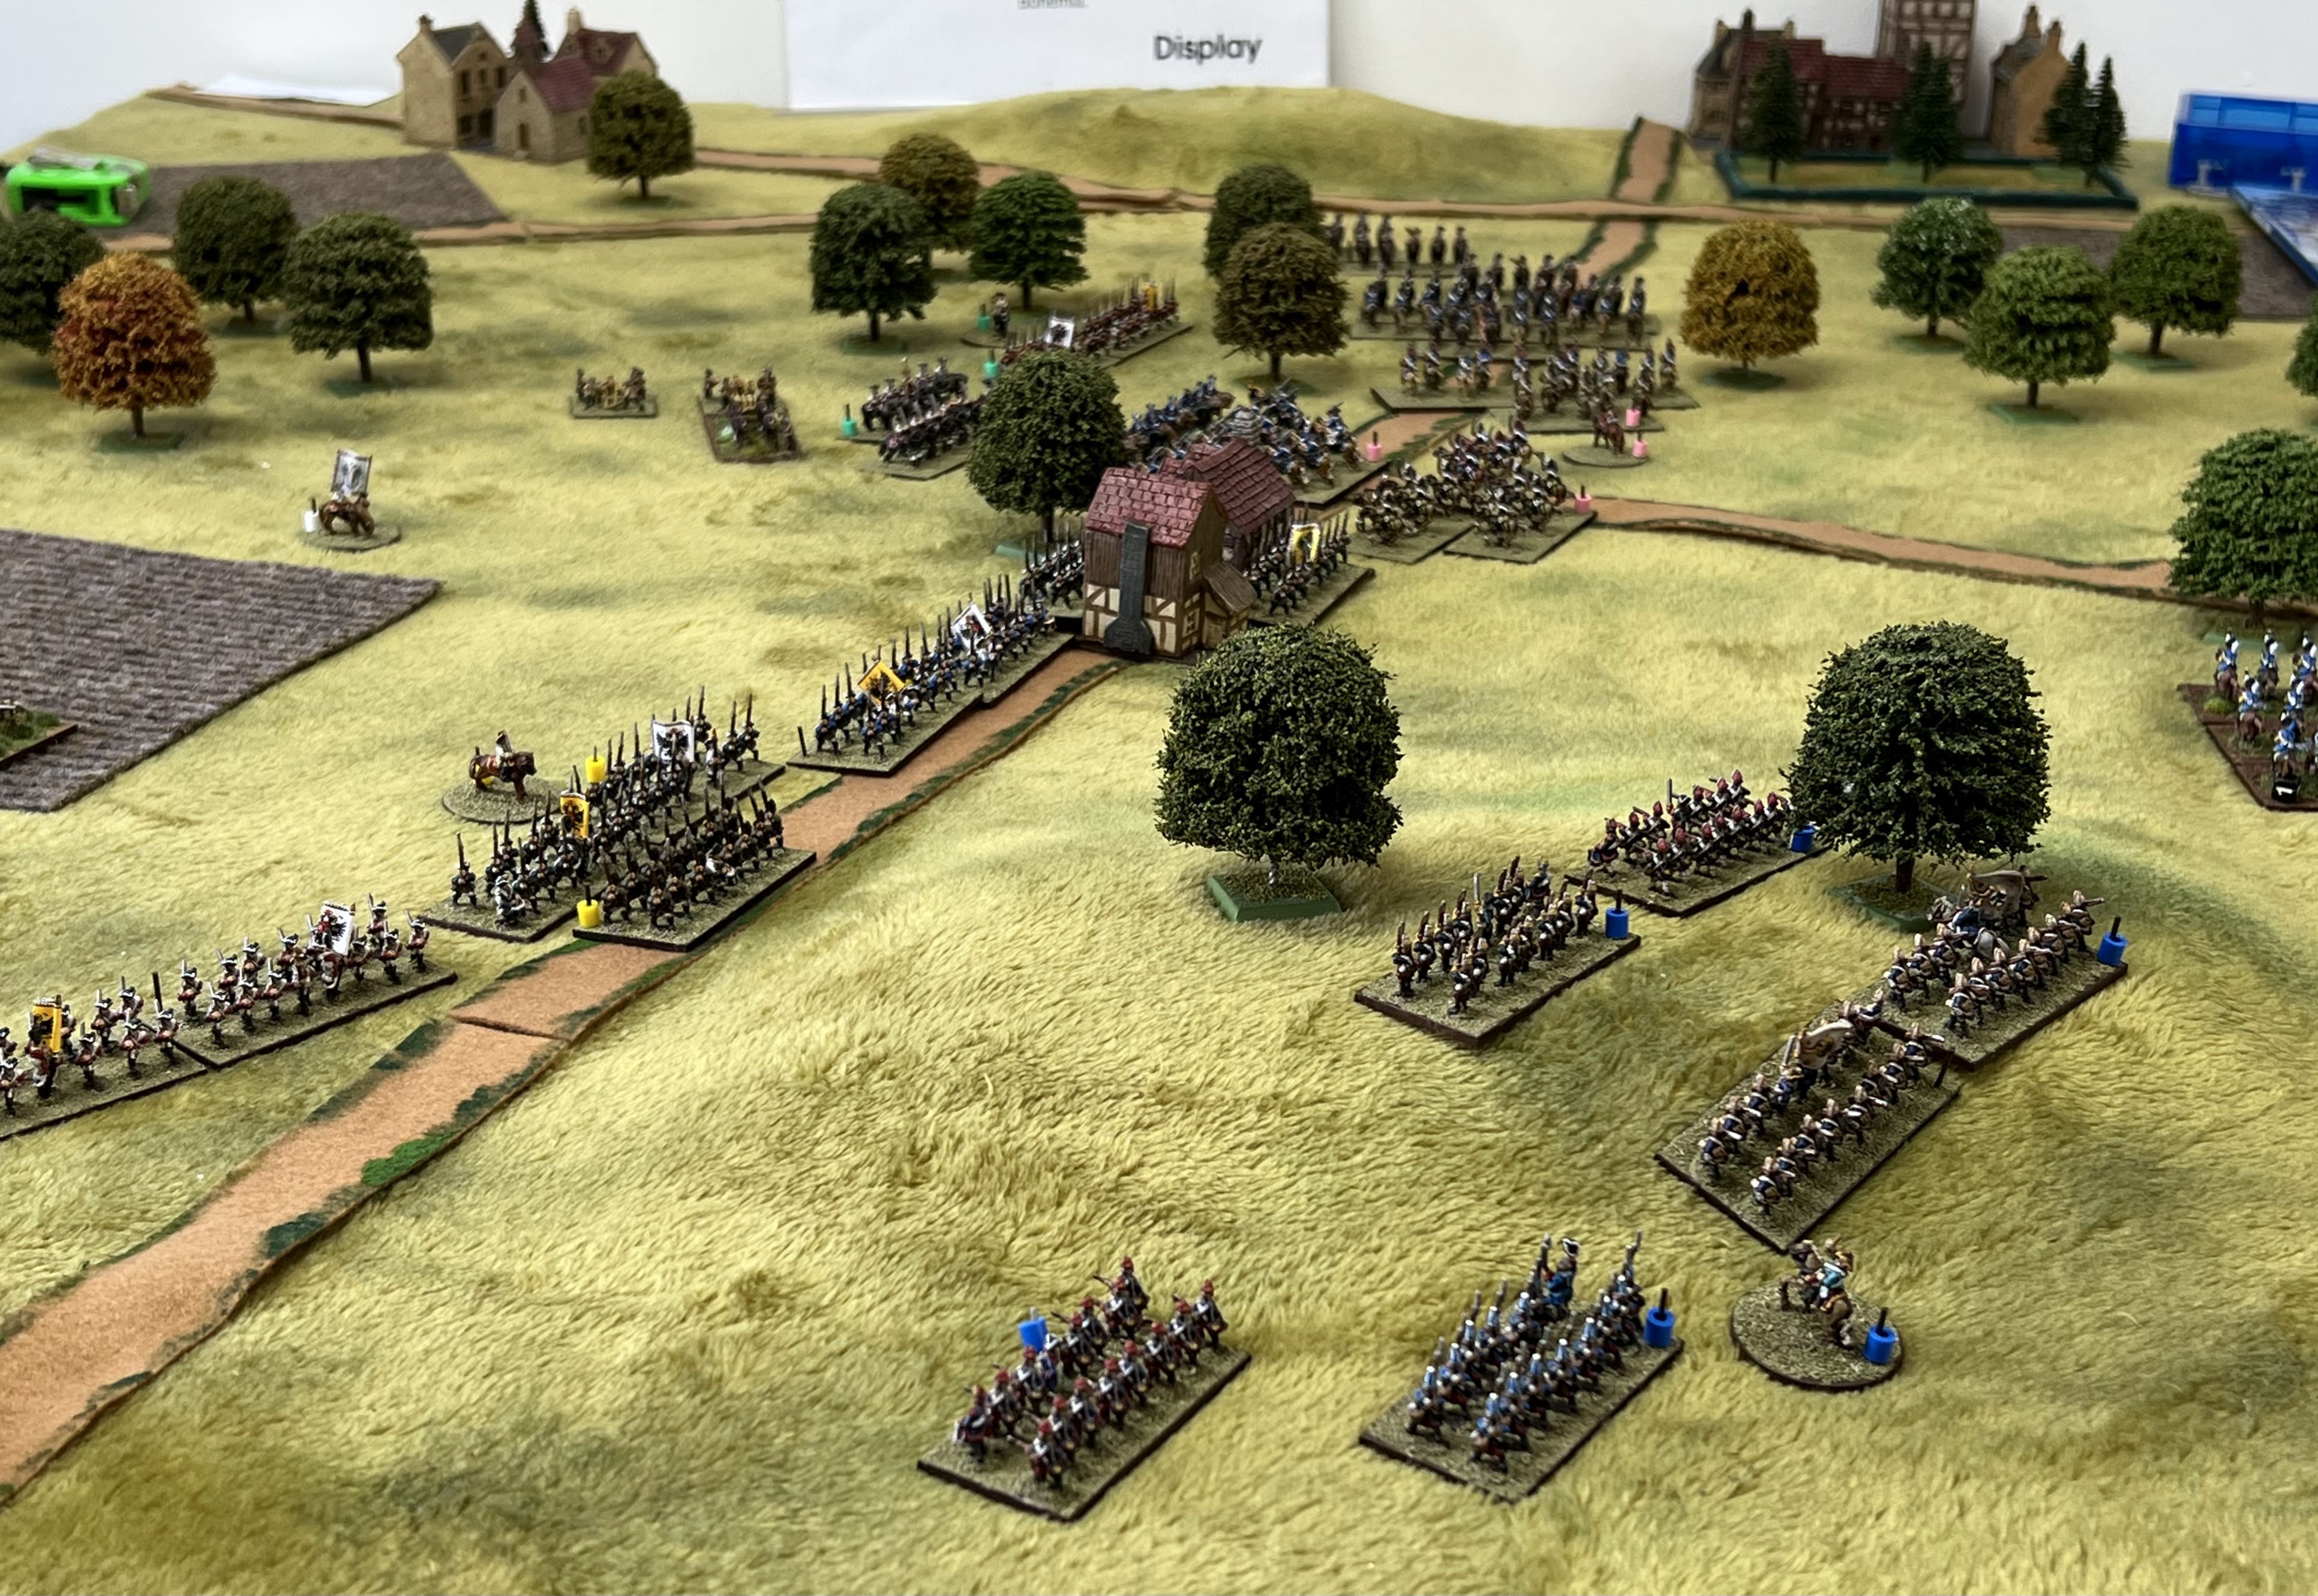
This is then all translated to the overview above, I asked Martin not not study the battle too closely so the Prussian Freikorps could arrive as a surprise  reinforcement from south. Their arrival would be determined by a simple d6 roll.
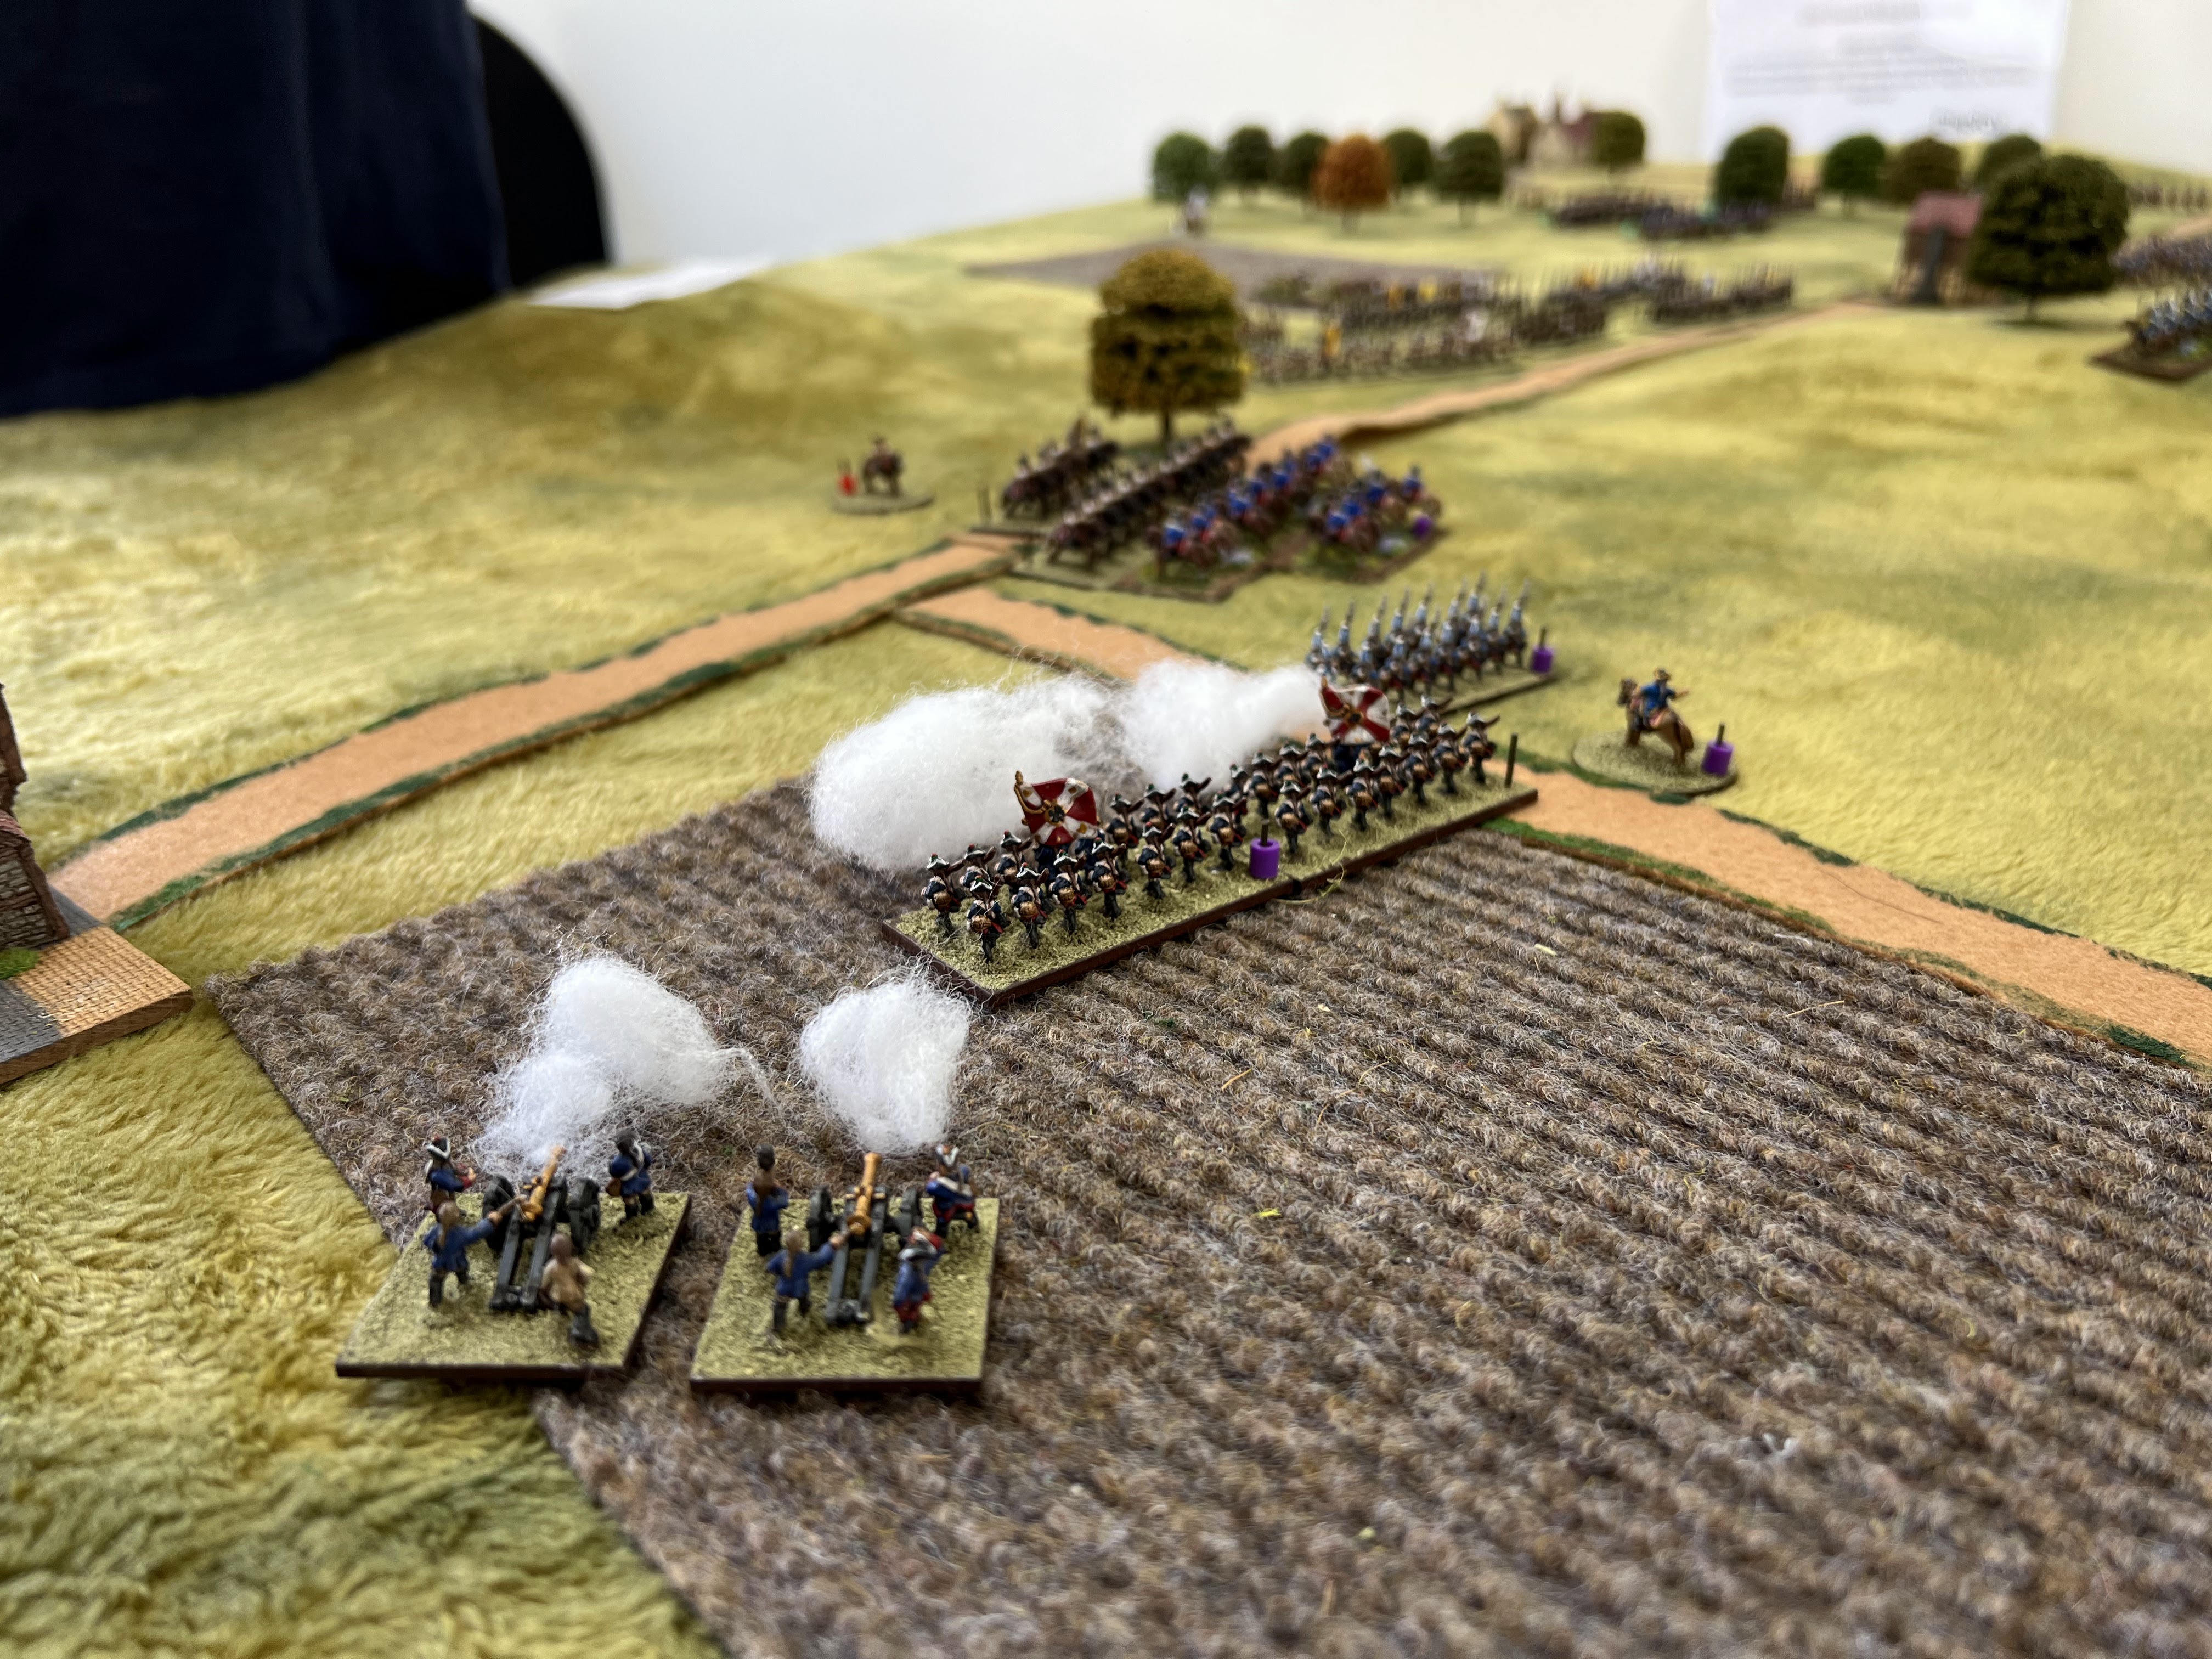
Von Kleist’s infantry including several combined grenadier battalions advance from the village of Kradrob
It felt appropriate for the Belling Hussars to capture the Wacholderberg as they did historically 
Kanitz’s brigade arrives on the Prussian left wing
The bulk of the Austrian Infantry get moving towards the high ground
The first clashes are on the Prussian left
And at the start the Prussians get the better of it
Both sides push infantry towards the Wacholderberg
Beyond the high ground cavalry clash in the open ground between the woods
Von Kleist captures the high ground for the Prussians
and both sides open long range musket fire 
The cavalry clash continues but it isn’t decisive at this stage
Prussian grenadiers on the high ground
 then breaking with history and having already dented the Austrian advance the Grenadiers drive down the hill
Kleist’s Freikorp arrives a bit later than hoped for
But the Prussian grenadiers have put the Austrian infantry to flight
At this point we reached a suitable point to stop the battle, giving the Prussians the victory
A very enjoyable contest which seemed well received by all the visitors. There were several other games on display but sadly I didn’t take any photos. Leon and the guys at Pendraken put on a great day providing food and refreshment. They have developed some excellent facilities and we plan to be back some time in the future.
I have also done a bit of painting this week and completed my next French battalion the 27th

I have another battle to blog but we are away for the weekend so that may not be loaded till next week.

Thanks for popping by 😀


Wednesday 20 July 2022

Jam and peanut butter : Painting update

 Just an update on some painting progress, if you’re not sure about the title check out Stew’s Terrible Loss blog listed at the side 😀 

Last time I shared the 15mm late war Germans I mentioned I needed some 88’s to round things out, as if by magic Martin (many thanks) had some unwanted from a previous, no longer active, project. I’ve completed these and some more bits 

2 x 88’s with the command vehicle which I had as a spare 
They came with some rather natty transport
Some objective markers , bits picked up at a show ages ago which had been sat on the side, so I finally got round to basing and painting them
Prussian SYW Jaegers, with the battle of Teplitz to be played we needed a unit of Jaegers for The Frekorps. As is often the case I had these but they weren’t painted so the day before I rushed these to the top of the painting queue. I will blog the battle pictures soon , honest
Finally not many Lake District landscapes recently but I have been out so here are a couple of shots, the first near Derwentwater
The second one of the many Neolithic stone circles a few miles from our house.
Finally at the Pendraken Birthday bash I felt obliged to buy something from their shop, we all need more books so picked this up hopefully useful for my impending retirement and some dark age tents which are being painted

So that’s it for now a show and tell of what I have been upto, almost completed another french infantry unit 👍and  ordered some Norwegian stuff 


Thanks for popping by 

Sunday 17 July 2022

Norway 1940 : The Road to Dombas

A second battle from last weekend. A useful set of scenarios again from Wargames, Soldiers and Strategy No 100. My collection isn’t quite big enough to play the full scenario and campaign as listed so I have adapted for the figures I have and to make sure it is a balanced combat. The first scenario is based around the German defence of Hagevolden.  

The background for the mini campaign is well covered in the article so I won’t list all the details here. In essence the German troops have been dropped into the heartland of Norway to capture the railway junction at Dombas but with limited supplies and reinforcements the small force has been cut off. The Fallschirmjager have dug in around Hagevolden, the Norwegian forces are on the attack and must force a way through. 

We had ten units a side with fairly small units. The Germans have managed to recover  75mm gun from their supplies, the Norwegians have an early lend-lease French tank. (There we’re some French tanks later in the campaign but probably not at this early stage)

The Paratroopers taking cover in the woods
Machine gun dug in together with a spotter for their Howitzer
The Norwegian infantry advances down the right supported by Madsen machine gun unit
Slow moving and poorly armed the R35 has little to fear from the Germans, the rest of the Norwegian infantry moves across the snowing fields towards the farm
The Norwegians on the right come under fire through the woods and the advance starts to stall in the distance their mortar has laid down some covering smoke for the attack
The rest of the Germans dug in around the farm
A textbook flanking attack down the right as the Norwegians push over the small road bridge and frozen stream
They are met in the woods by fierce resistance despite being pinned down
The Fallschirmjager put up a a withering fire
Things get nasty with hand to hand fighting amongst the trees brutal stuff both sides take casualties but the advance is being slowed
German casualties are mounting around the farm where they are targeted by mortar and infantry fire
The Norwegian officer pushes over the bridge in support of the remaining units on the right
With the assault on the right stalling the Norwegians order a more determined advance across the open fields
The defensive line is now very thin 
But the Germans have held the woods and can pull their only remaining unit back into the centre
As the Norwegians make a break for the road (final turn gamble to secure the objective) the R35 pushes forward but it is too slow moving and the Germans jump out of the way
We had the option for a one extra turn but the dice were with the Germans. So a minor victory to the Fallschirmjager who held the line but it had cost them dearly and all but one of their units were combat ineffective by the end of the battle.

A fun game very hard fought. Would like to develop a few more scenarios in this theatre but my troops are slightly limited. I need some Norwegian ski troops so if anybody is aware of suitable figures let me know. I have plenty of early British but perhaps a few French ? Next up some painting progress and yesterday we put on a SYW at Pendraken HQ to help celebrate their 30 year Birthday celebrations.


Thanks for popping by 😀


Wednesday 13 July 2022

Marcher Lord : Battle at Ogmore

Taking inspiration from a recent edition of Wargames, Soldiers and Strategy our game at the weekend was a Dark Age skirmish. The background set out in the article has the local Norman Lord setting out with a force to collect tax from the population. The welsh tribes are not happy and set an ambush.

I adapted the size of the armies slightly adding in an extra unit per side and giving the respective army leaders a small elite unit of retainers.
The Norman force starts on the battle field split by the small Ogmore River which is crossable, they have been distracted by welsh cavalry demonstrating on the distant hill
The rest of the welsh force is hidden in the surrounding woods
The welsh force is mainly archers and light spearmen
The challenge gives both sides something to think about the Normans must avoid their cavalry being dragged into the woods where they will lose their advantages, the welsh force is very spread out and in danger of being defeated peace-meal. Will the Norman crossbowmen be able to go toe to toe with the welsh archers ?
As the Norman move forward the welsh appear from the woods
And pepper them with arrows from the right, this pushes much of the Norman army to move to the left across the river
But one unit of Norman knights crosses the river the other way seeing some exposed welsh to potentially attack 
Normans crossbowmen crossing the river
The unit of welsh spearmen make it back into the woods but the small skirmish unit may be too slow
As the leading unit of Norman knights is forced back form the far woods the Lord advances forward to support them
Some of the Welsh are back in the trees jeering at the attackers
The other Knights are pushing into the woods
Whilst the Norman Lord and his retainers have caught the Welsh cavalry napping and they scatter
The knights in their enthusiasm charge into the trees to cut down more Welsh spearmen
Having now wiped out the Welsh on the far side of the river the axis of the battle has changed and the remaining units are facing each other across the river
The welsh charge through the river looking to finish the Normans off
Showered by arrows two more Norman units flee the field
The rest of the Welsh push forward sensing victory
Surprisingly honourable or foolish the Norman Lord chooses to resolve the combat by single combat
The Welsh commander is however no push over and the Norman Lord is quickly brought down. Only the quick action of his sergeant saves his life as he is dragged back onto his horse before fleeing the field

So a victory to the welsh, but it cost them, I fear the Marcher Lord will return another day but will bring more force with him next time. A fun game, tough for the Normans the Welsh were lucky with very few failed activations which helped.

Thanks for looking next up some WW2 Norway from the weekend

Matt 👍