Monday 30 March 2015

The Uman Kessel : Retreat to Bratslav

The first battle in our Uman Kessel campaign sees the Russian 12th Army commanded by General Ponedelin attempting to escape the German 17th Army under Von Stulpnagel. Using Blitzkrieg Commander rules we used the pursuit scenario where the smaller Russian force sets up in the centre of the battlefield with the German forces entering with mobile deployment from a random baseline, we also agreed the Germans were allowed to bring one formation (elements of the 16th Panzer) from the NE flank.

Germans as the attacker get the first turn and come on from the North (right)
The 1st Mountain Division is leading the way for the Germans represented by 3 battalions of the 98th Mountain Infantry Regiment, these are crack troops with good mobility in trucks and halftracks. They can be seen coming on from the right in the first few pictures, but immediately taking some casualties as the Russian 4th Anti Tank Brigade guns open fire. The Germans are supported by the 44th Panzerabwehr (Antitank) battalion which can bee seen in the foreground unlimbering. Again in the second photo the Russians have opened fire taking out one gun early on.
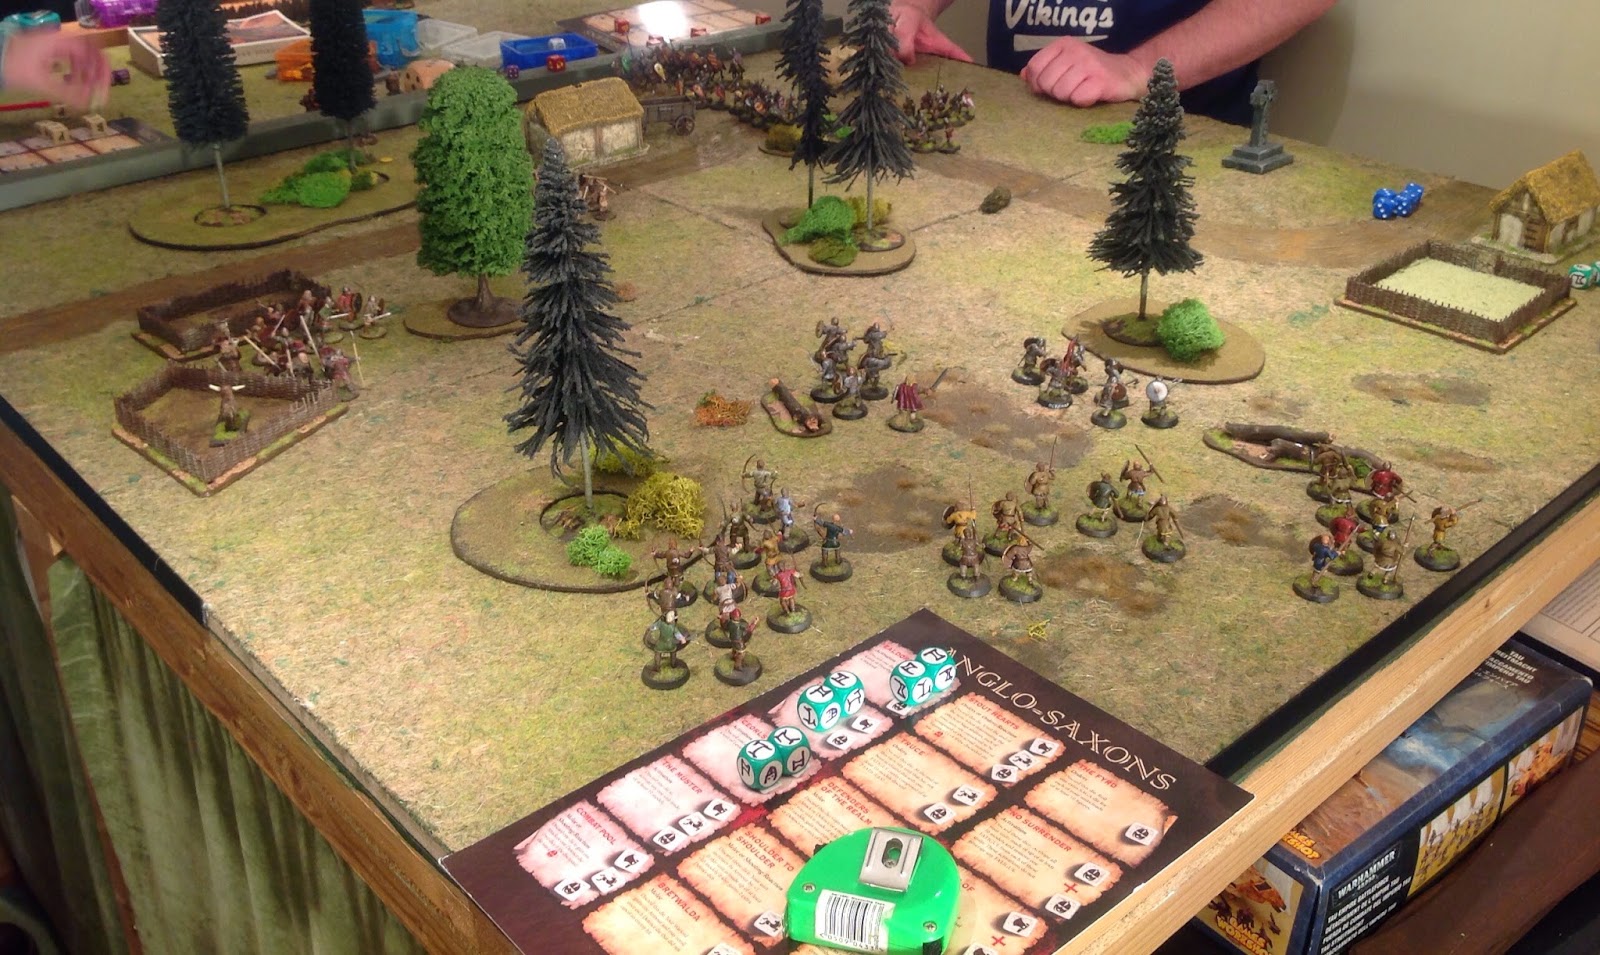
Russian set up in centre around farmhouse with infantry dug in in the central wood
The Russian forces shown above on the left consist of the 240th Mechanised Division on the road, the 44th Rifle Division dug in around the farm and woods, and elements of the 39th Tank Division (2 light companies of BT7's and one medium Company of T28's) attempting to hold the flanks.
Overview of the battlefield, German 50mm anti-tank guns have opened up on Russian Armour
The objective for the Russians in the battle is clear they are trying to get as much off the battlefield intact as possible. They are outnumbered and for a 'minor objective' they need to get ten elements of the field. This looked easy to start with but he battle proved to be an excellent challenge. The Russians having to decide between leaving units behind and running the risk of being overwhelmed and the Germans having to try and drive forward as quickly as possible.
German infantry starting to dismount and Anti tank guns fully active
One big challenge for the Mobile German troops was when to dismount, they are much easier to kill in vehicles so for safety better to dismount but far slower to advance.
Russian Mechanised Corps starting to pull back but caught by Artillery barrage
The Germans as the attacker have 3 scheduled artillery Barrages aimed in and around the road junction these were particularly effective in disrupting the 240th Mechanized Division who were pulling back along the road.
16th Panzers enter from the NE but have restricted deployment due to ground conditions
The Panzers form the 16th Division arrived on the flank on turn three, although very deep on the flank they are restricted by the poor ground conditions on either side of the road. Although they push on fast they have limited impact on the battle overall.
Losses are mounting up by valuable Russian Armour is pulling back further each turn

View from German baseline as the Russian armour disappears towards Bratslav
The town in the far left corner represents Bratslav and represents the next point on the Russian retreat to Uman.
Russians now pulled back beyond the road is it retreat or rout ?

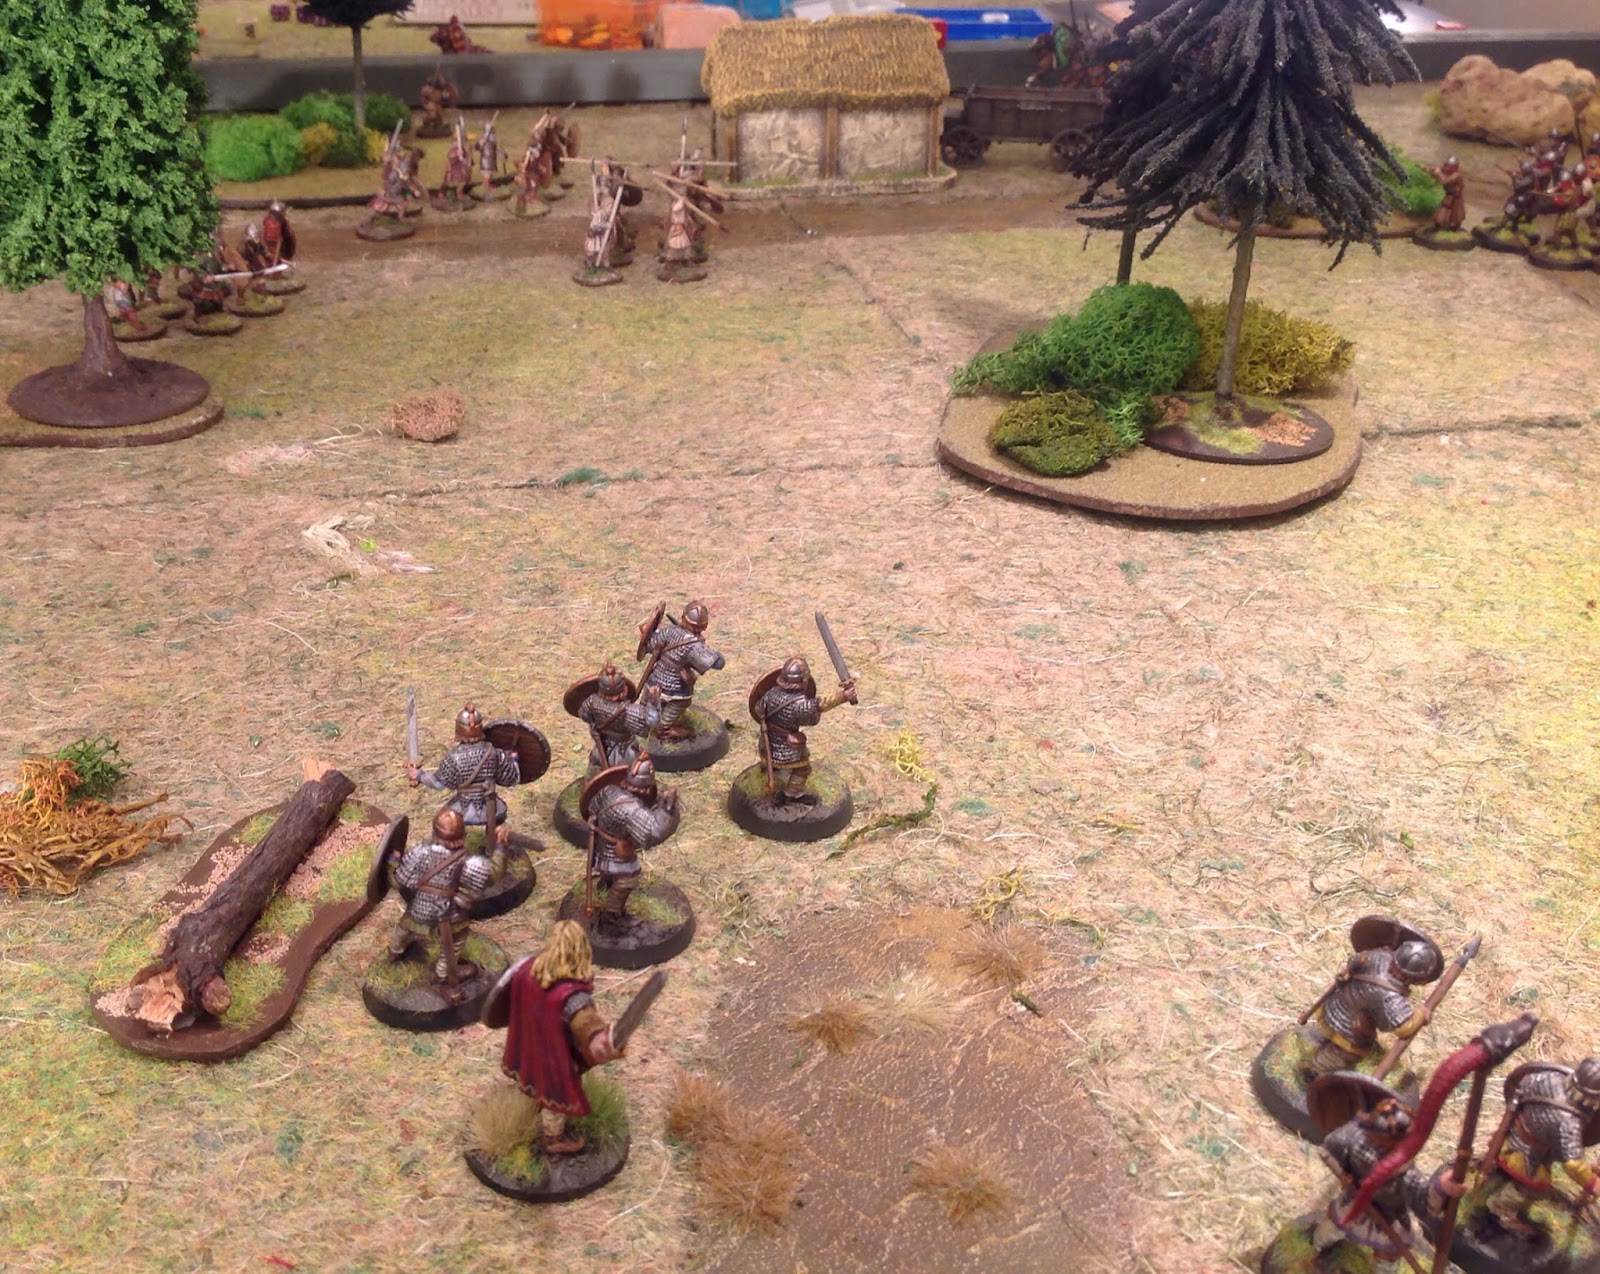
German Infantry are now on foot and having to slog it forward to push Russians out of the woods
By this stage in the battle the Germans have started to pick off any remaining Russian armour but the majority has, as required by the scenario pulled back from the front looking to regroup on the other side of Bratslav.
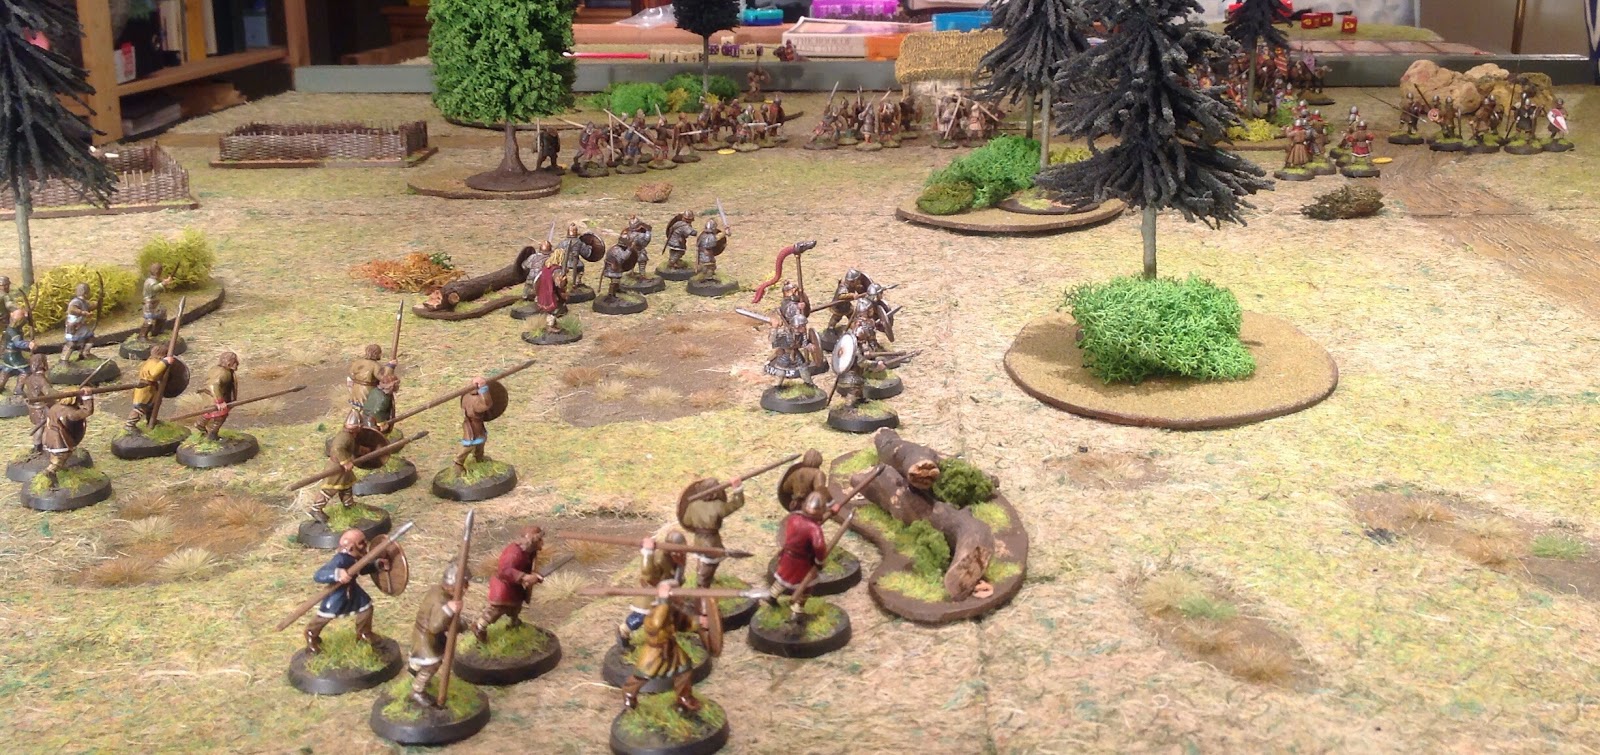
More pressure from the Germans pushing forward with anti tank guns
The Germans are now struggling to get forward quickly enough without adequate armour support the infantry is just too slow to capitalise on their advantage. Too little to late the 44th Antitank Battalion pushes forward to press the retreat eventually taking up a forward position in the nearby field.
German infantry in the mid ground advancing towards woods

Almost all remaining mobile Russian armour has made it off the battlefield

98th Mountain Infantry now clearing out the woods
At this final stage of the battle the Russians had achieved their minor objective and gained 2 victory points for the campaign. We judged the remaining Russian infantry in the woods would be captured and sent to work in factories back in Germany. The Germans have however, destroyed more than twice the casualties inflicted on them so they too gain 2 VP's. The outcome then for the campaign a tactical draw.
Final Russian infantry make it off the field, but some are left behind in the woods to be captured
 
Final thoughts, a really great battle, what looked easy on both sides was actually really hard to achieve.

Sunday 29 March 2015

Operation Barbarossa : The Uman Kessel Campaign

I have been hankering after more Eastern Front WW2 recently and have been painting up lots of 6mm reserves in preparation. As a start we have settled on playing a series of loosely historical battles which took place at the end of July 1941 as the German invasion pushed into the Ukraine.

My starting point for planning the campaign has been the excellent Osprey book Operation Barbarossa :Army Group South, which has a summary map of the Uman Kessel (pocket) and it's development. My sketch below shows the general position, with the German 17th Army (von Stulpnagel) and 1st Panzer group (von Kleist) coming in from the northwest (black arrows). The Russians, mainly the 6th and 12th Armies (Muzychenko and Ponedelin) were in pretty much full retreat and are shown by the red dotted arrows.
I have identified five key battles to give a feel for the campaign and to give us maximum variety. I have used real units involved where I have been able to identify them but only selected certain relevant units/battalions and regiments to give a blend and fair chance to both sides.

Battle A The Retreat to Bratslav (16 July) - The 1st German Mountain Division is in full pursuit of the 12th Army, a rearguard made up of parts of the 13th Rifle Corps, the 16th Mechanised Corps. with the attached 4th Anti-tank Brigade have been left in pace to hold back the German advance.
Battle B - Break out at Monastyrische (21 July) The Russian 6th Army attempts to break out before encirclement by the XLVIII Panzer Corps.
 
Battle C - The Battle for Uman (Late July) remnants of the Russian 18th Army which having come to help have now been caught in the kessel themselves and attacked outside of Uman by the 24th Infantry Division (part of the 17th Army).
 
Battle D - Breakout at Novo Archangel'sk (31July to 3Aug) the 4th Mechanised Corps attempts again to break out of the kessel towards the south and east. in their way are the tanks of the 14th Panzers.
 
Battle E - The Bridge at Pervomaysk (3rd Aug) the German forces have now linked up and the kessel is compete. The 16th Panzers need to secure the 300ft Bug River bridge at Pervomaysk against surviving fragments of the remaining Russian forces.
 
We'll be using Blitzkrieg Commander as a rule set and using the standard scenarios from the ruleset to reflect each battle. Victory overall will be on VP's collected in each battle. The first battle was played last night so will be blogging that as soon as I can.........


Saturday 28 March 2015

Roaring lions

Another run out for lion rampant down in the dungeon last night so we decided to try some of the scenarios which we hadn't played before. First of these was 'meeting the neighbours' a scenario where the two forces set up in the furthest corners of the table and then attempt to race across to escape from the enemies corner.

If you have seen my previous lion rampant posts you will have seen my new retinue is based around a Norman Lord Ranulf de Gernon, but they have come up against some very late medieval opponents. So at the last minute I thought I would tweek the figures to see if I could make the retinue look a little more period appropriate. I pulled out some of my empire troops and swopped them in for the Norman serjeants. (you'll notice I didn't take many pictures and none of the enemy, as Clifford the Butcher is entering some of his retinue in some fancy dress contest...Lead Adventure)
Here you will see my armoured halberdiers moving out to block the enemy advance.

Pretty much the whole retinue now on the field, the Bretonnian infantry fit quite well with the Norman Cross bowmen and Knights.
In terms of the actually battles, my guys got off to an incredibly slow start, with multiple fails in the early ordering stages. Hence much of the enemy was well across the board before we got going. I was able to sneek the sarjeants behind the house and having chased off a small group of bidowers they slowly made their way right across the field. Much of the rest of the battle took place close to the house where two units of sarjeants formed schiltrons and shouted rude words at each other, the defensive capabilities of the sarjeants in schiltron meaning nobody wanted to charge in. The better foot men at arms and knights eventually killed off the enemy foot men (and themselves) who had tried to sneek through the new field shown in far left of the above photo.
 
Armoured sarjeants push around the house, they eventually made it all the way across the table.

Schiltron formed proving a very effective road block to enemy advance
With the enemy unable to get any units off the board it was two glory points to my mixed bag and on to the second scenario, we picked out hammer and anvil another new one to try. (sadly I couldn't get any photos of this one as the enemy retinue became increasingly camera shy !) In a nutshell I continued to roll loads of double 1's across both scenarios I think 8 in total. Clifford had boasted at the start of the second battle that he would kill my lord .....and yes he did with one of those double 1's but not until my lord had killed him in a challenge!. But the early entry of my heavily armoured foot men had already started to whittle the enemy down. Eventually they managed to get one unit of sarjeants away, but as I had killed most of the rest of the retinue it worked out 6 to 5 glory points at the end of the two scenarios. Most enjoyable....... the rules are proving fun and easy to use, scenarios are quirky, my only criticism is whether it can expand to something larger ?

Thursday 26 March 2015

Exploding 8's a little too much !

We played another game of deadzone over the weekend. Having read the rule book closer we realised our armies were well over sized so they shrank considerably for these two scenarios down to the official 70 points. This meant the enforcers had a very limited five figures, but they make up for this with good old shootiness !. First scenario for the enforcers was a mix of killing the enemy but keeping alive. This really suited them as they could stay back and 'blaze away' as the plague ones tried to get across the board. Needless to say the lucky rolling of dice always has an impact and I have a bit of a reputation for being able to roll very high when needed. This enabled the enforcers to cut the plague men down pretty quickly without the need to get too far down the board. 

Set up for initial scenario, enforcers finding cover
Plague seem reluctant to poke their noses out !
Charging down the middle has to be risky !
So we sorted out a second scenario, my enforcers kept the same five troops whilst the plague men upgraded to have a captain with a bit more punch. The objective for the enforcers this time was to kill as many as possible but more worryingly to attempt to assassinate the enemy captain. In previous battles this has proved almost impossible to do. So finally after yet more good shooting by the enforcers we get to the title of this post. In deadzone (based on D8's) when you roll an 8 you get to re roll a fail and then if you roll another 8 you can roll again. Now when you add this to my obvious excessive luck at rolling dice you can get quite dramatic results. Step up my captain to shoot at the enemy commander and with 5 dice he scored a pretty unbelievable 8 hits ! Game over although I can't but feel a bit guilty...........still not limbed for a force yet, but getting closer.
Set up for scenario two enforcers holding back again !

Monday 23 March 2015

Imperial War Museum Manchester

Travelled down to Manchester on Sunday to pick student son up for Easter holiday, so took the opportunity for some Father and son time at the Imperial War Museum at Manchester. Lots of interesting stuff but for somebody currently planning and painting figures for an Eastern Front campaign pride of place has to go to these two, T34 and T55 Russian tanks.


Sunday 22 March 2015

Tanks and armour need fuel...

In preparation for a developing Eastern Front  campaign I have been completing a few extra tanks and vehicles. Here are a few more Russian T28's and a BA10 together with the all important fuel dump. This will combine with some factory buildings I have to make a slightly larger industrial sector. The bits for the fuel dump are actually n gauge railways bits. The oil drums are slightly large but I think I can get away with them at 6 mm.

Saturday 21 March 2015

Feast of Crows....

Have been hoping to give my new Norman retinue a try out with Saga as I have never played with this faction despite the board coming in the original rule book. Friday evening saw the first opportunity and with three players it was a good chance to have a 'light hearted' go at the feast of crows scenario. The new Normans up against Saxons and grisly Vikings.
Table set up for the feast !  My saxons stuck in the bog, Vikings hemmed in a bit by the woods and the Normans cautiously  moving on from behind the village

Close up shot of the Normans coming on in two phases led by crossbows, Norman knights on the right flank.

After about 3 of the allotted 7 turns  nothing much has happened, my saxons are still getting their feet wet slogging through the boggy ground, at least the Vikings are starting to push along the road to tackle the Normans who seem reluctant to  get stuck in.

Finally the Saxons have something in their sights, but it has taken so long to get out of the bog my leader is somewhat reckless urging his lads on before his full warband has been able to form up.

Best shot of the battle and taken before my warband disintegrated. Vikings can be seen in the distance making a move for the Normans, but just when I thought their attention was looking the other way and we could snatch a few points by running into their flank they noticed the smell from the bog and turned our way !

Vikings are getting stuck in on both fronts but that is what they are good at. Saxon levy archers have finally woken up but far to late, my Saxon warlord has already been slain with some of his Ealdormen. Things didn't get much better from here as the Normans were reluctant to divert the Vikings attention and preferred to watch them demolish the Saxons off one unit after another. Victory to the Vikings

We res et the battlefield and swopped a couple of Warbands around. it seemed appropriate to try a completely different tactic for the Normans and see what they could do ?. I only had time for one photo as the Normans gallantly charged from the off across the table seeking to slaughter the Anglo-danes (who had replaced the Saxons) History was cruel and the Normans exceptionally reckless under my command. It didn't go well but at least I know what the capabilities of the Normans are now.

Monday 16 March 2015

Where the Iron Crosses Grow......

Sometimes it is ok to feel excited by this mad hobby of ours. Got home from work and found my recently ebay purchased copy of Where the Iron Crosses Grow had arrived.....giddy with excitement and looking forward to getting into some Eastern front scenarios. I still need to work out some details as the spearhead scenarios are often very large and detailed, so I will need to simplify them down a little and convert the OOB for. Blitzkrieg Commander. I feel like a kid in the candy shop !

Sunday 15 March 2015

German radios on the blink !


After a week of painting re-enforcements we were able to play another 6mm WW2 battle on the Russian front. This week the plan was to bring Steve upto speed on the infantry rules and how to use artillery. So I pulled together two lists from very early June 1941. Playing the Assault scenario we set a German Panzer force to assault a Russian Anti-tank brigade. This was 'very loosely' based on the 14th Panzers on the second day of Barbarossa being held up by the Russian 1st Anti-tank brigade.

This first picture sets the scene Ivan dug in on the right, with 85mm and 45mm anti-tank guns in the trees, infantry holding the main town and the farm. They are being supported by various 'hurriedly' pulled together tank companies, T28's in the forground, some BT7 light tanks behind the town and some early T34's being rushed to the front along the road. We set the main objective for the Germans to take the town in 8 turns ! The Germans have three mixed tank battalions PzII's, PzIII's and PzIV's. Sadly no fancy German armour at this stage of the invasion. They also have a strong infantry battalion in 251 halftracks supported by an attached anti-tank battalion. Both armies have some 150mm artillery off table.
2nd Panzer battalion advancing using the fields as cover before hopefully making a direct push at the town. My plan (I played Germans) was to push forward right along the length of the front overwhelm the defences and then rush the infantry in transport up to the town and take it hand to hand.
Russian infantry dug in in the town, I knew it would be hard to shift these without direct assault by infantry. Ideally I would bring down some artillery on their heads suppress them then charge in all guns blazing!
Now normally the Germans with excellent command values are fairly good at pushing quickly across the battlefield so I had scheduled my first artillery barrage at the town on the second turn. So what went wrong ? my assumption is the radio stock which the panzers had used was in some way faulty or due to the previous rapid assault on the previous day they hadn't been properly charged. Either way they didn't work and the Germans immediately began to flounder failing command roll after command roll. stalling the attack right along the front. The picture above is about turn 3 and you can see the two panzer battalions in the near ground have hardly started forward. In the distance the infantry is gradually moving through the trees, but again their Panzer support is lagging behind.
This shot is somewhere around turn 6, Panzers have finally pushed the Russian left flank back and are preparing to pincer in on the farm. The Battalion in the centre is very slowly pushing forward and picking off the light tanks in the trees by the town.
In this closer view around the town, the infantry realising that time is running out have decided to launch their assault supported only by anti-tank guns. (I know this is somewhat suicidal but I had to give it a go). In the distance the 85mm guns dug in in the trees are pinning down the panzers on the German left.
Not unsurprisingly (about turn 7) the German infantry have been mown down , running across open ground without adequate support is not fun ! The Panzers in the foreground have been temporarily slowed by the anti-tank guns in the trees.

These last two shots turn 8 show the high point for the Germans, finally the radios had started to work and the central Panzer battalion had swiftly eliminated the light Russian tanks in the woods. They could now turn tier attention to the town. the remaining German Pak36's and Stug's are starting to trade shots with the T34's. However at this stage with no infantry left to make the final push into the town all was effectively lost. A win for Ivan. Strangely this reflects history where the Russian held the 14th Panzers although it was only temporary.

Friday 13 March 2015

All quiet on the Eastern Front ?

Well not really, a busy week at work means I have only had the enthusiasm to get on with small stuff and with a view to further WW2 on the eastern front  I have polished off a few more re-enforcements.
PzIV's, Marders, PzII's, 251 half tracks, a staff car and some Russian trucks (probably for artillery). Some will hopefully get on the battlefield this weekend.