Following the retreat of the British (miserable defeat) at Kemp’s Landing, the British commanded by Lord Dunmore have continued to seek out rebels in the local area. The next significant action worth a battle on the table top took place at Great Bridge in December. Sadly time constraints prohibit me from running through the full history. You can find some details on wiki, I did find this useful map of the action and this information board which marks the location today. Around which I built our small scenario, given the size of this battle it is ideal as a skirmish for an hour or so one evening.

Modern map/interpretation of the Battle from the excellent American Battlefield Trust copied here without permission but perhaps if I can promote a better understanding of this small engagement they will forgive me ? one key thing to note is the marsh areas identified in the period map below has in modern times been replaced by the modern canal, where the causeway would have been back in 1775
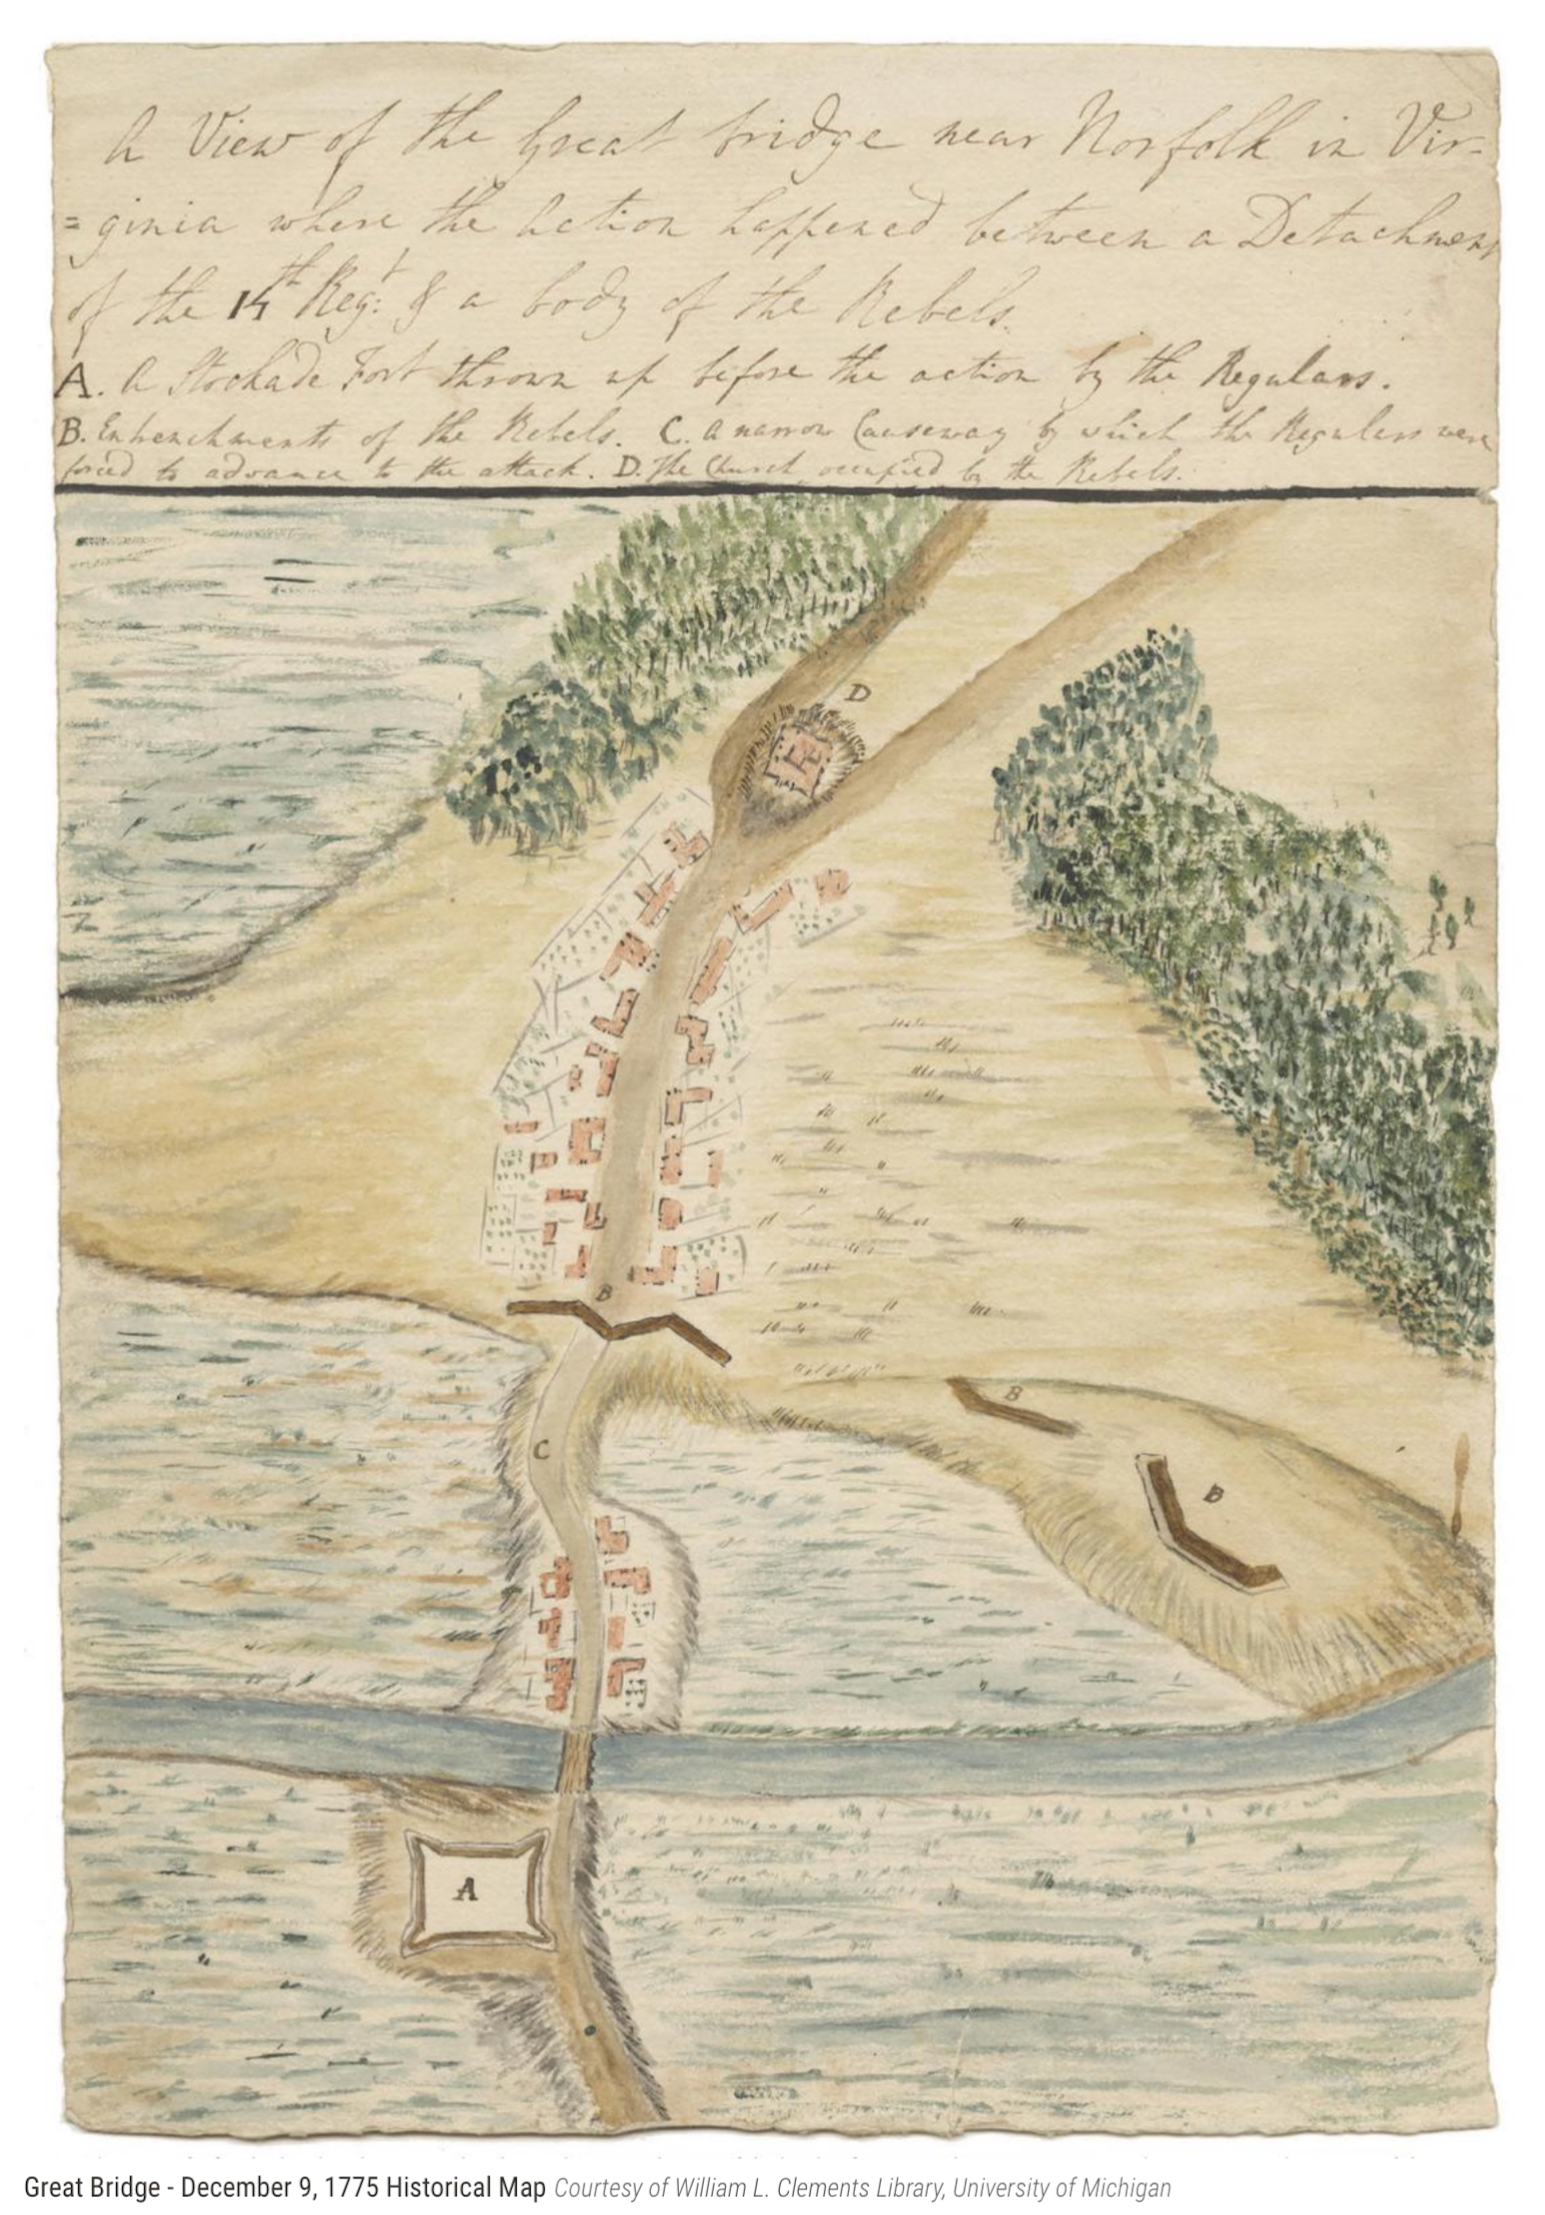
Also from the web is this fine period map of the engagement

.
Finally the information board I mentioned sadly I don’t know the location as this wasn’t mentioned but I presume it is located close to the modern day site, all of this means that the British were in for another tough evening. Following the previous couple of battles I ‘tweeked’ the balance to give the British a better chance. The challenge here as with several of these battles is creating a battle which gives both sides some element of chance of victory whilst not losing the essential elements of the historical battle.
As I think Jonathan has mentioned on his blog if in any doubt don’t forget it isn’t meant to be easy to attack a well defended position across a restricted frontage. Historically it provided fatal and a disaster for the British. Special rules in play were all Americans were green so more liable to fail morale and activation tests, American reserves were not able to leave their camps until the first musket shots were fired or until their pickets raced back to reach the earthworks, the British cannons could attempt to break the defences down but couldn’t target the defenders (this is what they did historically) the Culpeper Minutemen were in place at their breastworks from the start and given a longer range due to their superior hunting weapons.

The British cannons open the battle

Rebel pickets have been pushed back, but at this stage the Americans don’t realise a full assault is beginning. The pickets choose to stand and fight.

The British assault led by Captain Fordyce is headed by the light company, all regular British are from the 14th Regiment of Foot

They are supported (reluctantly as it proved) by American Tories or loyalists who like their historical counterparts didn’t initially want to cross the rebuilt Bridge

Choosing not to open fire and trigger the rebel reserves, the light infantry attack with bayonets but fail to break through the pickets

Breaking orders they open fire next turn

The cannons continue to target the earthworks hoping that they will be weakened by the time the British assault arrives across the causeway

It takes the grenadiers to smash through the pickets and this encourages the Loyalist to cross the river

But the head of the assault is a lonely place, Captain Fordyce leads the way, historically he was shot in the knee recovered, rallied his force and led the attack forward only then to be killed close to the breastworks.

Devils all of them the Culpeper Minutemen proved to be enormously effective with their hunting rifles ! Only after they had really caused chaos amongst the British did they start to fail their activation tests

The battered light company and the ‘Tories’ are reluctant to push on ....

And then the remaining grenadiers who have been almost wiped out, caught in cross fire on the causeway break and pull back, Captain Fordyce did survive but perhaps he will wish he had been killed in battle, gaining eternal heroic status rather than face the inevitable court-martial when he gets back to Lord Dunmore

The Virginia loyalists do put up a show of advancing across the causeway but not surprisingly without their leader and the redcoats they waiver and break when they come under heavy fire

Colonel Woodford in the final turn leads some of his successful Virginia regiment onto the causeway, to tend to the British wounded ? Or perhaps collect trophies luckily this unsavoury aftermarth of the battle is lost to history.
Despite the slightly balancing of the odds our game remarkably recreated the historical outcome, no bad thing ? As often happens when the final result is calculated it felt slightly one sided but that wasn’t the case in the heat of battle, the Minutemen were more effective during the key early phase of the battle than they should have been. The British failed a couple of early activations which in a tight game makes a difference. As the table is still set up I might just re-run the battle solo. After the game we debated what might have swung it and I might test it with the British having an additional unit of grenadiers ?
On the weather front it has continued unseasonably cold, bad for cycling but perfect weather for walking so I took the opportunity to get out in the hills, this time around Buttermere in the Western Lake District, the photos say it all really 😀

Looking East
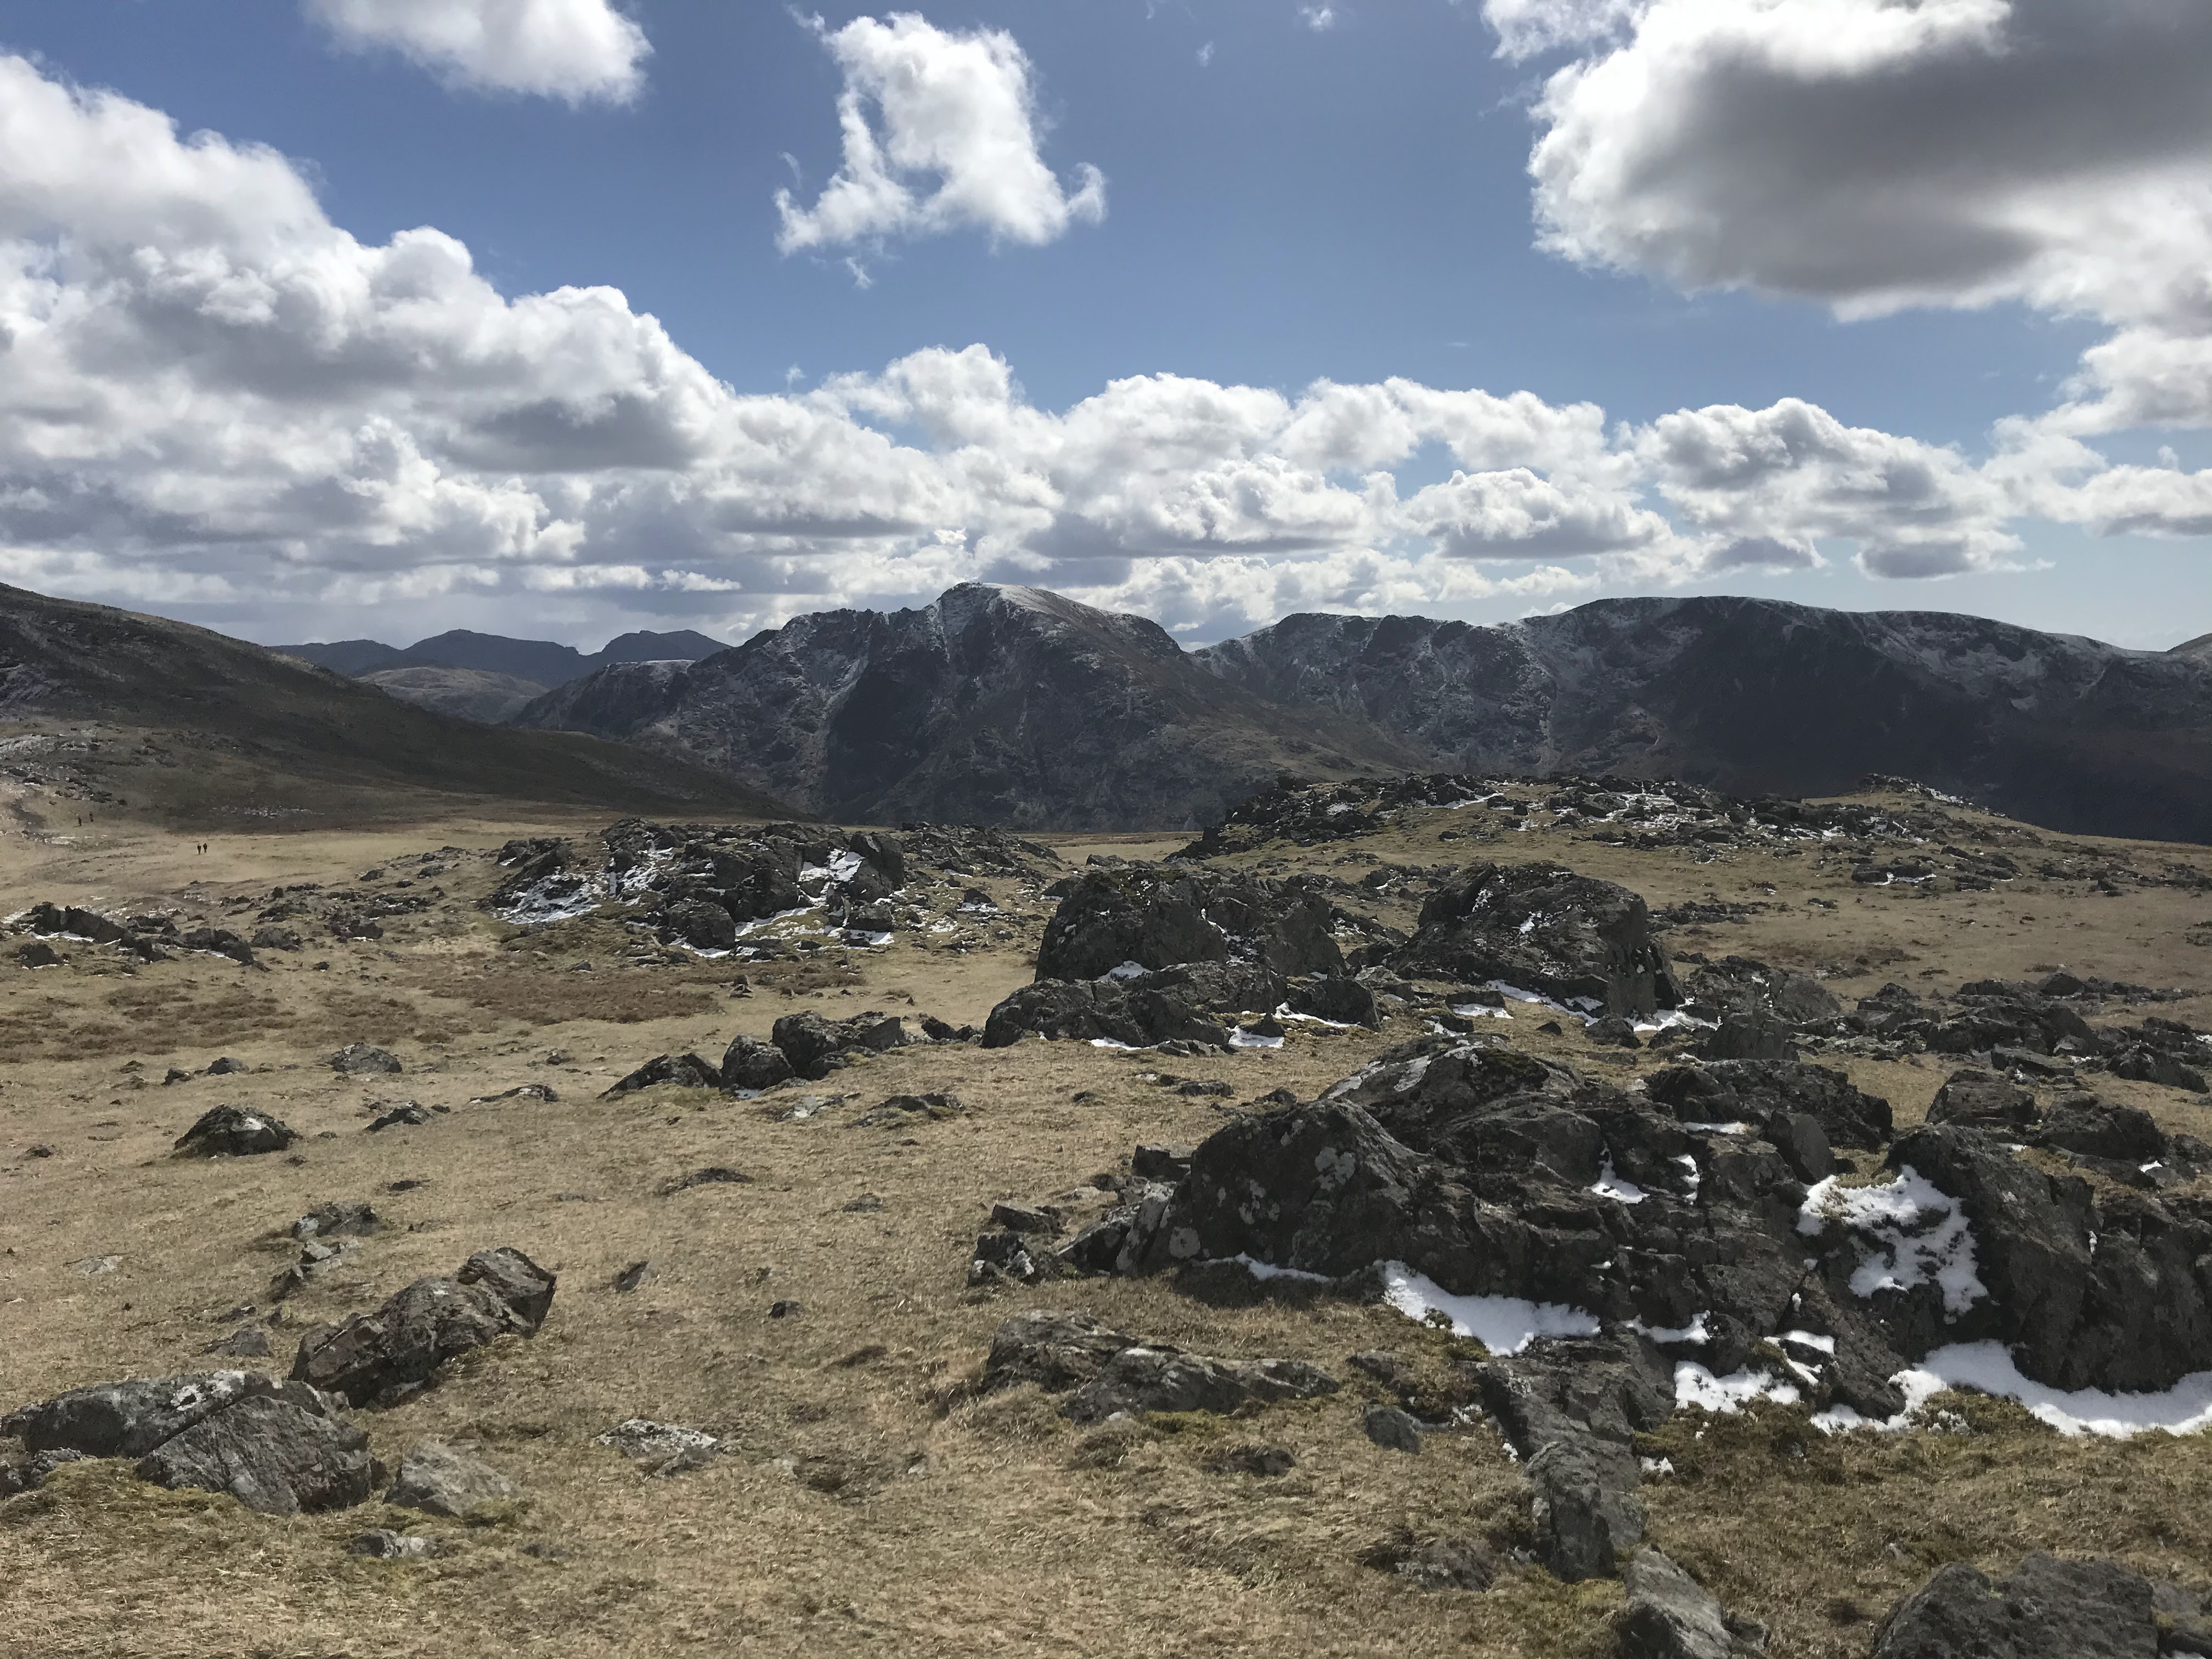
and later on the walk looking south over Ennerdale, a slight dusting of snow
Hope you are all keeping well 👍 as the weather warms up face to face gaming is a possibility in the garden gaming centre (don’t let my wife hear me call it that )
Looks like a great game
ReplyDeleteThanks Neil 👍
DeleteGrand little set to there Matt! Lovely photos of the locality too, thanks!
ReplyDeleteIt was a tough one for the British , but part of the fun of this project is exploring some of these fairly obscure smaller engagements
DeleteAnother drubbing for the British but it damned tough task for them and it does make you wonder what they were thinking in the historical battle, as it could really only end one way.
ReplyDeleteI wonder whether allowing the canon to give the pickets a whiff of grapeshot at the start might allow the British to get a bit closer to the ramparts? One of those scenarios that can be replayed as you plan, tweaking things here and there to see what, if any, difference they might make.
Too cold to cycle here of late until today that is, which was acutally pleasant for the first time in a long while.
Thanks Steve, I am going to try and replay over the next couple of days with a couple of tweaks ! Still waiting for that warmer weather up here
DeleteI just like looking at the pictures ...... and then looking at them again :-)
ReplyDeleteI did visit the bookcase to see if I could dig up anything more on the action - sadly not.
Thanks Norm...I think the internet is the only likely source for info on these more obscure engagements.
DeleteYour work on this scenario produced a nifty little action. The British had a tough time, for sure. I replay (even solo) would be a welcome read. Perhaps you would like to swap sides and let me take on the challenge? The Culpeper boys failed one or two activations early on but for the most part, they were a deadly lot. Sharpshooters with extra range and hitting on 4+ against targets n open on the causeway was never going to end well. I used the skirmishers on the causeway as a speed bump to hold up your advance as long as practical. It worked.
ReplyDeleteTo attack in this situation, suggests that the British clearly had little regard for their opponent's capabilities.
Another excellent scenario to add to the growing body of interesting R&P scenarios.
Your landscapes are stunning. Too windy for outdoor cycling for me today but Thursday should be perfect. I expect to be out for a good, long ride.
Thanks again for the very enjoyable game.
I must be seeing things through my colonial eyes ! Those Culpeper boys never missed !!!!!!! Slowly slowly warming up here 🥶
DeleteAnother great game, did the British ever win a battle? Weather has been lovely but very cold. Walked to work today - furthest I've walked in about 6 months. My bones ache now but good to be back in work
ReplyDeleteFrom what I have read the British in fact won more battles than they lost but in classic style lost the war. This assessment won’t include these many smaller skirmishes and engagement though.
DeleteFantastic looking game as always sir!
ReplyDeleteThanks Michal 😀
DeleteSplendid reportage and photos as always, nota splendid result. The British will lose the colonies at this rate, I can ensure a success though. Put me in command........... .......... (of the Americans😂)
ReplyDeleteThanks Phil, certainly I am making a hash of retaining the colony for King George. I feel my estate and lordship may not be forthcoming !
DeleteGreat looking game, Brits are onto a hiding to nothing, shouldn't be frontally assaulting dug in troops, probably shows the low esteem the British held for the colonials, whoops!
ReplyDeleteBest Iain
Thanks Iain it would appear the British with being dragged into obvious stereotypes were a little too cocky !
DeleteAnother great little game Matt. I have a book called Cassells Biographical Dictionary of the American War of Independence by an ex US Army officer Mark M Boatner - it has an entry for this action and lists the conclusion thus "The Virginians captured the two guns and 16 wounded, including Lt Baton....They buried Capt Fordyce and 12 others. Additional British casualties, according to Gordon, brought the total to 62. The only rebel casualty was one man slightly wounded in the hand. The action lasted less than twenty five minutes". According to the account, the supporting troops were "Ethiopians" and loyal Virginians ie some at least were black - presumably freed slaves?
ReplyDeleteThanks Keith, sounds like an interesting book. Searching the web the Ethiopians ie freed slave troops which Lord Dunmore had created where sent away on another mission...but the history I found was to be honest pretty sketchy other than an American Victory. I’m off to see if that book is floating about on Amazon 🙂
DeleteGreat job designing the scenario Matt. You’re getting in a lot of wonderful AWI action. The pics are very nice. But maybe it’s time to find a scenario that the British can actually win. 😀😀
ReplyDeleteThanks Stew.....be careful you might just be falling into the trap of feeling sorry for those colonial masters. If you want independence you need to strike hard and early !
DeleteImpressive AWI gaming again, Matt! Although my venture into AWI has been delayed, seeing your marvelous figures still has this as a future project.
ReplyDeleteThanks Dean.....highly recommended period 👍
Delete