Showing posts with label ACW. Show all posts

Sunday, 8 February 2026

Battle of Olustee 1864 : ACW

This weekend saw us return to the ACW. Having discussed with George his latest game I thought we would try converting it to 28mm and using Valour and Fortitude.

The details of the scenario and published and available in these Potomac Publications
Historically the Confederate force had were looking to throw back the invading Union force, having built entrenchments the Rebels sent out a small force to entice the Union force into attacking. Not taking the bite both sides ended up feeding addition troops until they were fully engaged. Although the terrain is quite open it is constructed by swamps and a small pond.

A nice picture of the battle but inaccurate as this shows the attack at the entrenchments. The battle was also famous as it involved a number of Black American troops including the famous 54th Massachusetts Regiment made famous by the film Glory.

I squeezed the battlefield onto the L shaped battlefield in the dungeon the Confederates on the left.
The battle kicks off with a skirmish between light troops, the main challenge for the Union force is where to stand and can they hold before they are overrun ? V&F does give a bit of an advantage here with the ability to ‘at the double’.
Union reserves rush to the sound of the guns.
In the distance the bulk of the confederate force arrives and the Federals still have a lot of ground to cover
The Rebels push forward but fail a critical early activation before their commanding general has arrived this delays the advance of their largest brigade for one turn, this could prove critical later
The rebels get moving while the Federals try to build a coherent defence line
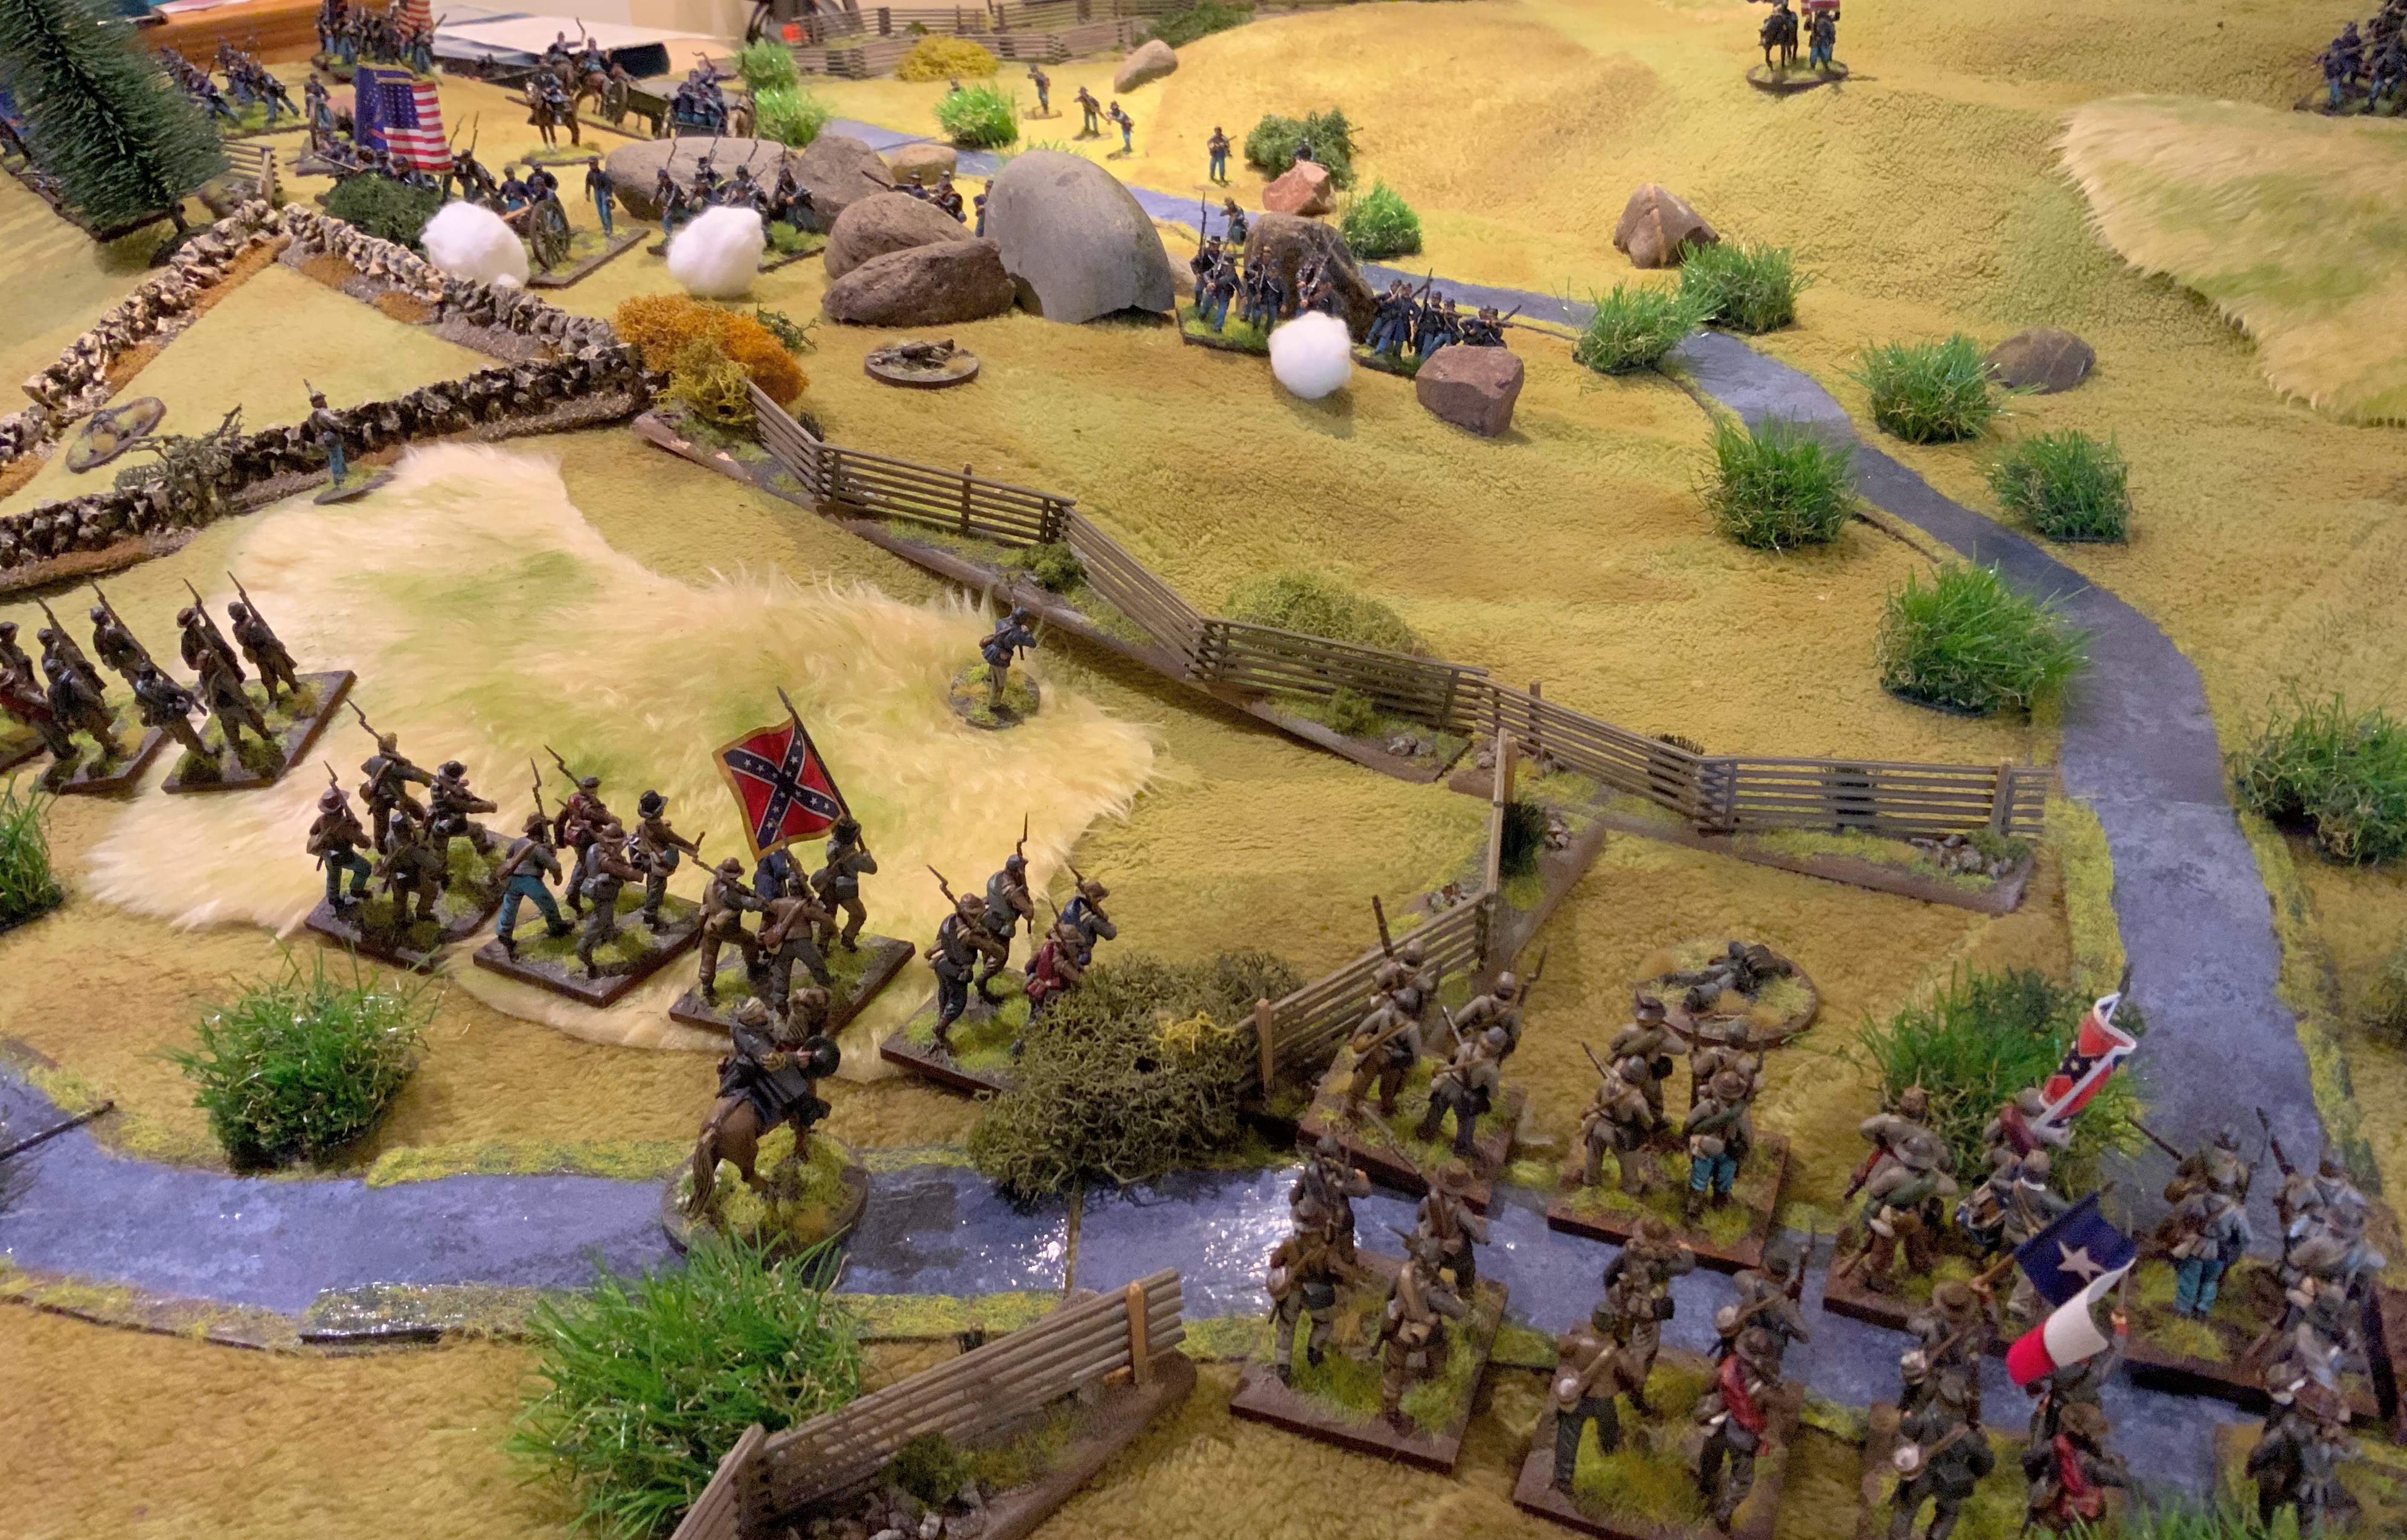
Inevitably the two lines draw closer together the Rebels taking the initiative 
The rebels chose to focus their attack on the Union right where they have the advantage of numbers
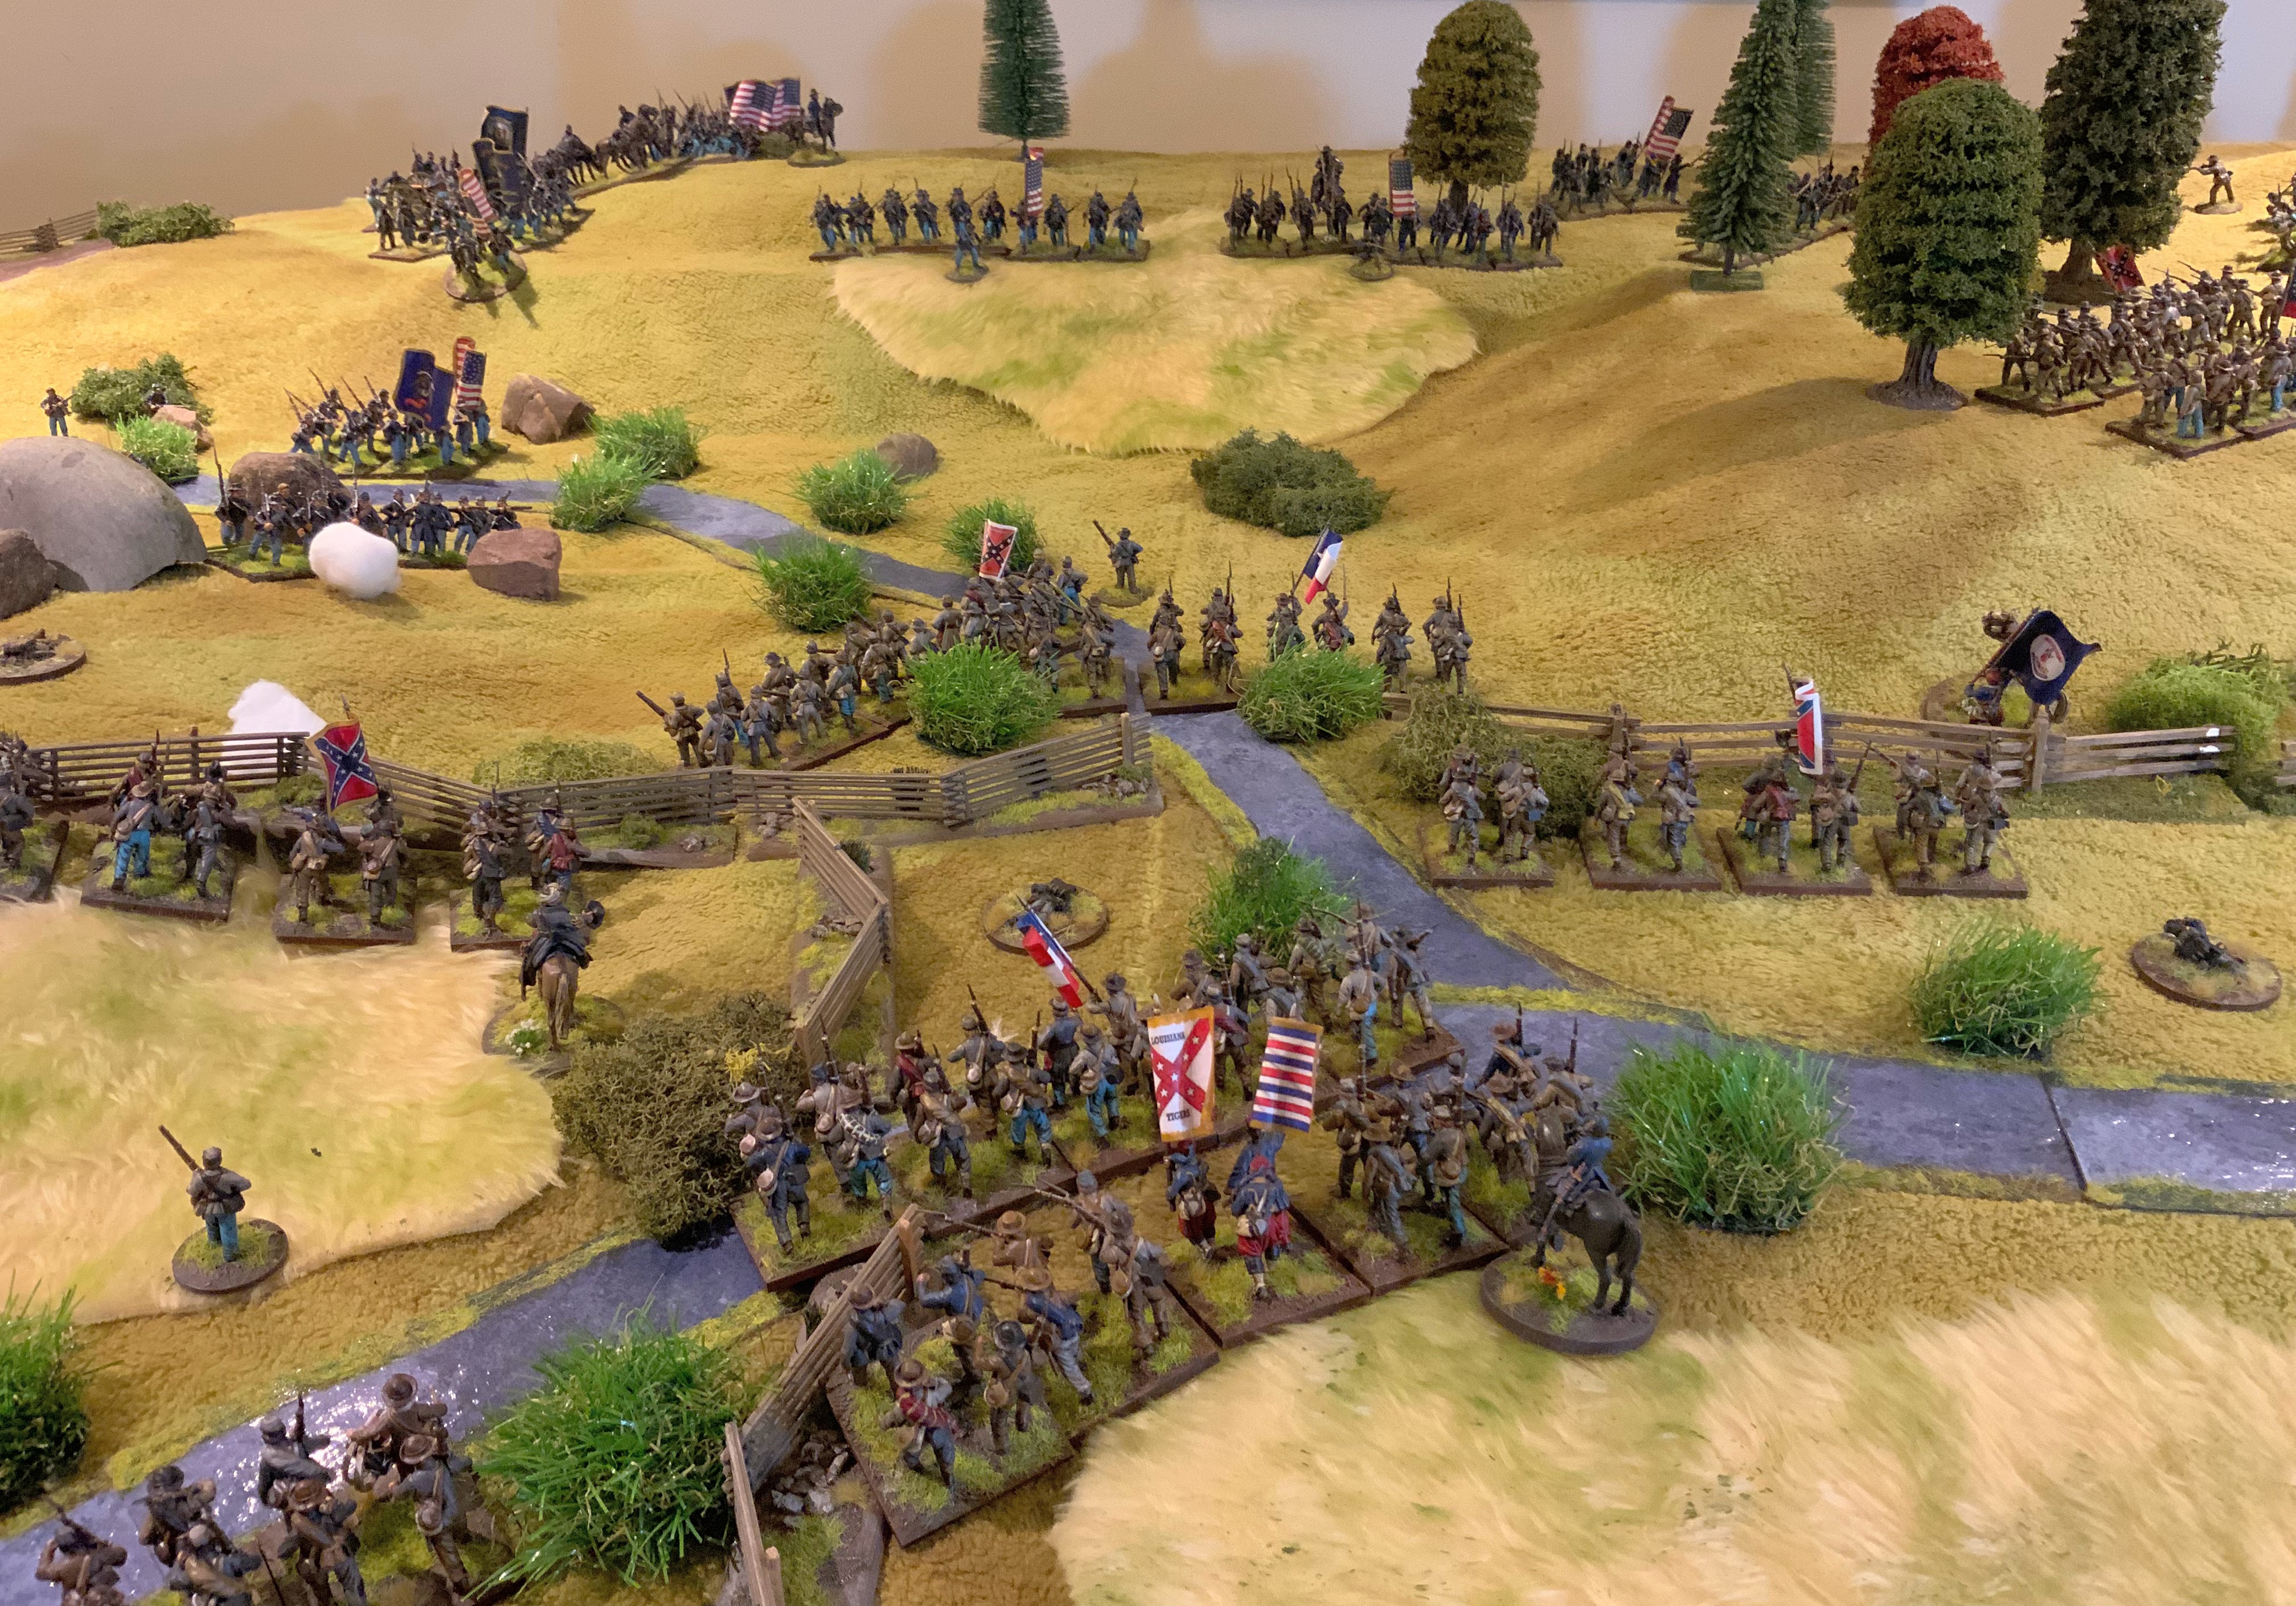
But the rebels on the left are already fairly exhausted, the red counter mark units which are shaken, but somehow the brigade manages to hold its position 
Locked in brutal hand to hand combat, both sides now close to breaking, somehow the rebels continue to hold
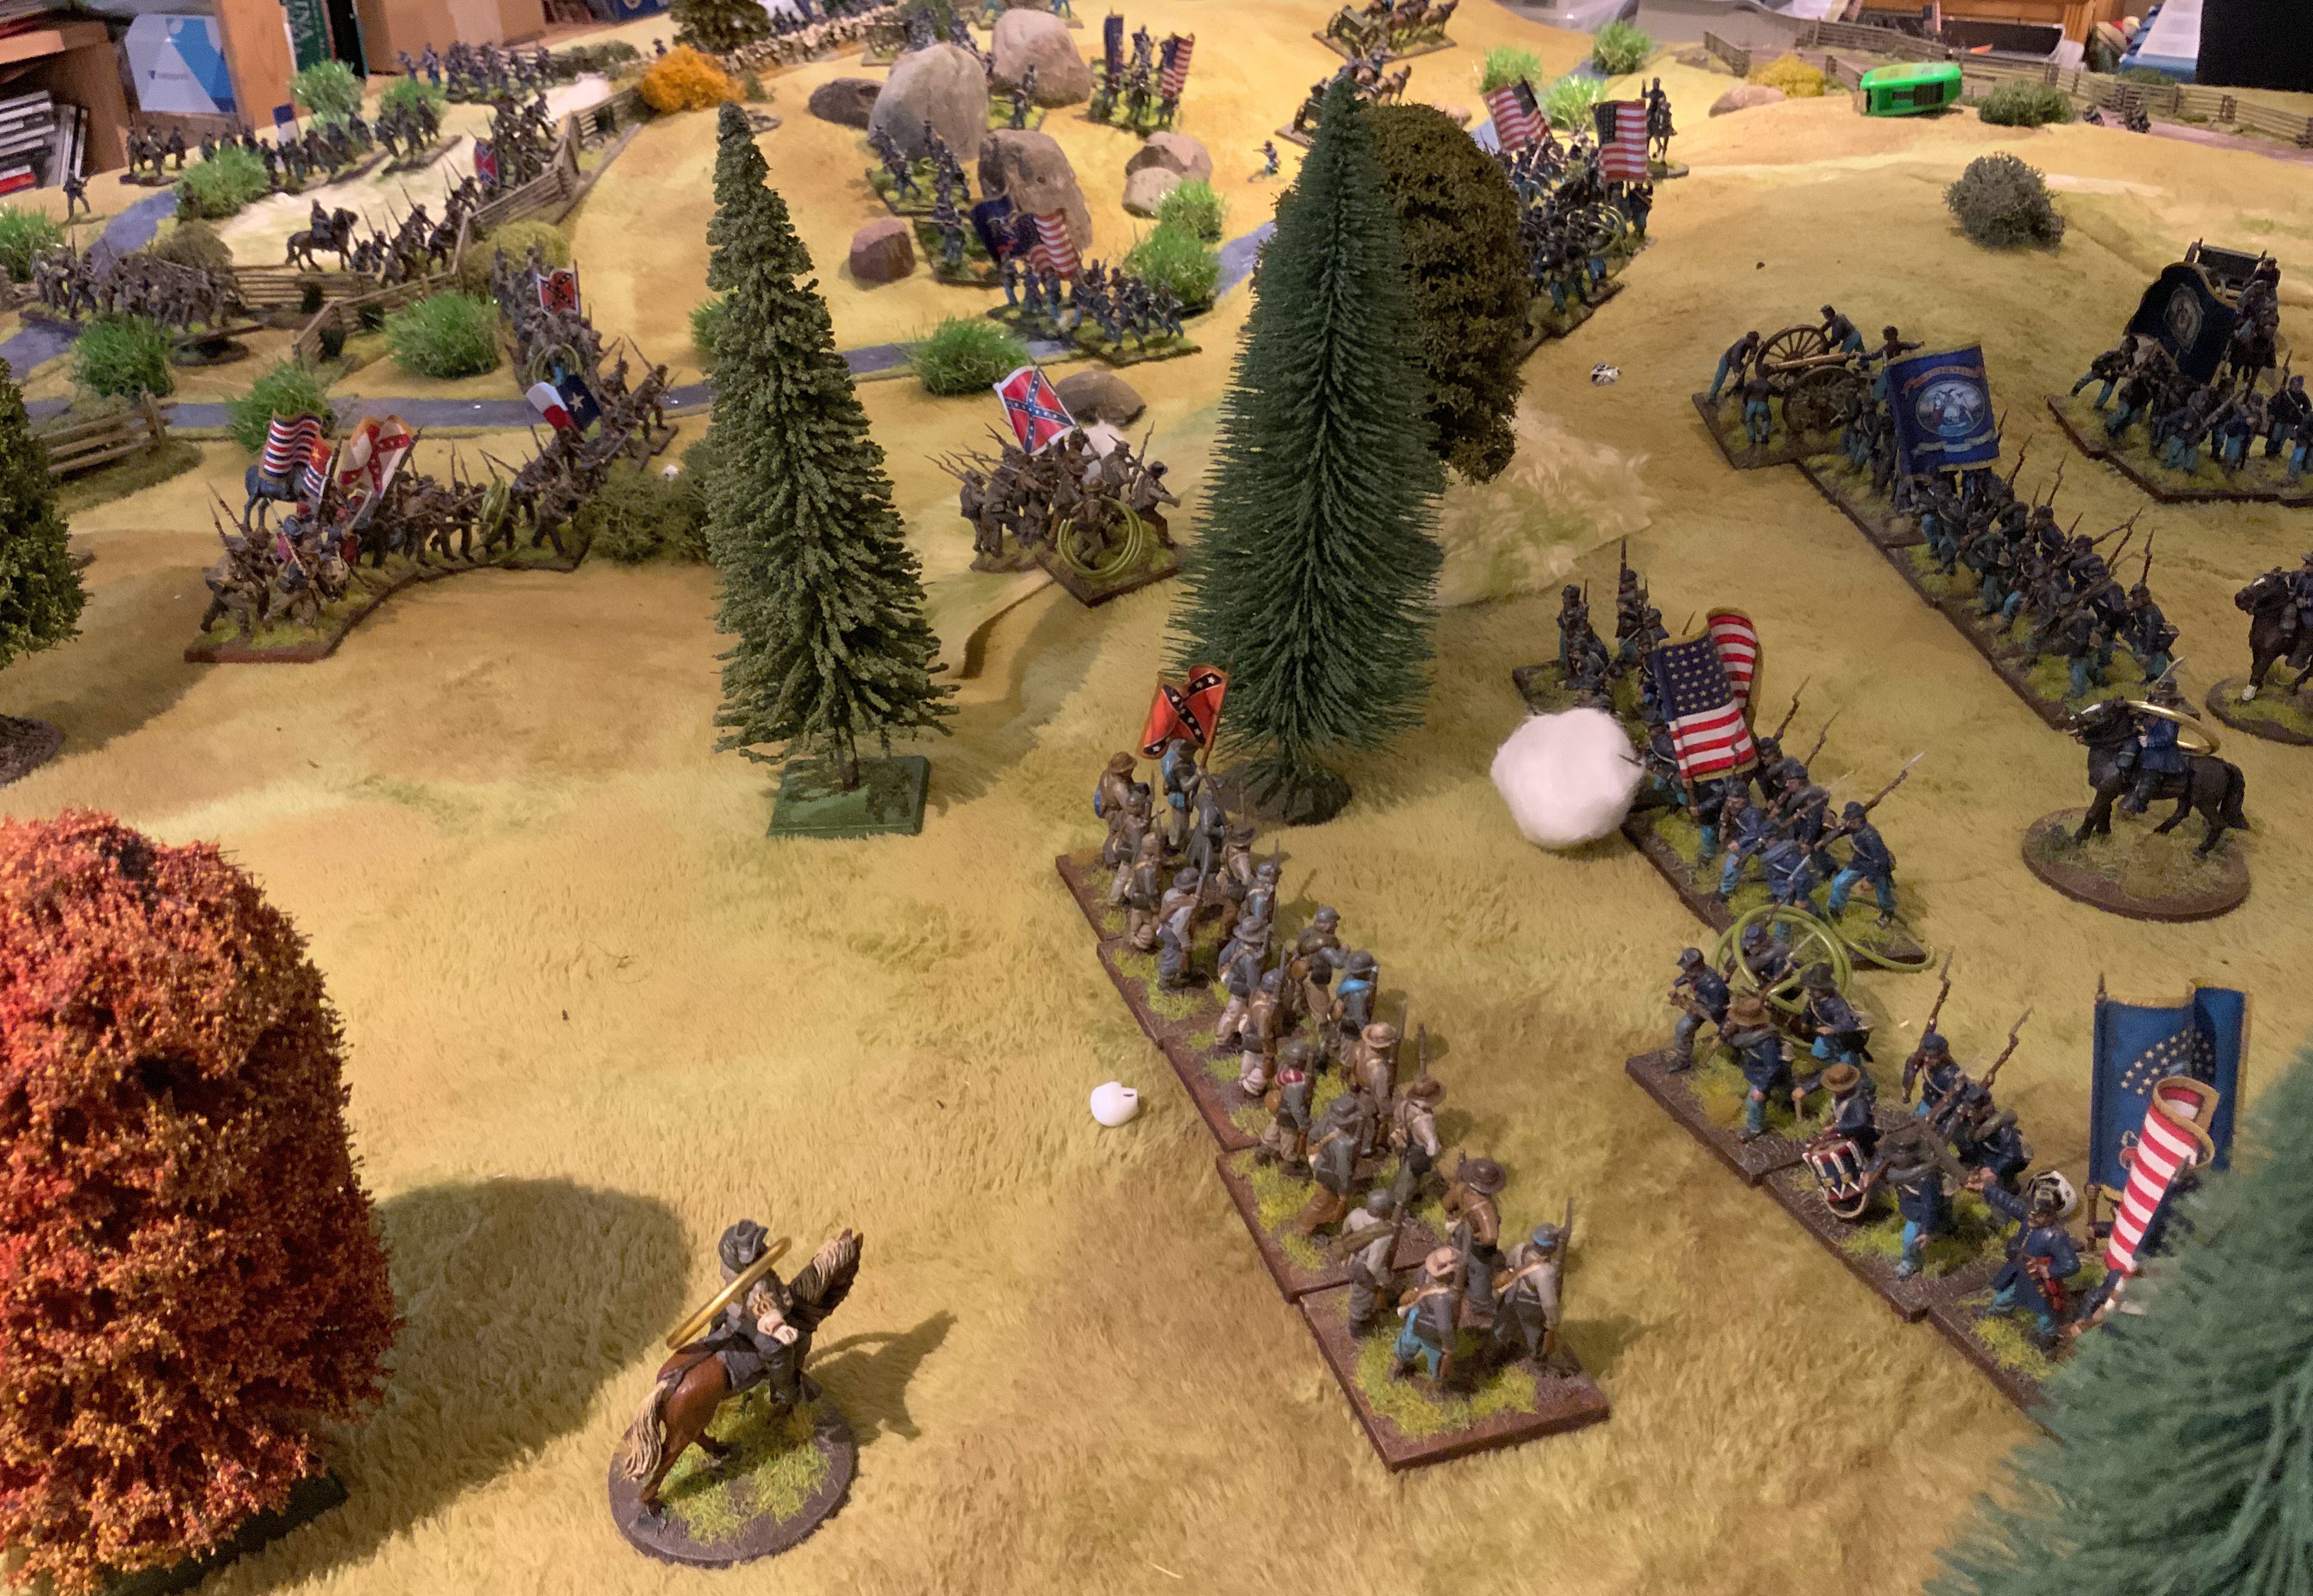
And eventually break the Union right
They continue to advance taking out the final Union artillery. But as you can see the Rebels are pretty exhausted.
On the right the remaining rebel cavalry having been bolstered by late arrivals and having rallied from the initial skirmish battles charges in against the 54th Massachusetts Rgt. In an unlikely result (the dice gods favouring the rebels) the 54th flee and are cut down.

At this point we called the battle to an end with night falling, both sides and generals exhausted. It was a very tight battle, we played a couple of extra combats through just to see if one side could get an advantage but no, neither side would break. In the end it was probably a tactical draw, but after some discussion given the context of the battle we gave it to the Rebels as they had achieved their objective of holding back the Union force, they had captured all of their cannon and given them a serious bloody nose. A tough but enjoyable battle for both sides.

A bit more completed painting…

Here are the two Half tracks I picked up at York, they are very rough casts so I’m happy with the way they came out, ultimately they are only going to be used as transports

 And I mentioned a parade of my french cavalry ! Next on the list might be some Polish lancers ?

Thanks as always for checking in on the blog 

Matt ❤️


Wednesday, 17 December 2025

Battle of Iuka September 1862 ACW

Monday I travelled across to play an ACW battle at Martins. He had set up the Battle of Iuka not one I was aware of but a good sized battle with three brigades per side as he had enough figures the soldiers and terrain are all his.

I’m going to leave it to you to read the background. But essentially both sides have sent a smallish force of three or so brigades to push the enemy out of the way. The terrain is very wooded and they basically bumped into each other. Historically the Confederates took the lead and were the more aggressive, but as I was playing the Union forces we thought we would get stuck in ! Just a couple of shots to show the action.

Battle field setup, both sides have a brigade in reserve to be brought in on a D6 roll. As it happened the Union side were much more successful in bringing their reserves on 
The main assault is focussed in the centre/right. Whilst the left wing of the Union force simply looks to hold their ground
Hoorah Union reserves arrive almost immediately giving them the advantage of numbers
Tough fighting but the Union drive the confederate centre back, but their forces are close to breaking beyond the small road in the distance
Eventually the Confederates bring on their reserves, much of the leading Union units are close to breaking a red ‘ring’ means the unit is shaken and close to breaking 
The Union reserves stabilise the position
And despite their own fatigue they are able to drive the confederates back who start to break and run back to Iuka. Good fun and a good sized and balanced battle which I will look to play again sometime.

A bit more painting time this week and I have managed to finish up some stuff
These were a Christmas gift from last year so I was determined to get them finished before next week, warlord figures which come with alternate heads, I put them on square bases as I have an idea that I might squeeze them into Spanish units in the Peninsular when I’m short of a base ? Obviously they can also be baggage or simple eye candy vignettes.
Just before I picked up all the EVW stuff at Battleground I had ordered some 15mm tents off eBay so I made a couple more ‘camp’ bases for the ECW. I’m not sure what to do with the other tents as I have too many now ? I guess if I painted them green they could be WW2 command tents. Otherwise I don’t have any 15mm stuff. I might even put a couple on the railway somewhere ? If anybody wanted a couple let me know.
Finally a proper unit painted for the AWI these were the last metal figures picked up ages ago at the York wargame show as part of a big job lot. Hence the unit has three musicians, two standards and an unarmed officer. But they work (just) as a unit. I think I might have one more plastic American unit in the box although I’m not really looking to expand the collection too much as I have enough figures to fill the table. I might just get some French though at some point.

We have another battle planned for tomorrow Edgehill ECW and I have been playing with the stats to give some historical feel to the battle. After that one more remote game before Christmas hits, when I am hoping to get some Zombie games played ?

In the words of a famous cartoon, ‘thats all folks’ thanks for looking

Matt ❤️


Thursday, 2 October 2025

Battle of Fox’s Gap 1862 ACW

Another battle at the start of this week, myself and Martin have managed one a month so far this year,so we only just managed to squeeze this in following my long holiday in early September. This time back to ACW and a version of Fox’s Gap from 1862. Many of you will know the back ground to this battle which was all engagement preceding the much larger battle of Antietam. The confederate forces under Lee tried to block the movement of McClellans Federals across the mountains at both Fox’s Gap and Turner’s gap. Eventually although they were forced to retreat the Union army was too slow to capitalise on the Ada vantage and this allowed Lee to regroup and led to Antietam a few days later.

This scenario of which there are lots on the internet is based on a JReb scenario but I have adapted it for my collection, space and V&F. It gives a sense of the battle rather than a truly accurate refight.

The table setup. To make things fun Garlands brigade who are initially holding the high ground behind the  stone wall are in hidden deployment, the Union commander not knowing which or how many Regiments are on the table. Scammon’s brigade arrives for the Union turn one with the next brigades arriving on successive turns. The Confederate reserves are similarly phased but must all enter the battlefield from the North (this end of the table) the Union player also didn’t know this. We had a special rule where potentially Garland or Reno could be killed in action but I completely forgot about this during the battle and we didn’t roll for it ! To simplify the setup we made the stones wall as cover whilst the wooden fences aren’t they just slow movement.

Scammon’s Brigade advances towards the higher ground with the attached West Virginia cavalry occupying the farm buildings at the base of the hill. In the distance Crook’s brigade arrives and come under fire immediately from the angle of the stone wall on the hill. (The hidden deployment will end when trooos are within 12” or they start to fire)
Anderson’s brigade marches onto the table in column 
Garlands brigade is spread thin but they open up a ferocious fire  on the advancing Union troops knowing that any damage will help if it comes to melee
Crook’s brigade starts to deploy and seek to outflank the hill at this southern end of the battlefield the Union has significant numerical advantage 
Dayton’s Brigade arrives from the north as well ! But the Rebels are still outnumbered
The flanking move in the South
Rather than attempt to move right across the table Drayton deploys his troops into open formation and starts to move through the woods hoping to outflank the Union at this end of the battle
The Union make a first push for the gap but are driven back ….yeehaa
The confederate flanking movement seems to be working drawing Christ’s brigade from on the road to protect the Union flank
The battle was very tense here and could have gone either way, the Union prepare a second attack on the gap and again hand to hand fighting on the slopes
But eventually the rebels hold and drive the Union forces back, you can see by the gold rings which denote shaken units that the Union assault has been blunted at least for now.
Although it felt like a slight side show and I didn’t take many photo’s Garland’s brigade has continued to hold the angle against a much superior force, trading volleys at long range they plug away at each other but the Rebels hold on eventually driving the Federals back on this flank. The last photo show the Confederate horse artillery chasing the withdrawing Union forces into the woods to the south.

What a fun battle the scenario worked out really well, the hidden deployment working, with out this we might need to randomise the location of reserves or the Union forces would know the rebels are weak on their right flank ? One thing we noticed was the need to get troops into open order which or ACW is a real advantage especially when defending. A win for the Rebels as they held the ground against the superior Union force.

We has a trip out to Ulverston (south lakes) and came across a couple of nice books

I really only bought this as I was at the battlefield a few weeks ago and wanted to run through the battle again.
This is also a useful little book with a lot of smaller battles listed

 And a spot of painting…….before family stuff took over the second half of the week requiring me to cancel a planned battle for Friday 🙁
Another ECW infantry unit completed and ready to go.

I have several more on the go but may only get to them in a couple of days

As always thanks for popping by

Matt ♥️


Monday, 7 July 2025

2nd July 1863 : Little Round Top

Well the title gives it away rather. For our battle this weekend and seeing as we are pretty close to the start of July I dug out another Scenario for Gettysburg. Shout out again for Brad Butkovich’s Summer storm book which always provides great inspiration, and in fact this scenario is pretty much straight out of the book, I just had to squeeze the terrain a bit.

On site ‘research’ back in March from the top of Little round top
The artillery position on Houck’s Ridge
Looking from Devils Den back up to Round top, I’m pretty loose with translating real details on to the table but you do get a sense from visiting how this is quite a small area.of course there is much debate about timing of the attack etc which I won’t go into here.
Translated onto the tabletop, Historically and in the scenario it is a tough ask for the Confederates they appear to have left their artillery behind. They were of course really only trying to find the end of the Union line and turn it rather than the frontal assault which it turned into. From some of what I have read Hood pulled back at the end of the day as he felt they had achieved their objective ? But that is obviously not the case with hindsight. At the start the only Union troops in position are on Houck’s Ridge, General Warren has realised the danger and is pulling in troops to extend the line.
Law’s Alabamians advance towards Big round top. (Worth noting they had been marching pretty much for 12 hours or more before the attack !)
Robertson’s Texan brigade faces Devils den it pretty obviously not a good place to attack, rather they attempt to pin Wards troops while the rest of the Confederates outflank the Union line
Vincent brings his brigade on from the North including the 20th Maine, really I could have done with them failing to activate ….wishful thinking !
The Texans are now pinned against Devils den, and come under fire from the rocks
Law swings his troops through the trees on big round top, hoping to catch the Union forces un prepared
Confederate reserves Bennings Georgians arrive and push forward but their path is king of blocked by the Texans who are stuck in a fire fight at Devils den 
The Union reserves are being brought onto round top and Vincent prepares for the attack
The Alabamians surge through the woods on the right
The advance is definitely bogged down at Devils Den repeating history !
The confederates crash into the the end of the line
After fierce fighting the 20th Maine are wiped out ! History is rewritten, Chamberlain is killed. But the Confederates crash into the famous 16th Michigan ? Who hold the left flank of the Union line and thus win Gettysburg and save the Union and the war ?
The benefit of wargaming is the Union General can advance off Houcks ridge to start to outflank the Rebels, this couldn’t really have worked historically as there were more troops to the left and it would probably have exposed their flank too much, but it forces the confederates to fold back their line around the triangle field
The Texans at this stage have take a real beating, although they are holding their position all their regiments are pretty much exhausted and it is surprising to both sides that the Brigade hasn’t broken. Some good Valour tests by me and a card used to save a failed fortitude test !
Eventually the assault starts to stall as the regiments begin to take increasing casualties
The final nail in the coffin when the Alabamians eventually fail a fortitude test and the brigades disintegrates, the confederates only have one viable Brigade now fighting and the Union reserves are pretty fresh. An almost historical win for the Union.

A very fun if occasionally frustrating battle, tough for the confederates who had their noses in front for a while or at least until the Alabamians faltered in the woods. Given that we played with fairly historical troop numbers it perhaps isn’t surprising the Union can hold Round top. Historically of course Warren and Vincent didn’t know the size of the force attacking them and the trees would have provided more visual cover which doesn’t work on the table top. Any delay (which didn’t happen in our battle) to Vincent arriving or the other Union reserves and the line would have been rolled up fairly easily. If nothing else it shows how this was a very close run thing on the day.

Setting up today for a Napoleonic battle tomorrow but that’s it for now

Many thanks for checking in as always Matt ❤️