Thursday 29 September 2022

An AWI interlude, the Battle of Ucles 1108 and yet another Roman Fort

I am currently failing to keep pace on the blog with hobby and other stuff going on so a bumper post to catch up. First up, a small AWI scenario to introduce George to the delights of Rebels and Patriots, a mid week game as we are now both retired ! He has shared his thoughts on the rules on his ‘Musings’ blog so I will just share the photos of the battle I took. After a preliminary skirmish to introduce the mechanics the two main forces arrived in a head on clash. I got to play the Americans which was nice 👍
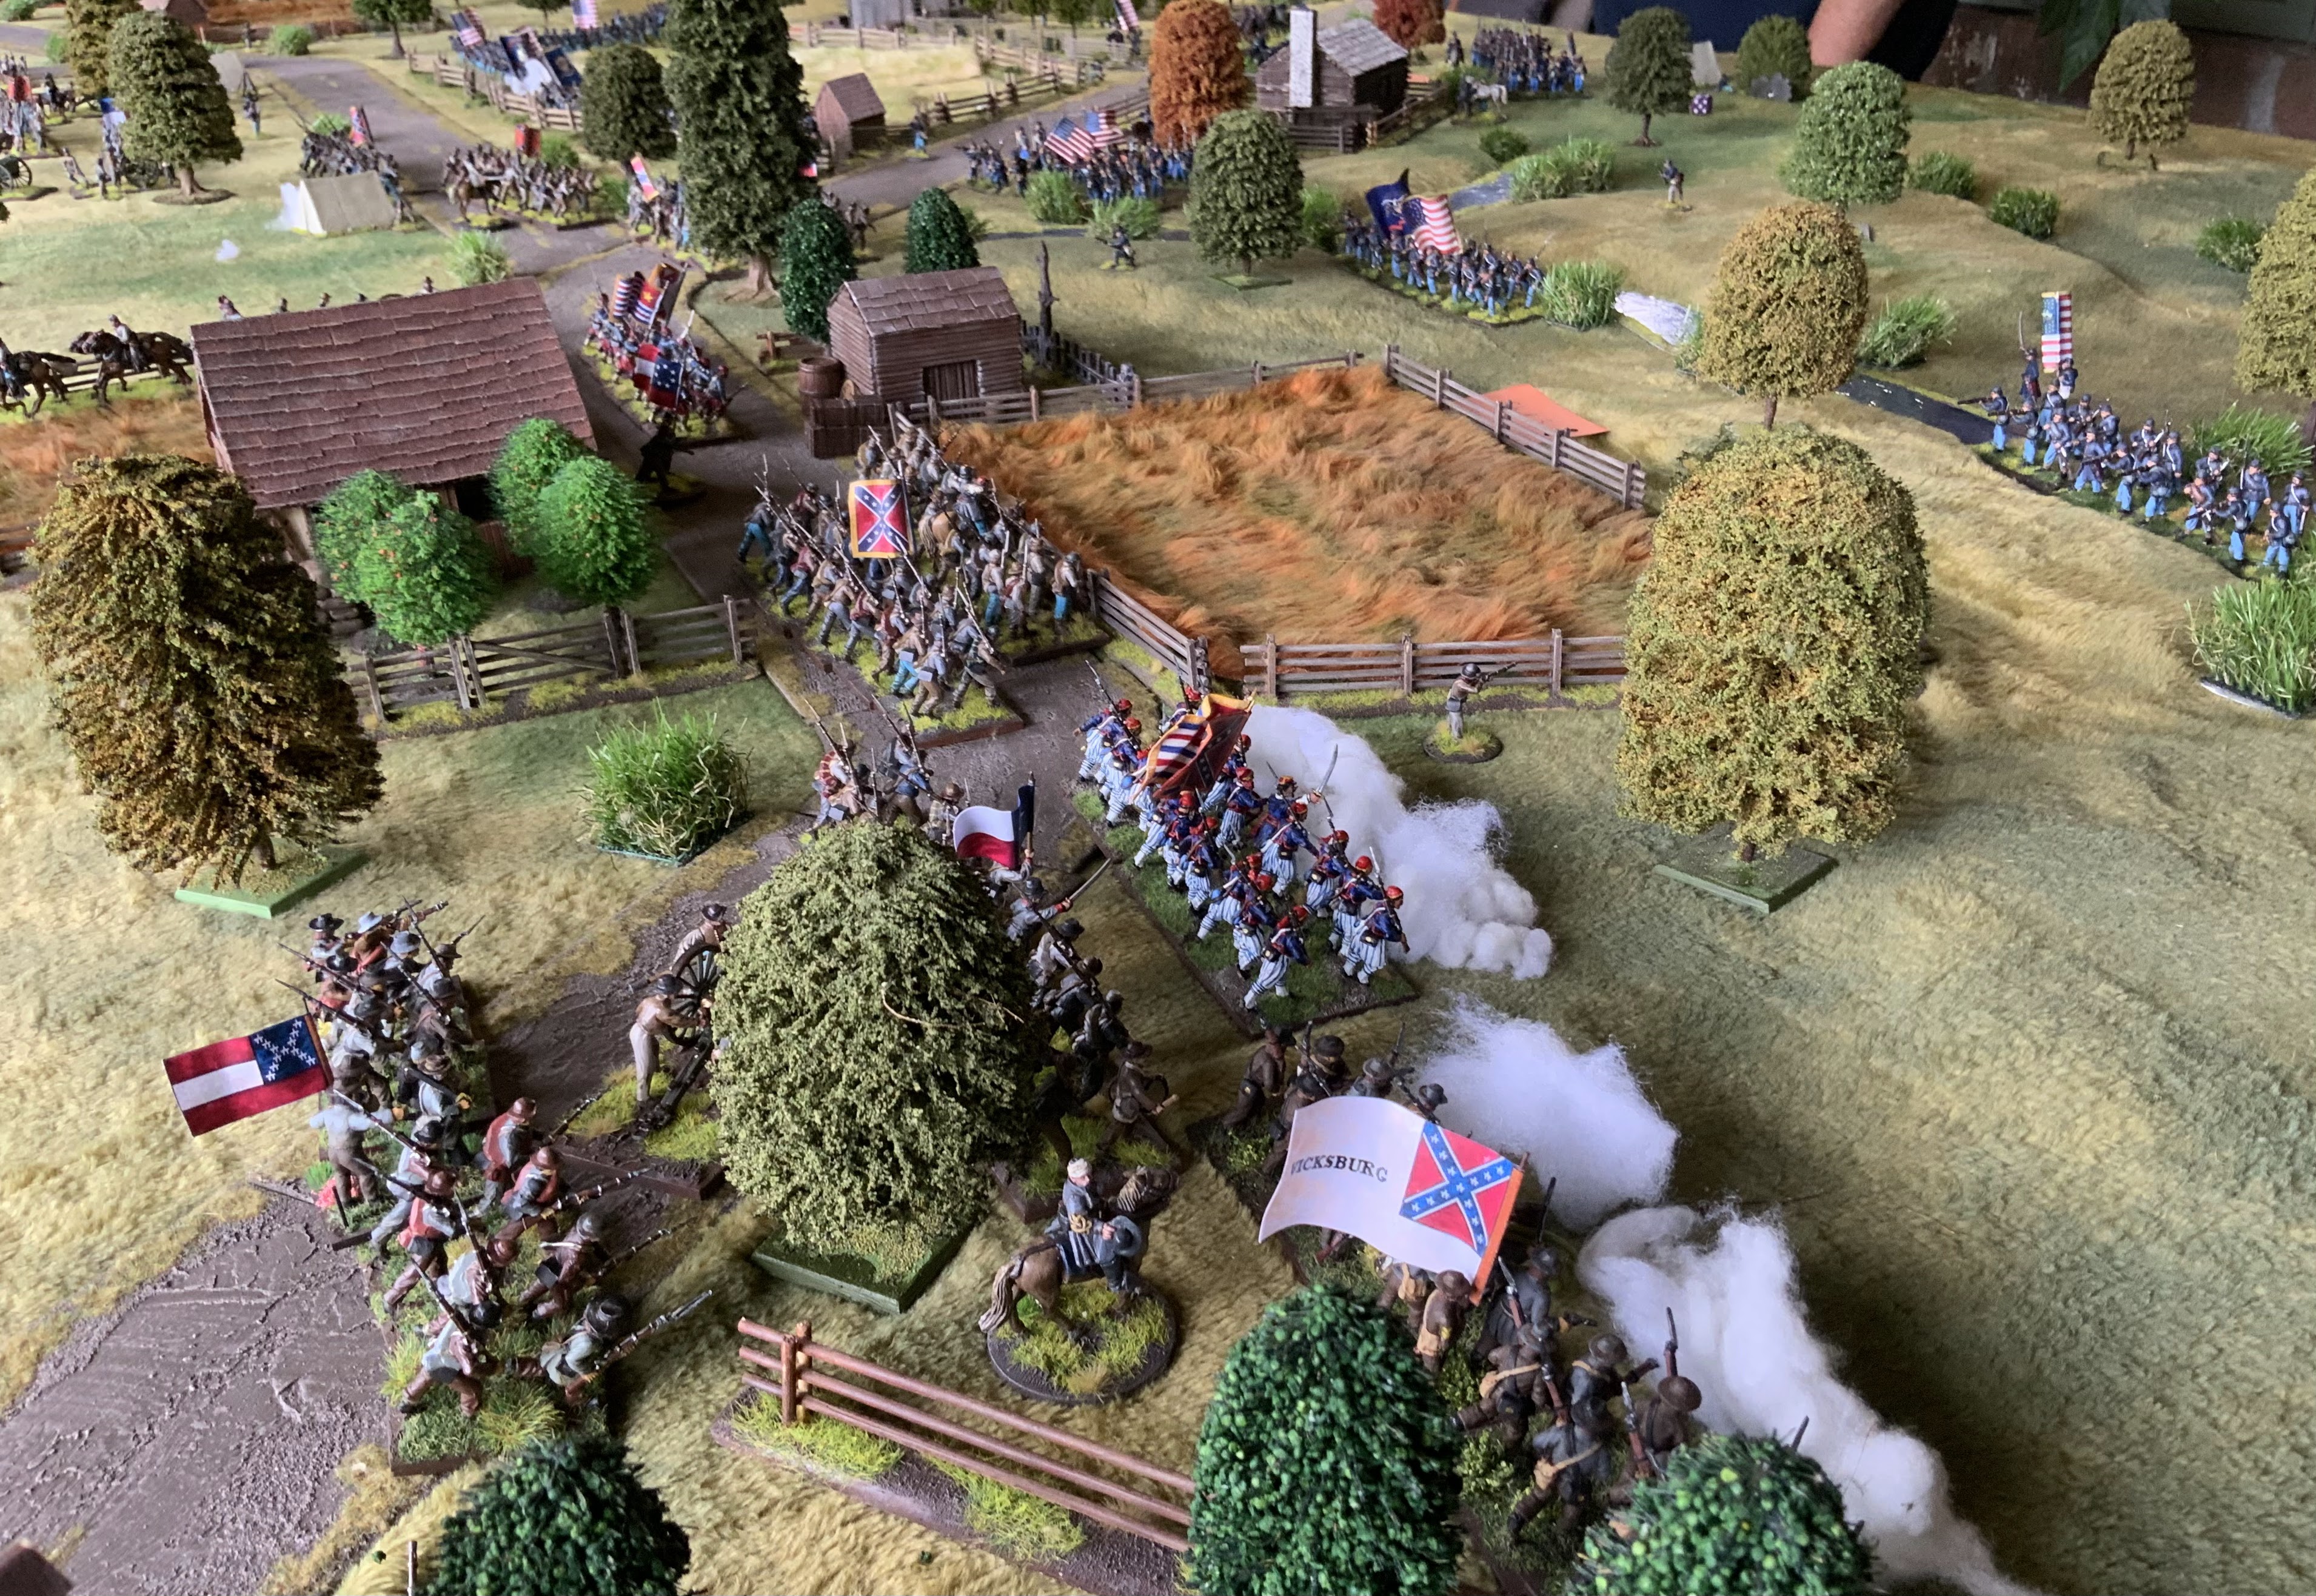
The patriots push forward across the small wheatfield
Facing them the evil imperial British redcoats (boo hish)
I didn’t really have a plan, but initially the Patriots did pretty well pushing the over eager British back, the British grenadiers behaved the same as when I command them which was reassuring and they were reluctant to enter the fray
Having no plan of course only works to an extent as I mistakenly put my ‘green’ militia on the far right flank and predictably they struggled, some of the American skirmishers can be seen fleeing from the British artillery which was particularly effective. 
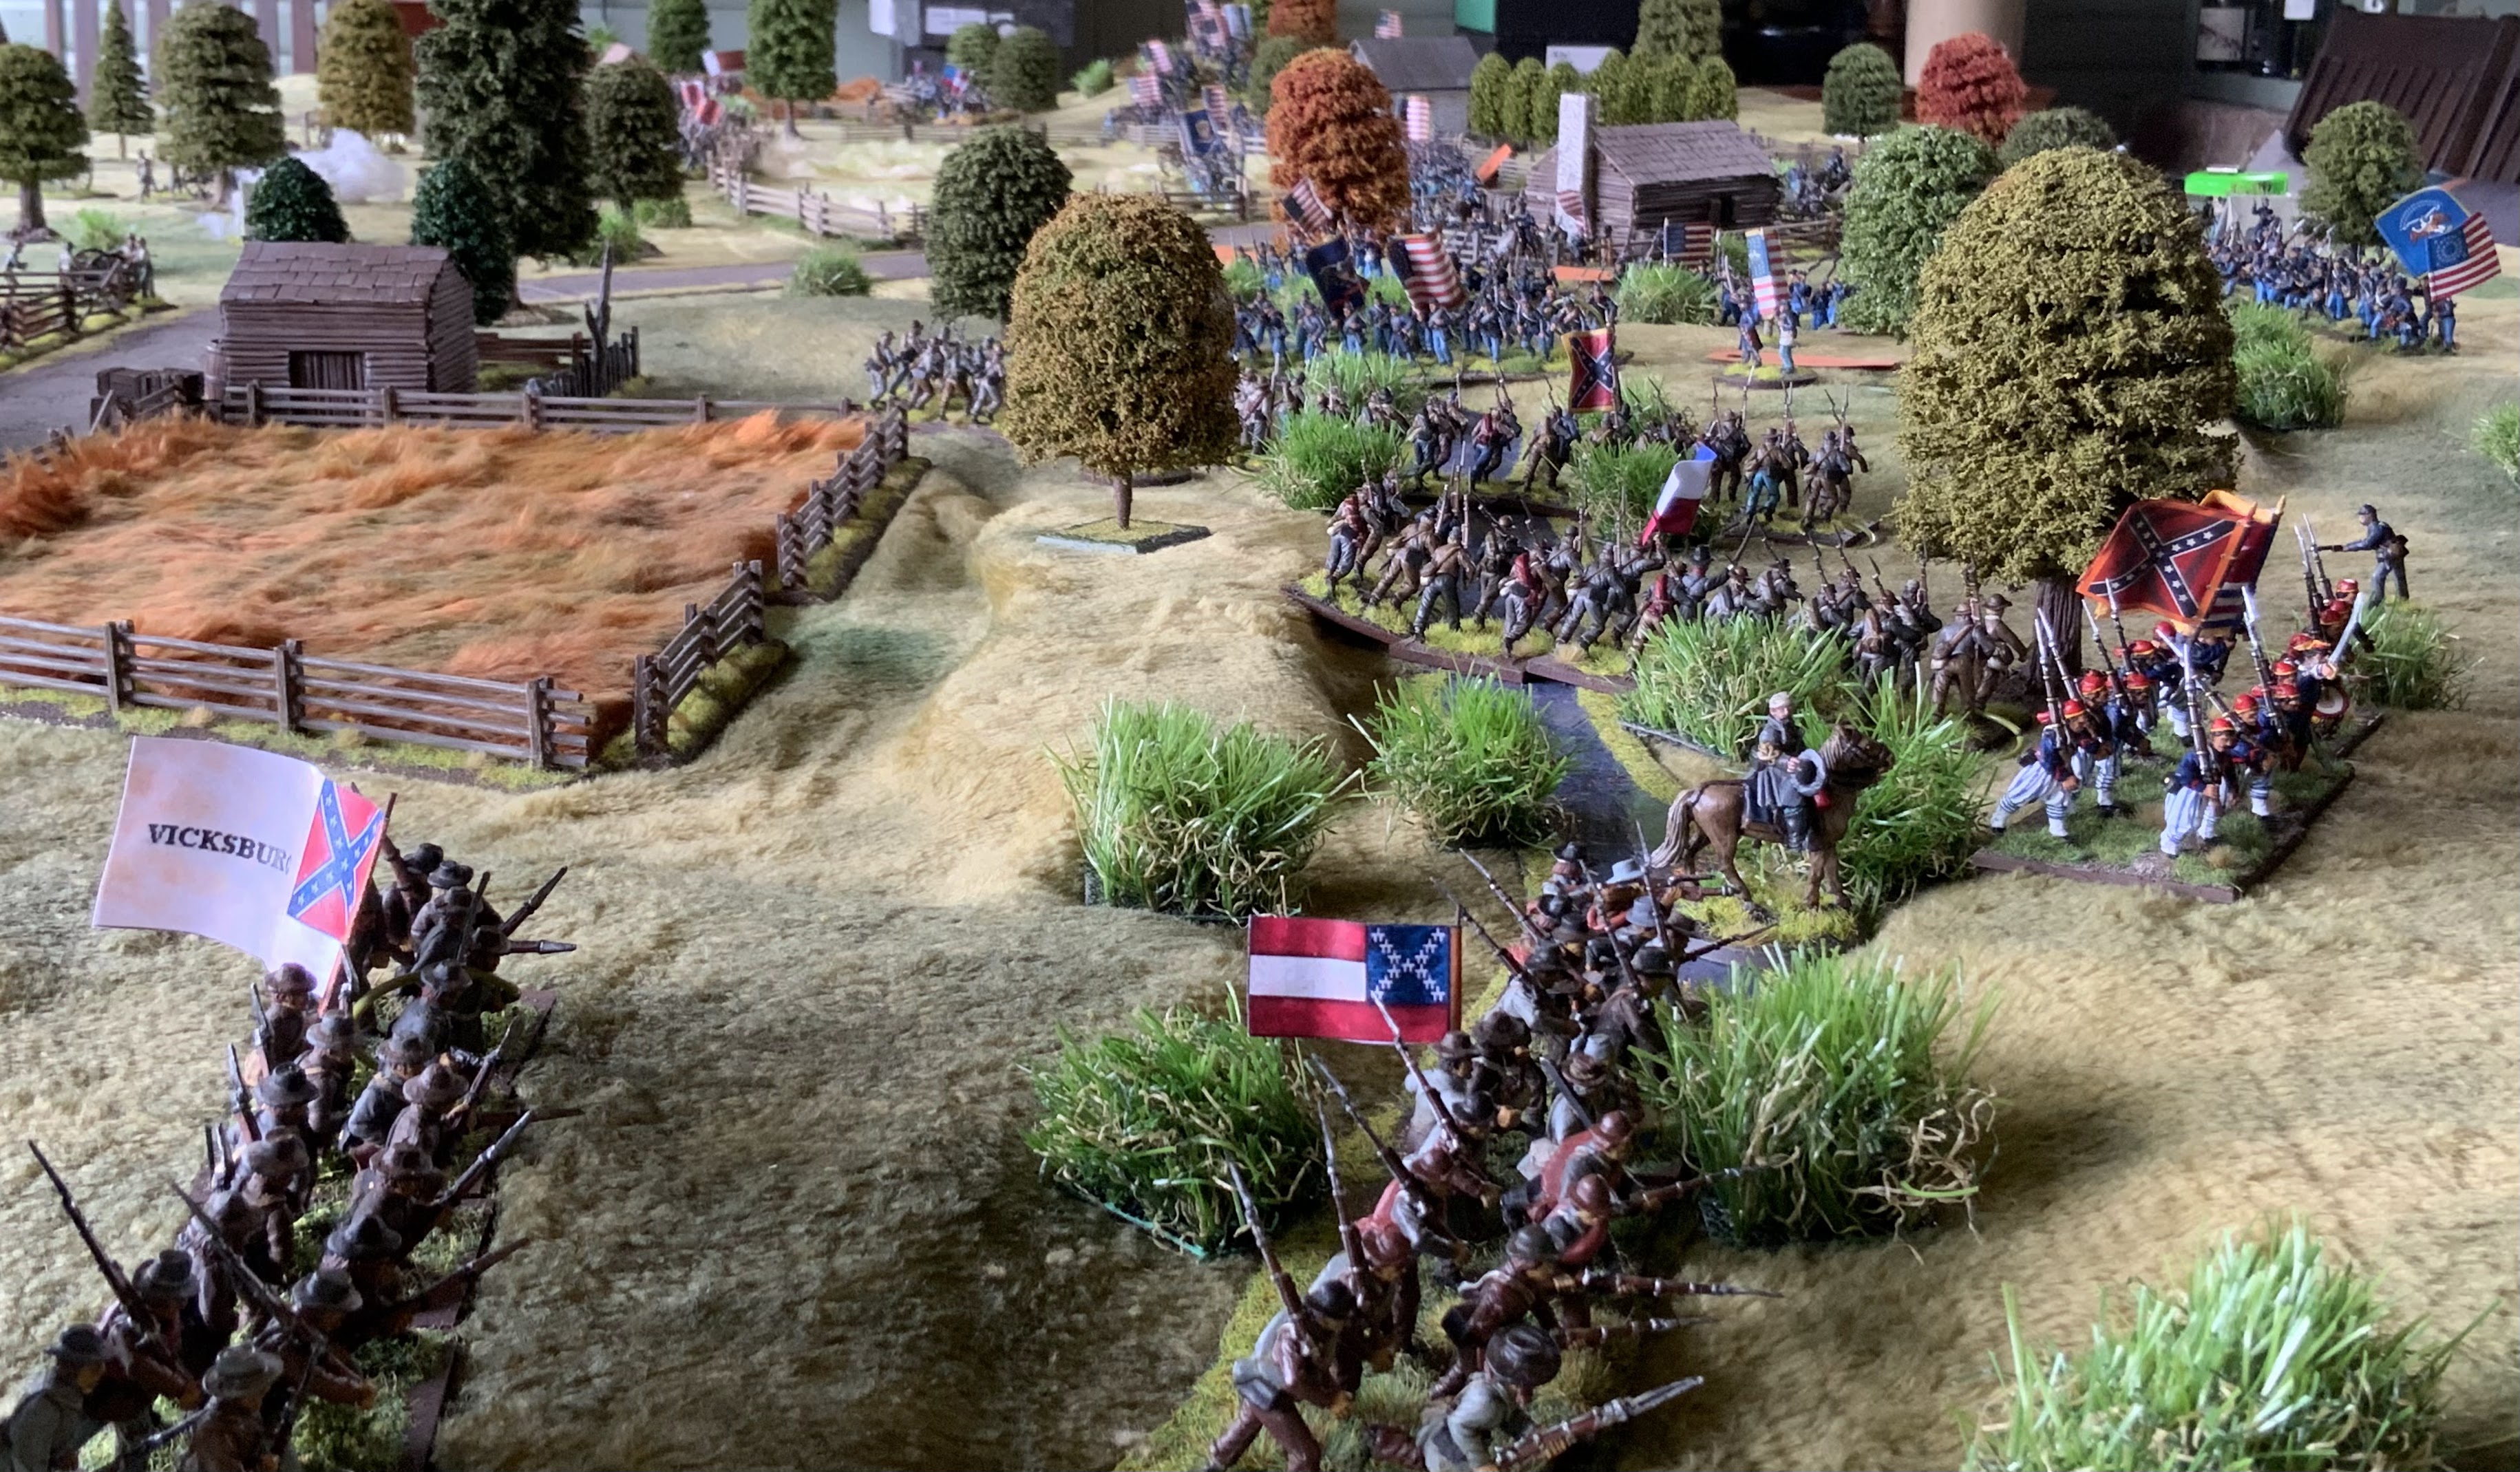
The American light artillery after a slow start also started to have an impact and the focus of the battle between the two fields intensified
The militia did attempt to get stuck in
A hard pounding for both sides and gradually the effectiveness of the British artillery made a difference
As usual we rolled several double 1 and 6 activations. The only one I captured on film saw the militia clearly confused by the smoke and noise of battle put a volley into their erstwhile colleagues !
By now although the Patriots continued a plucky fight the writing was on the wall as individual regiments eventually broke under the pressure.
Eventually the American Colonel had had enough as well, strategically withdrawing from the battle (fleeing) a good intro for George and a fun battle. This remind me that I need to re jig my Bolt Action rules for AWI

Next up a virtual game with Jon, again he has covered the general details of the battle already, so just some alternative photos.
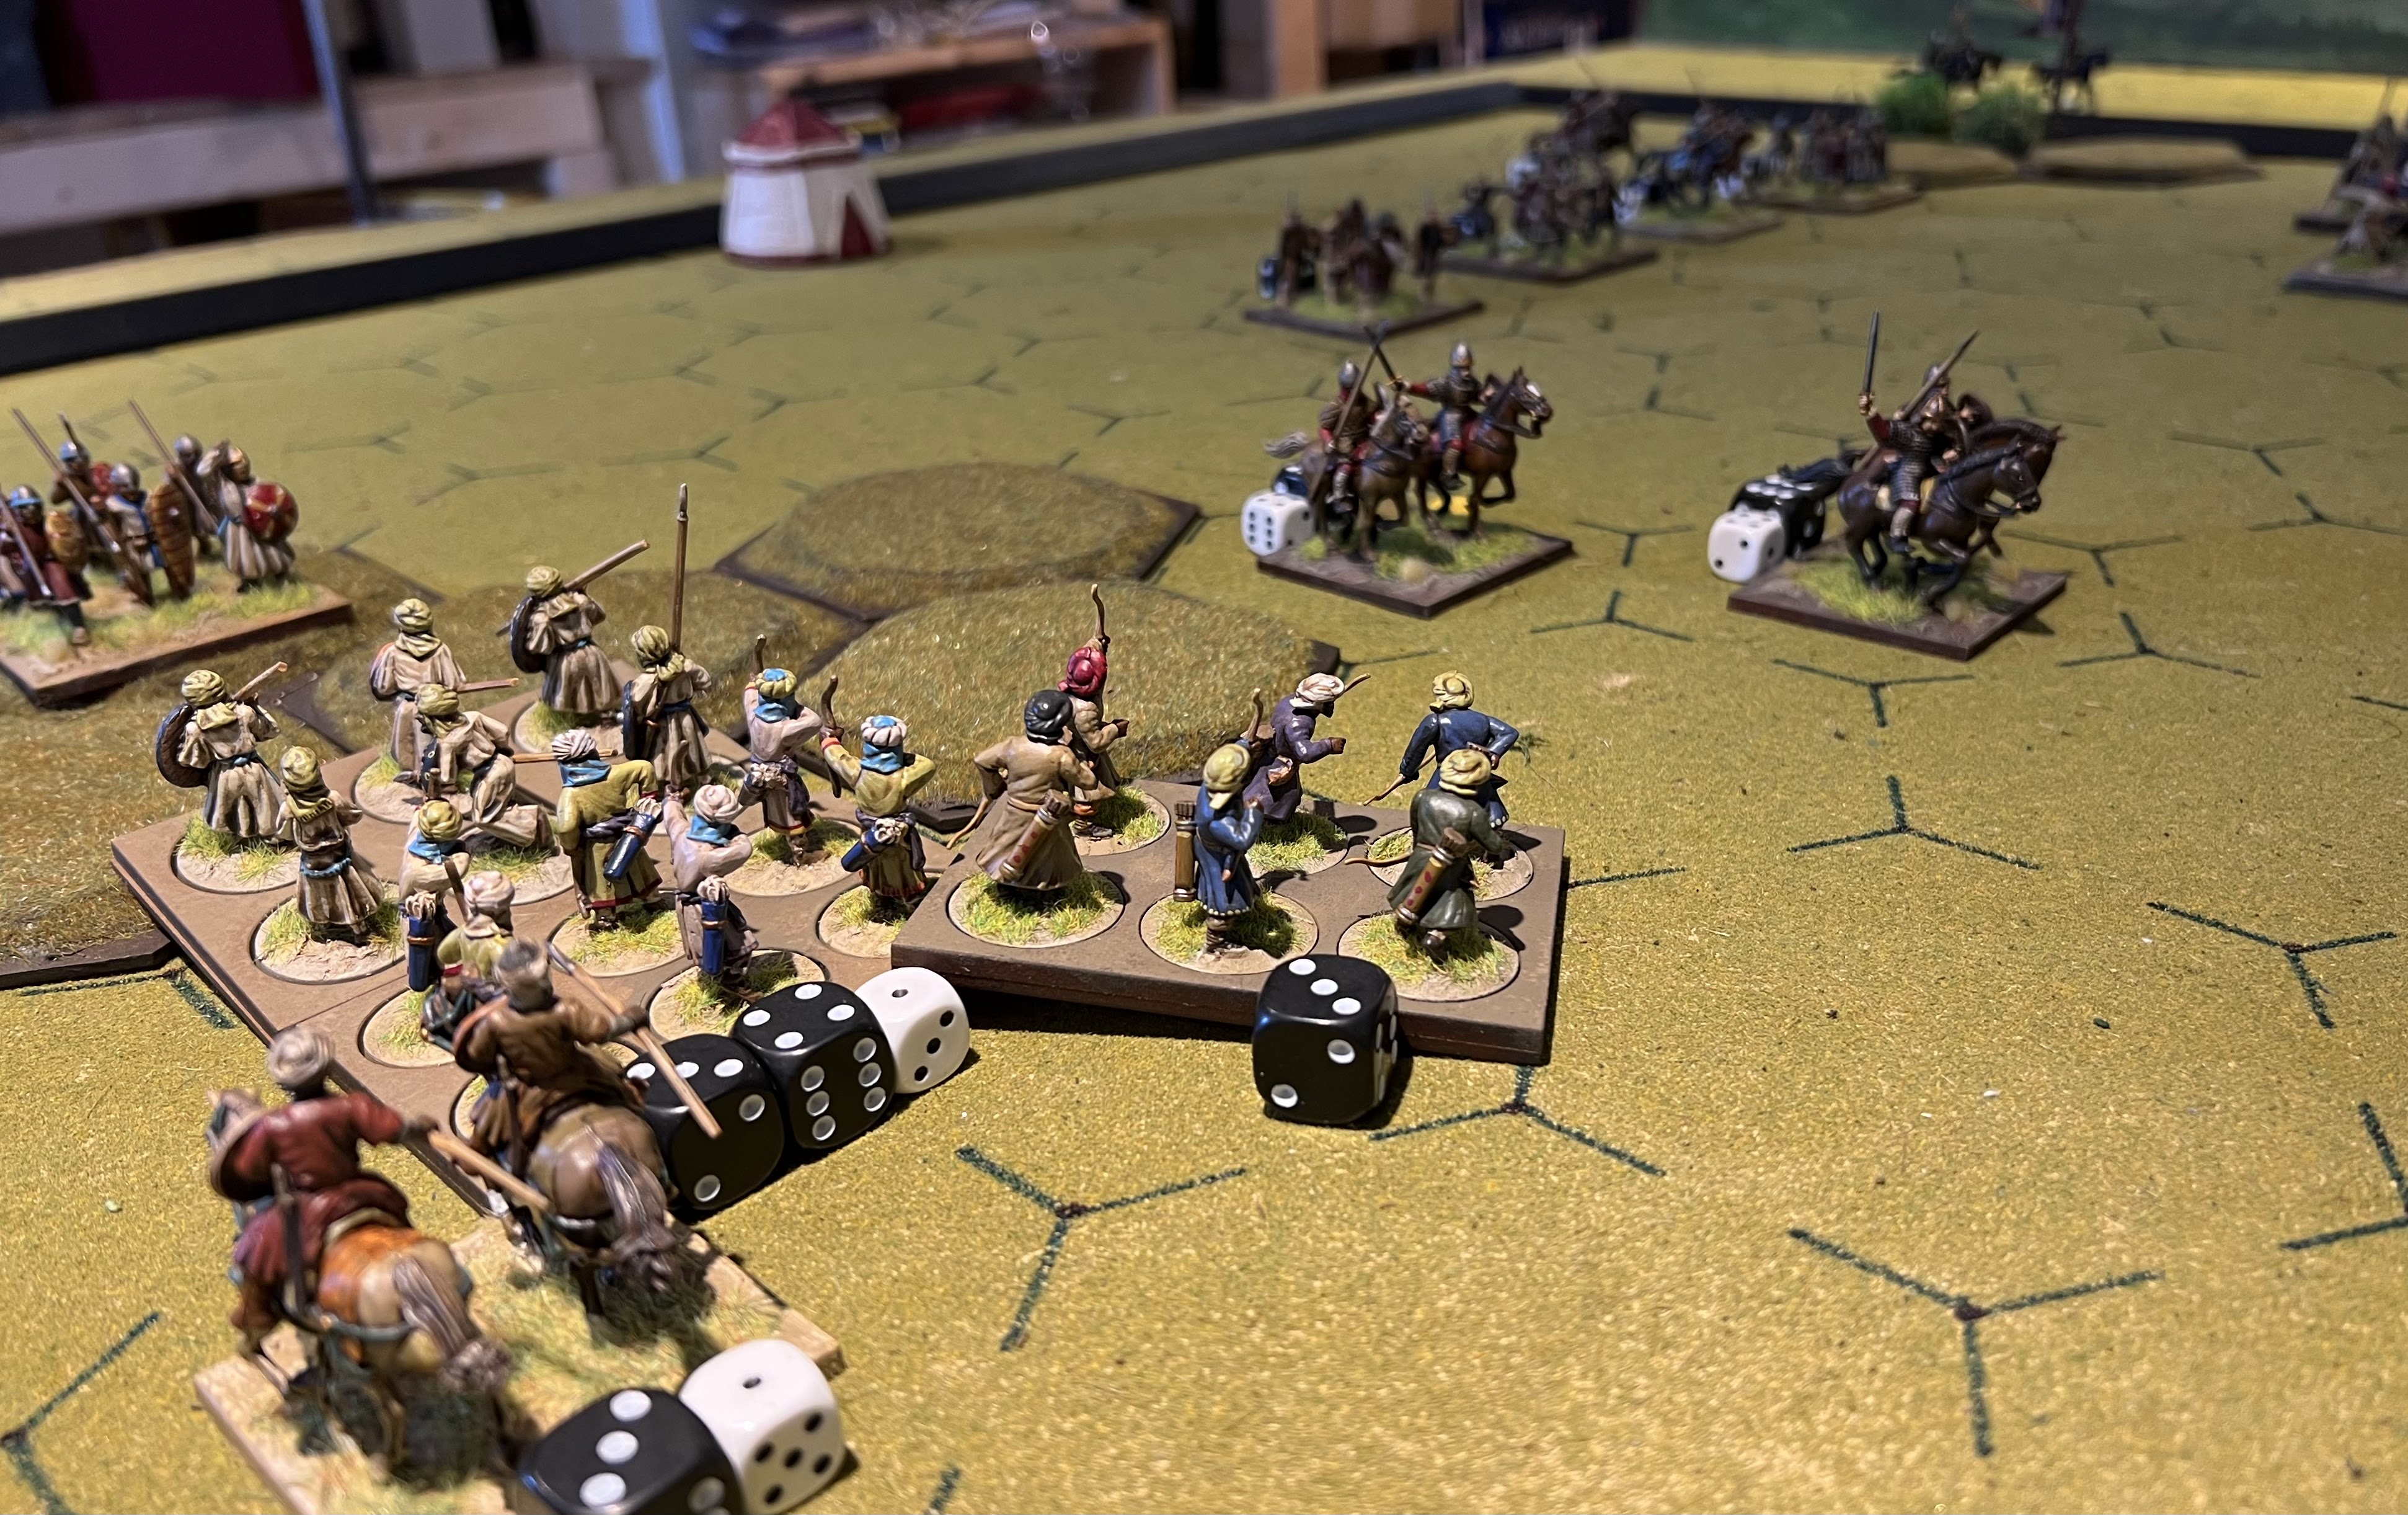
The battle of Ucles 1108 the Christians under Alvar Fenez are outnumbered but believe they have God on their side. There aren’t that many details of the battle available but enough to create a reasonable scenario. The Christians have a significant number of Heavy Knights, in some sources about one quarter of all the knights available in Leon. They are supported by some lower level infantry from the local town (unfortunately I didn’t have the relevant stats for these so the infantry on both sides were a little too good !) the Almoravid commander Tamin ibn Yusuf leads an army of predominantly infantry and archers from Cordoba, Granada, Valencia and Murcia split into four blocks. The battle appears to have taken place outside the city of Ucles on fairly open ground. This would make a great ‘big’ battle sometime as the Christians had no less than 7or 8 distinct Lords fighting on their side most of whom were killed during the battle. Obviously for a hex game I cut this down to 2 supporting Fenez would be the Kings son Sancho who also died at or just after the battle.
The Christian knights in all their glory
Tamin ibn Yusuf with his black guard 
The Christians have little choice but the charge in which they did with gusto initially pushing the front line apart as they did historically
But with the Almoravids for once winning the important initiative roll in this early stage, the leading unit was isolated and wiped out, Alvar is pulled from his horse and beheaded ! Oh dear we diverge from history as he actually survived the battle.
The Muslims advance on both flanks (which in hindsight was a mistake)
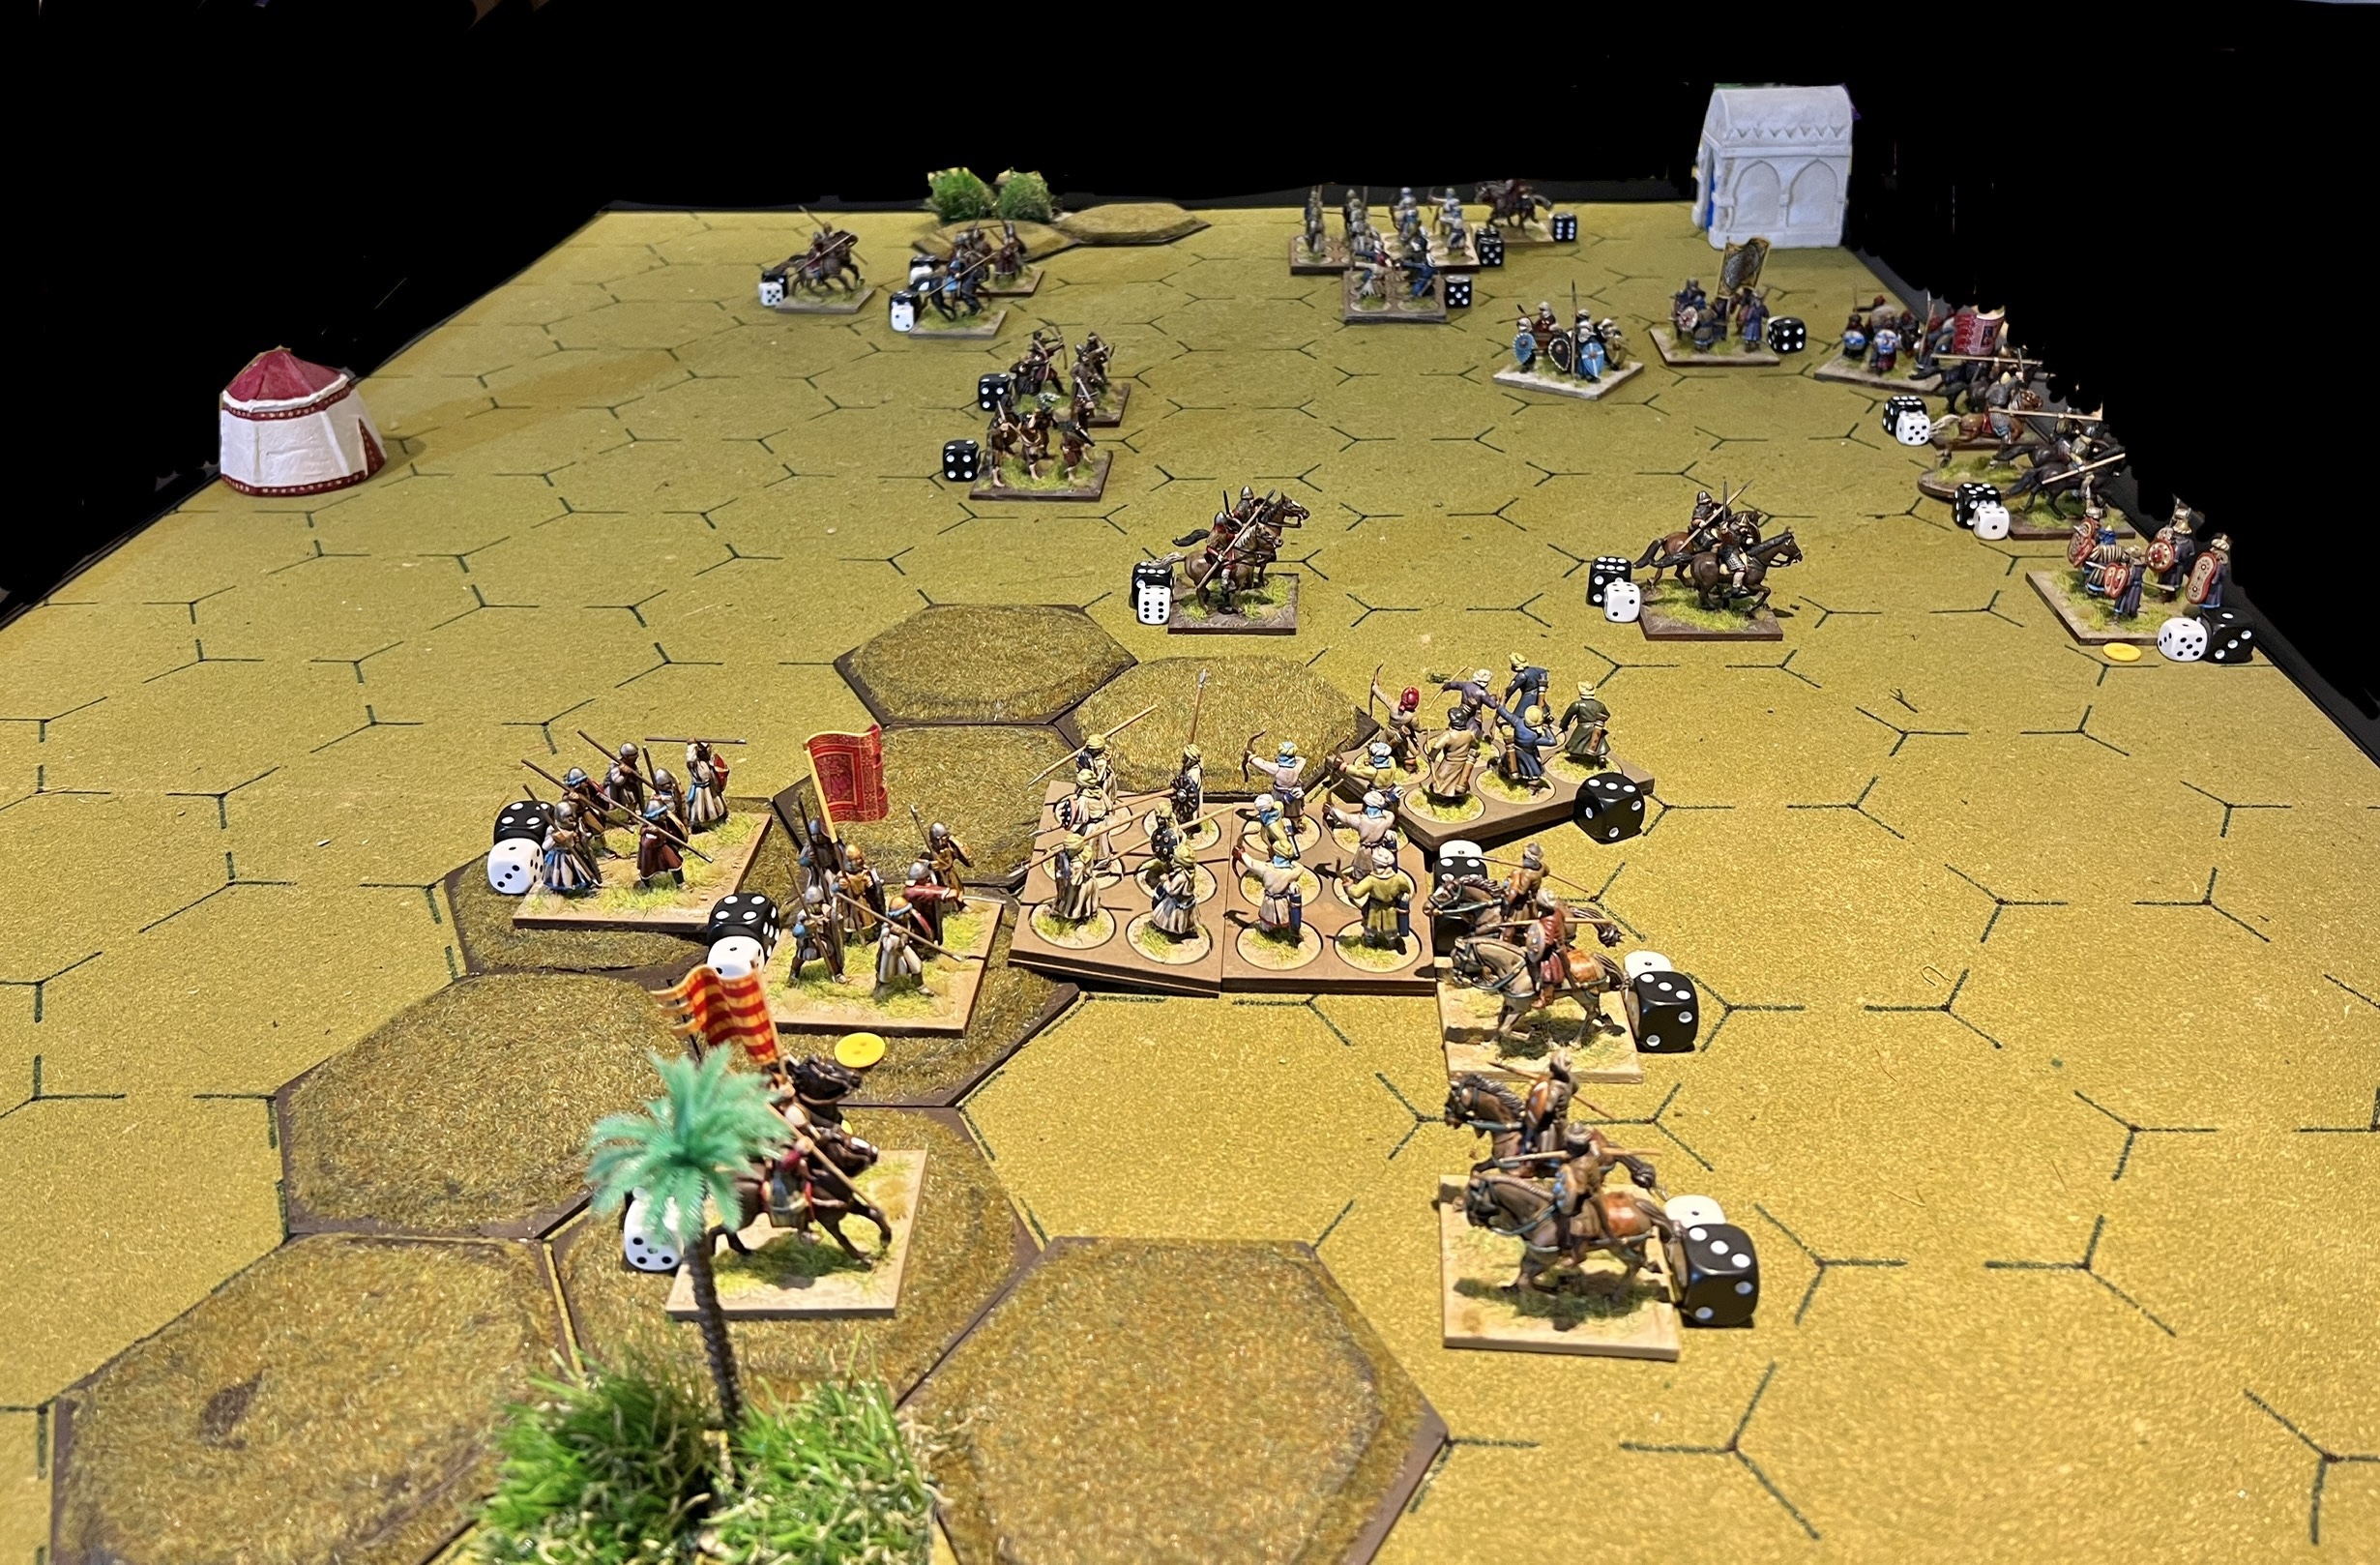
As this gave too much room for the heavy knights to crash through the centre which they did on mass, at this point the game appeared to be almost over with the Christians well ahead and closing in on victory. But then a final twist…
The Muslim light cavalry on the right flank who had been ineffective for much of the battle broke through, knocking out two already wounded Christian cavalry units, they made a break for the Christian baggage 
The Christian’s left flank has been decimated
And suddenly the battle has come down to the wire the Christian cavalry has been stranded in the Muslim camp for a while 
But then manages to regroup to claim the final victory point needed. A splendid battle and game, the hex system while obviously very simplified gives a good game especially when playing remotely. If I wasn’t so busy I would like to try it using some other periods especially SYW ? Another day perhaps.

Finally my seemingly weekly visit to a Roman Fort, this time another trip for me and my daughter to Epiacum. The fort lies NE of Penrith amongst the Pennine hills around Alston. And although it has obviously been known about for a long time has only really been investigated and made more accessible in the last few years.
A blustery by dry day in the Pennines
I do love these signs although the Rome pointing is slightly misleading as it points into the valley where the Roman road would have been not towards Rome
The fort itself has some really characteristic ditches and earthworks surrounding it.
From a slightly distance it would have made a very impressive location, the Roman road I believe runs in the valley just beyond running south
A reconstruction from the same direction.

So our investigation of Roman history continues.

Thanks as always for popping by Matt👍 More gaming this weekend and hopefully a trip to Partizan show next weekend if I can sort myself out

Thursday 22 September 2022

Painting update and a little more ‘local’ History

Feel like I have been painting lots of bits recently rather than any full units, that trend will change soon I suspect.

Completed this week some much needed AWI artillery support, I picked these up at the Edinburgh show recently, the idea being the Caisson and munition wagon can double up as limbers or play as nice terrain when needed. I also chose to individually base three of the figures giving some flexibility 
This means they can if needed man the extra artillery piece. Although I already have quite a lot of artillery so not sure if they will be needed.
A small purchase of eBay as I had already picked up some of their larger guns, some of these may well be painted up as Austrians

I was also away again last weekend with my Daughter and we visited a number of interesting sites
First up the Gilnockie Tower. Once falling down then repaired as a house now repurposed as a visitor attraction and small museum. The tower is reputed to be the ancestral home of the Armstrong clan and more specifically the original home of the infamous Johnnie Armstrong an infamous reiver eventually killed by the king
It is only small but nicely put together audio tour, some interesting displays and of course much of the discussion is about the Reiver way of life.
Some replica armour etc. I have of course thought many times about collecting. Some reiver types for skirmishing. What with it being fairly local, I’m holding off for now.
We visited the Sir John Malcom monument 
I have since read a little more detail and considering getting one of his books, a classic ‘British’ adventurer served with the Wellesleys in India before moving into deplomacy as a career in the east.
Day two we visited Orchardton Tower , sadly not currently open to the public but apparently a rare example of a round tower house
Finally Burnswark Roman fort near to Lockerbie, Surprisingly there is quite a lot written about this which I’m not going to repeat here, if you are interested just Google it.
Suffice to say the Iron Age fort seen below (not my aerial shot) has Roman forts on both sides. There are two schools of thought, either it was a training camp for training new soldiers or perhaps more excitingly it does represent an actual siege during the attempted invasion of Scotland. The obvious round mounds have been identified as Ballista firing platforms.
It is quite exciting to picture the siege in place with Pictish warriors hemmed in on top of the hill the Roman commander ordering the two forts to be built to prevent escape and then the ballistas being placed and the final assault. The battle scene in gladiator comes to mind 
This is a reconstruction picture but it is quite easy and accessible on the ground.

Well that’s it for now hopefully some gaming this weekend 👍


Saturday 17 September 2022

Battle of Shiloh : The Peach Orchard

Another dollop of juicy ACW goodness as Stew would say. Not sure why we played two ACW in a row but I’m glad we did. Here we played a large Shiloh scenario from This Bloody Field again by Brad Butkovich. This is a fairly big scenario so we were playing on my larger outdoor gaming table which was stretched to 12x6 feet and combining mine and Martin’s ACW collections. Breaking with tradition we chose to test out Honours of War as a ruleset for ACW. More of that a bit later perhaps.

In terms of scenario the battle for the Peach Orchard took place around 10:30 on day one of Shiloh. General Albert Johnston had thought he had turned the Union line only to find that part of Sherman’s Division Colonel Stuart’s Brigade had been detached to the far left of the Union line. This left a significant gap in the Union line which the Confederates attempted to exploit. The confederates made a frontal assault, but on their left they discovered difficult ground in the ravines bordering the Tennessee River. In the centre the Union forces pulled back to the edge of the Peach Orchard forcing the rebels to attempt to cross the large open ground of the Sarah Bell cotton field. The right wing of the Union line is bounded by the Thick trees and undergrowth of the ‘Hornet’s Nest’ which saw fighting later in the day.

The objective for the Confederates is to smash through the gap and turn the Union line, the Union army needs to get its reserves into play to fill the gap as quick as possible before Col Stuart’s brigade is wiped out.

The battle set up, 12x6 table the streams at this end of the table represent the often dry ravines and very small streams that feed into the Tennessee River all troops in this area obtained an extra cover bonus and a penalty to movement. The tents represent the union camps and any Rebel passing through a tent must test to check if they have stopped to loot breakfast. The whole of the battlefield is light woods except those designated fields and the roads.
BG John J Jackson’s Brigade from Alabama moving upto the Larkin Bell Farm, the isolated elements of Stuart’s brigade beyond the Hamburg Road
Williams Brigade lined up along the Sarah Bell’s Cotton field
The hornets nest , Union reserves unaware at this stage that a huge attack is coming
The peach orchard, currently quiet
Jackson and Chalmers Brigade’s start well but then suffer a series of bad activation rolls slowing their advance
This is compounded when troops from Jackson’s brigade stop to ransack the Union tents !
Finally they get moving again but they have lost valuable time
Firing opens up from the confederate line but Colonel Stuart following his historical counterpart pulls back into the difficult terrain to gain time
Bowen’s brigade can now be seen making its first assault on the Cotton field across the Hamburg-Purdy Road
To the west Statham is holding back
Confederates are moving in force across the main road, but whilst the Rebels have been hindered by a number of poor activation rolls 1’s the Union General has rolled several 6’s getting double moves for his reserves
The Union line in this section is complete but fairly thin ?
The confederates charge in to break the line
And have some success pushing one unit back across the cotton field
To the left musket fire opens up rather than the bayonet
But the Union troops of Williams get the best of it forcing some rebels to pull back
Fierce fighting now around the road junction where the reserves of McArthur have arrived
Around the fence at the cotton field both sides are taking a battering but nobody has the ability to capitalise on the gaps opening up
Chalmer’s brigade has now pushed through and Col Stuart’s Brigade is massively outnumbered
Union troops are being forced to retreat back across the cotton field, where they hope to reform
Again rebels charge in around the road junction but the fighting isn’t decisive
More confederate troops are arriving some from Stephens Brigade from their previous assault on the Hornets Nest
The Union have eventually lost their left flank, but the confederates have a long way to move to capitalise on the breakthrough, top right can be seen the final Union reserves no in place to hold the Union left
With no chance at the Hornets nest Stephens takes his brigade further East but it may take too long to bring them into the battle.
The confederates swarming through the ravines
Unfortunately at the Cotton field it is a different story here the Union have regrouped on the far edge making it a near impossible position for the rebels to get across, they try though 
The rebel reserves are now East of the wheatfield but still too far from the action
The rebels attempt to drive forward and sweep in from the right flank, but suffer a series of set backs. Suddenly two brigades collapse exhausted by the fighting since early morning.

Here we called the battle to the Union, they had adequately halted the Confederate attack. The confederates had the numbers but in classic wargaming style they started off with a series of failed activation rolls this just managed to slow the advance long enough for the Union to plug the main gap with reserves. An excellent battle lasting several hours.

As for Honours of War for ACW, it obviously requires very little alteration from the core rules and in its favour the ability for units to flee then reform works quite well as this often happened in ACW battles. The general mechanics worked fairly well although we needed coloured markers for each brigade we have these for SYW and it became difficult sometimes to remember which Unit was in which brigade. The main criticism are the ranges, we use the 28mm ranges for our 10 mm SYW and that works well, transferring these same ranges to 28mm ACW just didn’t work for me and if we played again I think we would increase the ranges/distances across the board. So they certainly work ok although I am not sure they add anything different to our house Bolt Action rules. Obviously one benefit is you don’t need to remove bases which means you COULD fight using these rules and 12 man units to recreate larger battles and simplify the terrain appropriately. This would work and is an interesting idea for the future.

Anyway with all this ACW I decided it was time I buy Brad’s Gettysburg scenario book and it duly arrived in the post this morning👍


Thanks as always for popping by