After Washington’s victory at Trenton against the Hessians, the British under Cornwallis marched from Princeton thinking that they would be able catch the Americans on the wrong side of the Delaware river. A number of small engagements and skirmishes took place during the British advance to Trenton. But when they arrived it was getting late in the day. Washington had moved his army across the Assunpink River to a strong defensive position. The second battle of Trenton saw the British attempt but fail a head on assault across the single bridge. Those of you that have been following our AWI campaign will know we have already had a number of such battles and with little tactical options we decided to skip to Princeton a more open and interesting Battle. Along with Trenton these are amongst the most famous victories of Washington so once again I will skimp on historical details.

An interpretive map of the historical action. Washington expecting a renewed attack on the morning of the 3rd at Trenton boldly withdraws his army away from the safety of the Delaware instead marching them east and north towards Princeton where he hopes to defeat garrison which Cornwallis has left. While leading elements of the American army under General Mercer march north east, British forces under General Mawhood are ordered to move to Trenton. As elements of the American army are ordered to destroy the bridge over Stony Brook to prevent the British advancing from Trenton the two forces realise they are marching in roughly opposite directions on parallel roads. Turning of the roads to face each other the battle known as Princeton then took place around a series of farms.

Lucky for me the fine gentlemen at Little Wars TV (thank you) have made available a free scenario for the battle which pretty much fits my collection. We used the OB from the scenario although slightly modifying to align with Rebels and Patriots our current AWI ruleset. For example units permitted to skirmish were replaced with a skirmish unit.
WARNING TERRAIN BLUNDER AHEAD 😱
ok I have to own up now, as I was setting up the scenario, sorting the figures etc I completely forgot the battle was in January having had the lovely snow terrain at Trenton and this battle only two days later, by the time I realised it was too late with only 20 mins till the game. So we played Princeton on a lovely spring day after the thaw !
Having got that off my guilty chest on to the battle
General Mawhood’s Brigade deployed on the Trenton to Princeton Road, he must attempt to hold either the bridge or the road to Princeton long enough for Cornwallis to come to the rescue (10 turns) heavily out numbered he can expect the arrival of some poorly trained recruits and convalescents and the 55th Foot who are marching to the area.
General Mercer’s small command has triggered the battle, but Washington is further up the road and several American Brigades are marching from the south arriving at designated times
A lovely spring day south of Princeton, Washington in command of Cadwalader’s Brigade is just north of the Clarke Farm
Washington urges on his Philadelphia Militia
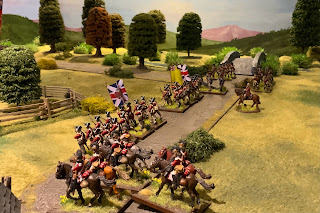
The 16th Queens Dragoons are sent to delay the American advance
General Mawhood opens up his guns on Mercer who take an early battering
The 17th Foot are sent to hold the Orchard, providing them some cover
General Mercers troops take a battering and then have to take cover
Washington advances on the right and his skirmishers open fire
General Mercers troops can make no headway against the British guns
The 17th foot deploy in the orchard
Washingtons troops are joined by a second brigade
The dragoons exchange fire with the advancing Americans but take fire from their artillery and are forced back
The 17th foot open up with volley fire on the advancing Americans from the orchard
The Philadelphia militia Foreman to line exchange volleys with the British in the orchard
Almost a disaster the British Grenadiers are forced to retreat following an activation blunder
The 55th foot who have recently arrived from the north are fired on by the retreating Queens dragoons, when the dragoons then flee the field the 55th also fail their test and flee. This is a potential disaster on the British left flank leaving the recruit regiment to hold the position !
The Americans are now advancing well on the right and have opened up with a second artillery piece
General Mawhood As he did historically keeps a close eye on the defence around the Clarke Farm
Washington urges on his troops
The recruit regiment waits in trepidation by the Farm building and in the distance the 17th Foot have been forced to pull back in the orchard
Mifflin’s large brigade of fairly green troops arrives on the road from Trenton, but despite Mercer’s encouragement they immediately start to get disorganised due to failed activations
Fierce fighting continues by the orchard
That the British raw recruits are holding their ground
The two British regiments fire withering volleys into the advancing Americans
By Stony Brook the British light infantry are skirmishing with the latest arriving American troops holding them back from advancing on the bridge
The Americans are close now to cutting the road to Princeton
The 17th foot rally And move back up to the orchard
The British recruits have been decimated but are still holding their ground by the road
More American reinforcements arrive but they fail their activation rolls and don’t advance quickly down the road
The Philadelphia militia Have now taken the orchard from the British defenders
The British recruits have died to a man holding the road but it is now open
The British command is still holding the bridge over Stony Brook
Washingtons troops are advancing in to the orchard and are preparing to make one final push
This was the end of turn 10 and we called the battle for the British they had held on despite being heavily out numbered. Holding the bridge as a communication route for reinforcements from Cornwallis. Mifflin’s brigade had arrived too late to swing the battle, Washington was close to cutting the road to Princeton but hadn’t quite reached it. The dismal performance of the 55th Foot must go down in the annuls as one of the worse performances so far, fleeing not having fired a shot, spooked by friendly fire from the retreating Dragoons 😀. However the recruits and convalescents despite their low status held their ground in the face of the American onslaught, literally being killed pretty much to a man ! As you can tell this was another good battle, close and challenging. Thanks again to Littlewars TV for publishing the scenario.
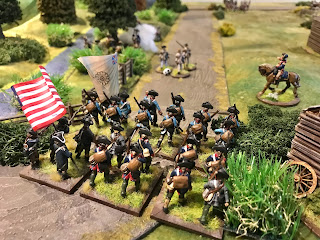
You may also have noticed that Washington only had a temporary flag in the battle this has now been replaced with something more permanent.
Hope all are well
Matt