Friday, 8 July 2022

AWI Forage War 1777 : The Battle of Spanktown

After a short hiatus we have a welcome return to our continuing AWI campaign and the third in a short series of smaller battles which were collectively known as the Forage War. These took place in the early part of 1777 in New Jersey. This was a slightly larger engagement than previous smaller skirmishes so is ideal as a battle for Rebels and Patriots. There is fairly limited detail and history available on the battle/skirmish, but the basics facts are here taken from wiki

Lieutenant Colonel Charles Mawhood was sent with a reinforced brigade to destroy any rebel forces he could catch. He set out with a battalion each of light infantry and grenadiers, plus the 3rd Brigade. The latter formation consisted of the 10th Foot, 37th Foot, 38th Foot and 52nd Foot. Near Spanktown (now Rahway), Mawhood found a group of militia herding some livestock covered by a larger body of Americans waiting on a nearby hill. The British officer sent the grenadier company of the 42nd Foot on a wide flanking
maneuver. Just as the grenadiers prepared to launch their assault, they were fired on from ambush and routed. At this moment, Maxwell sent his superior force forward to envelop Mawhood's force. The American force included the 1st, 2nd, 3rd and 4th New Jersey Regiments, the 1st and 8th Pennsylvania Regiments, and the German
Battalion. Mawhood's surprised men were hounded all the way back to Amboy.

A sign from the area which saw other small scale combats during this period
So to convert the details into a reasonably light hearted scenario. The battlefield is set up as above. The Rebels will have a unit controlling the flock of sheep and two units deployed on the identified hills. The British will advance en mass form the right. Other American troops will arrive randomly from the designated positions an element of uncertainty then exists to the quality of the ambush. Victory will go to the side holding the flock when the enemy are broken.
Rebel Militia (a small skirmish unit) holding the objective
Col Mawhood advances with the 3rd Brigade
To their far right the Grenadiers advance across the road
The view from Spanktown
Two American units holding the high ground under the watchful eye of Gen Maxwell….the trap is set !
With random deployment for the ambush the Americans arrive mainly on the British right ! And immediately open up on the advancing Grenadiers….is history going to repeat itself again
The British regulars advance to clear a path down the centre
Th8gs are looking good for the British they are holding a strong position on the road and start to from up into line
American troops begin the firefight
HISTORY does repeat itself and the Grenadiers caught in the open are forced to retreat !
But the British have numbers and are in a strong position , a withering fire is exchanged across the field
First one …….
….then another British unit is forced to pull back.
But the British line rallies and holds
Pushing some of the rebels back through the ploughed field
The Rebels are attempting to advance around the right flank, initially they are held…….
But then they are able to charge home along the road some hard fighting hand to hand but eventually the remaining British are forced back 
The final situation the British are really broken at this stage and now outflanked on their right another victory to the Rebels

Once again without trying we seem to recreate the historical outcome, the battle ass often was close and initially we both felt the Americans were up against it. The British grenadiers took a pounding and yet again the British light infantry failed to activate a number of times. As usual an enjoyable battle with several twists and turns, now back to the timeline to see what is next ?

Thanks for looking ๐Ÿ‘


Saturday, 2 July 2022

ACW Command Figures

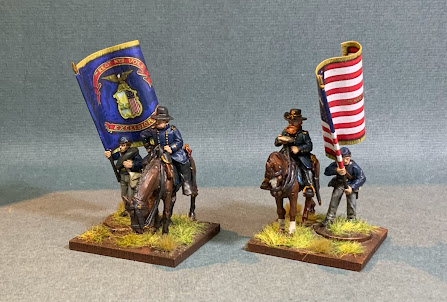
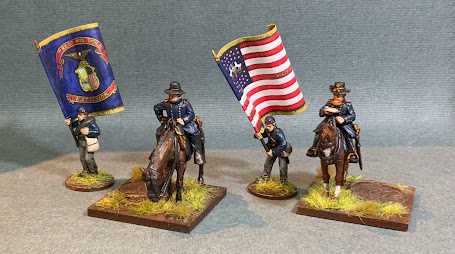
I already have quite a few ACW command stands, but was gifted a couple of extra mounted generals from David B, thank you David finally got round to painting them up. Regular followers will have seen me create command bases which are designed to fit within a regular infantry unit allowing you to split the unit, this gives flexibility and allows larger battles if desired.  The next evolution of this approach is to make some of these bases but allow the standard to be changed so that occasionally when required specific famous regiments/units can be represented.

Here are the first couple
And with the standards removed, they are magnetic and very solid when in place.

Of course they are useable as they are and will hopefully see some action soon, i can’t promise to produce a huge range of options but I have my eye on a few possible ideas which I will mull over. I could also replace the standard with a suitably generic officer figure which would work just as well.

Anyway that’s it for now

Hopefully some gaming this weekend ๐Ÿ™‚


Wednesday, 29 June 2022

American War of Independence : Command Figures and a few holiday pictures

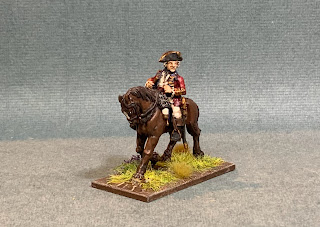
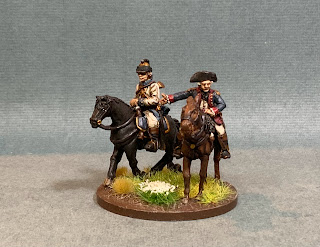
Back from another week holiday over in the North East of England this time with both the kids. Unlike many I always take some soldiers to paint in the evenings when the rest of the family are looking for some down time. This year I focussed on getting some AWI command figures completed, I had picked these up ages ago so nice to get them completed. I have forgotten if they are all Perry or if some are Foundry.

An American in hunting shirt
General Howe
American officer but can’t remember which 
Cornwallis I think
and a second Gen Howe, these give me lots of options for Brigade commanders etc…

As always our holiday included some history elements and I won’t bore you with all the other stuff we got upto.
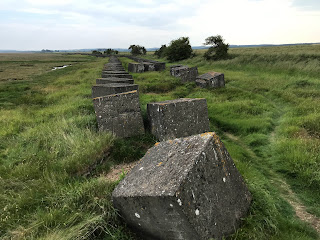
Some of them 1940 anti invasion defences along the NE coast these close to Lindisfarne
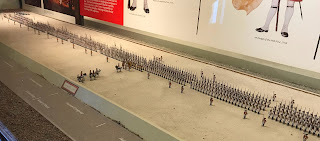
The Kings Own Scottish Borderers museum in Berwick lots here to see
Including a one to one Battalion in 25mm (this is why we game with scaled down units)
The Berwick upon Tweed Napoleonic defences, built upon earlier Elizabethan structures.
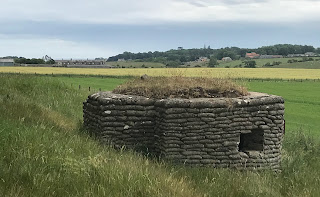
An interesting pill box set back in the Northumberland countryside
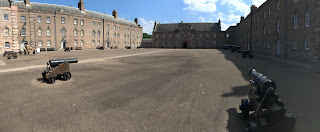
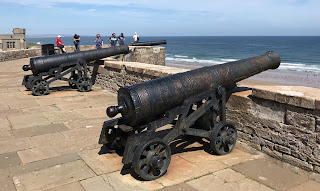
Cannons at Bamburgh Castle
And a very large Vickers tank model at the small Armstrong museum at Bamburgh castle

So lots going on but not much actual gaming hopefully some more this weekend๐Ÿ‘

Thanks as always for popping by 

Friday, 17 June 2022

10mm Buildings and the Battlefield visit to Clifton Moor 1745

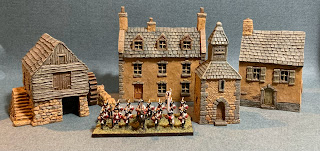
Lots of painting and prepping going on this week in advance of another week on holiday next week. However the only completed things are these additional 10mm buildings.

These are Battlescale buildings to match the rest of the collection, I have one more to complete which should be enough, for our usual SYW battle setup I can furnish at least 8 Villages or towns which is enough for pretty much all scenarios.

Some free time at the weekend so I took my daughter for a picnic to the village of Clifton (only a couple of miles south of Penrith) the village is small but ‘famous’ for being the location of the last land Battle English soil although really it was only a small skirmish. In December 1745 the Jacobite Army was retreating back north from Preston in Lancashire  and were caught but the advance of the government forces. Feel free to Google the details……
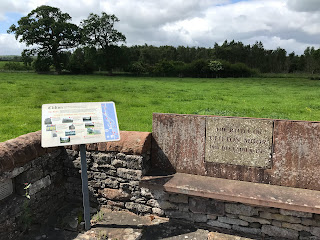
The site of the battle is marked by a small stone bench and information board
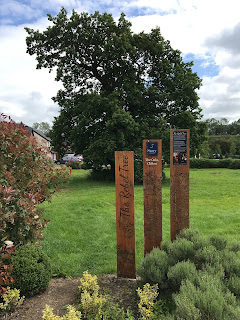
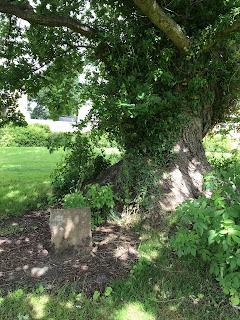
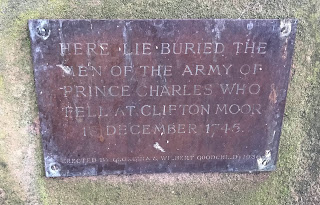
In the village, now surrounded by a small housing estate is a the Rebel Tree where as legend would have it the fallen Jacobites were buried in a mass grave.
A stone marks the spot
With a small plaque
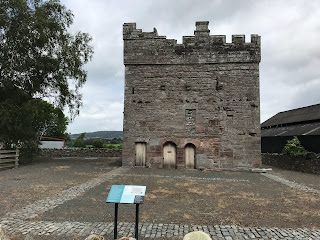
Also in the village is a small tower which formed part of Clifton Hall at the time of the battle the rest of the hall has gone but according to the history was raided by the Retreating Scot’s presumably looking for food and provisions or somewhere dry to sleep ? Free to visit (you can see Penrith in the background)
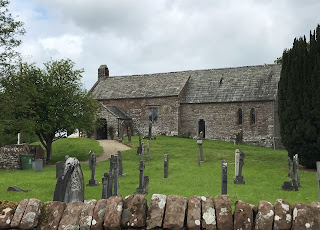
St Cuthbert’s Church in the village predates the battle
And there is a small memorial in the grave yard to some of the kings Dragoons who fell at the battle but I’m not sure if they were actually buried here or not, it would seem to make sense and is reported on wiki that they were.

The Jacobite's continued their retreat from here across the border which would ultimately lead to defeat at Culloden. I have often considered the period for gaming perhaps on a large skirmish scale but never made the jump !

Thanks for checking by๐Ÿ‘

Matt


Monday, 13 June 2022

Back of Beyond : British Raid

After several weeks being disrupted by holidays and illness we played a delayed Back of Beyond battle. Set in our early 20th Century Back of Beyond setting the  British expeditionary force has found itself short on supplies and have targeted the local village, having secured the necessary provisions as they turn back to their base they realise they are in a vulnerable position. Sure enough the local tribes have gathered amongst the rocky terrain intent on preventing British column escaping with the supplies.

The British force setting out from the village
The overview of the battlefield. The main objective of the British is to get across the board or at least as far as possible. The bridge is the only route for vehicles across the dry river bed. Tribal forces will randomly arrive from a number of features, we are using bolt action with some specifics for the scenario, vehicles aren’t able to double move due to the road conditions, rocky areas provide cover, tribal forces are all irregular when firing but ‘regular’ in combat. Additional tribal forces as reinforcements will be available if necessary.
The British expeditionary force is a mix of British and Sikh infantry. A platoon of armoured vehicles, a single light howitzer and a couple of units of cavalry.
Tribal units initially deployed on the table are all in hidden setup so can’t be targeted until they move or fire.
Some of the Sikh infantry heading north form the village
Two machine guns set up on the rocky terrain west of the village to support the advance
They come under fire from the rocky hill and the small holding to the north
More tribal warriors in hiding in the dry river bed in ambush
The tribesmen have a single mountain gun which they have wheeled onto one of the hills
The British make a general advance
Wouldn’t you believe first turn tribal warriors literally appear from nowhere, presumably tunnels or caves in the rocks to surprise the retreating British column, they immediate charge the machine guns knocking them out int two turns
The British push on not wanting to be distracted leaving only some Gurkhas to cover their rear.
Bengal lancers scout forward
…only to be wiped out in a single turn, but the rest of the advance is progressing to plan
On the right the British seek to overrun the small farm but the defenders are well dug in
On the left the two supplies lorries are pushing towards the bridge covered by on of the British armoured cars
British cavalry seek revenge for the bengal lancers catching a group of tribesmen on the edge of the river bed.
But then they are caught pulling back by wild Tribal cavalry, in the melee the British lose out and are forced to flee 
The leading armoured car advances to secure the crossing but is ambushed by tribesmen, they struggle to have any impact or damage the vehicle but they delay the advance
The British have secured the farm on the right 
But more tribesmen are appearing in the distance
Particularly hard fighting around the Farm on the British left
But the bridge is taken
The leading supply lorry makes a bid for the bridge
Whilst an heroic but foolish charge by a platoon of Sikh infantry fails to secure the farm house
Then the second supply wagon receives a direct hit and immobilised
The leading armoured car seeks to break across the bridge but gets bogged down and although it is fairly impervious to assault by the tribal cavalry it can’t move forward
The farm is still being held on the left
but the British column is now pushing over the bridge
The farm is finally taken and in the distance British infantry are pushing into the river bed having driven the tribes men back
and then another lucky shot from the rocky hills catches the second supply wagon knocking it out.
At this point we decided to call it a day, a minor victory to the tribesmen/Afghans who having knocked out the two supply wagons slip away into the mountains. The British have plenty of troops left and have made good progress but the supplies will have to be left behind as they trudge back to base.

A fun game as usual, lots of twists are turns. The Bengal lancers were disappointing being knocked out in a single turn, we perhaps need a few more ? The arrival of the tribesmen from caves behind the British lines was inevitable ! It felt balanced though the British are superior quality but outnumbered. This was the first run out for my new desert mat and the rocky areas were quickly repurposed from some old 40k terrain. Plenty more opportunities in the future ….and we are now planning a siege battle ๐Ÿ‘

Thanks for popping by ๐Ÿ˜€