We have played a number of the smaller Gettysburg Day One scenarios from Wargames, Soldiers and Strategy Issue 66, the scenarios run into each other and were all written by Mike Evans and Don Effinger. All of them so far have proved worthwhile, so with a ‘big’ game planned and the combined resources of Martin and the Dungeon I picked up one of the largest scenarios. The Battle for Oak Ridge.

The scenario maps are particularly good in my opinion and easy to interpret and adapt. Whilst we can easy muster enough troops, this scenario has roughly 24 infantry units a side, I needed to do a bit of squeezing to fit as much of the table into the dungeon as possible. One day I might have an 8x6 table but not at the moment !

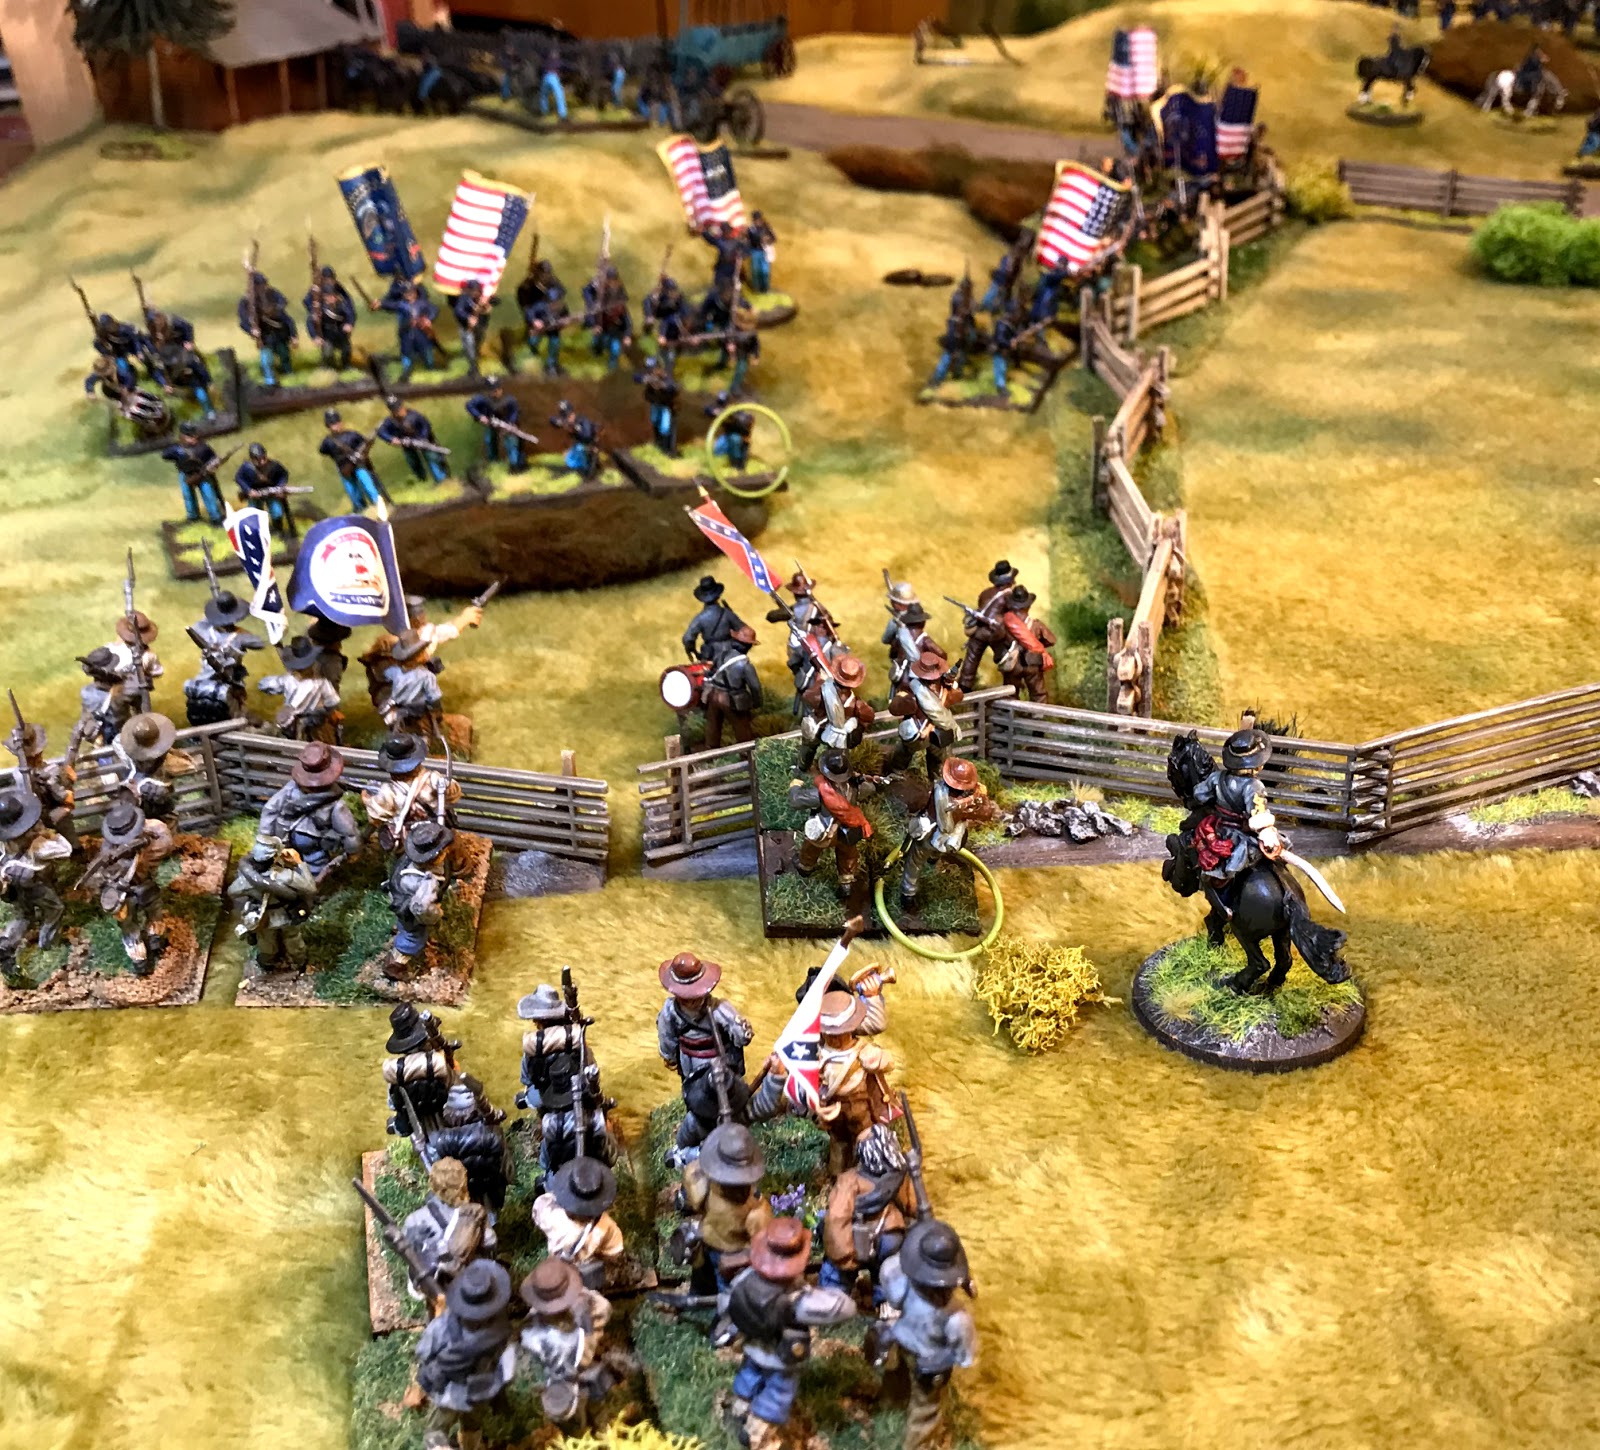
The set up at the start of the battle, looking from the Confederate side, three rebel Brigades are advancing towards Oak Ridge which runs across the corner of the L shape table. In the far distance McPherson’s farm. We tweeted the scenario slightly such that the two Rebel reserve Brigades of Doles and Ramseur and the Union reserve of Paul’s Brigade will enter from their respective baselines from turn two on a reducing D6 roll. We also adjusted the normal rules to speed the game up by giving each Brigade a dice in the bag rather than each unit. The only complexity here is when the units get jumbled up remembering who is who. I also reduced for both sides the number of total artillery pieces, mainly because in the magazine they have the names wrong and it is quite confusing.
So onto the game, it was large and if I say so myself quite photogenic so I apologise for the number of photos, some of you will enjoy them and study each one the rest feel free to skip 🙂

Brig. Gen Schimmelpfennings Bde in the distance the other side of the mummasburg Pike, then BG Baxter’s Bde holding the
Pike and the middle part of Oak Ridge then in the foreground, parts of Lysander Cutler’s New York Brigade also holding the Ridge.

Form the North the Brigades of Iverson, O’Neal and Daniel advance past the McLean Farm

A shot of Stone’s Union Brigade currently holding the McPherson Farm

The Rebel advance, the aim was to adavancing as quick as possible to prevent the Union Forces from concentrating, but the terrain is quite difficult

Stone’s Bde is ordered forward across the Chambersburg Pike

Parts of Baxter’s Brigade 11PA and 97NY move off the ridge to take up the fence line

After a couple of turns Iverson’s Bde is in line level with the Forney property

O’Neal’s Bde is pivoting left down the Mummasburg Pike now supported on the left of the photo by Ramseur’s Brigade

Not much of a defensive line along the railway

“Hold boys hold!”

The view from Oak Ridge.....a thin blue line !

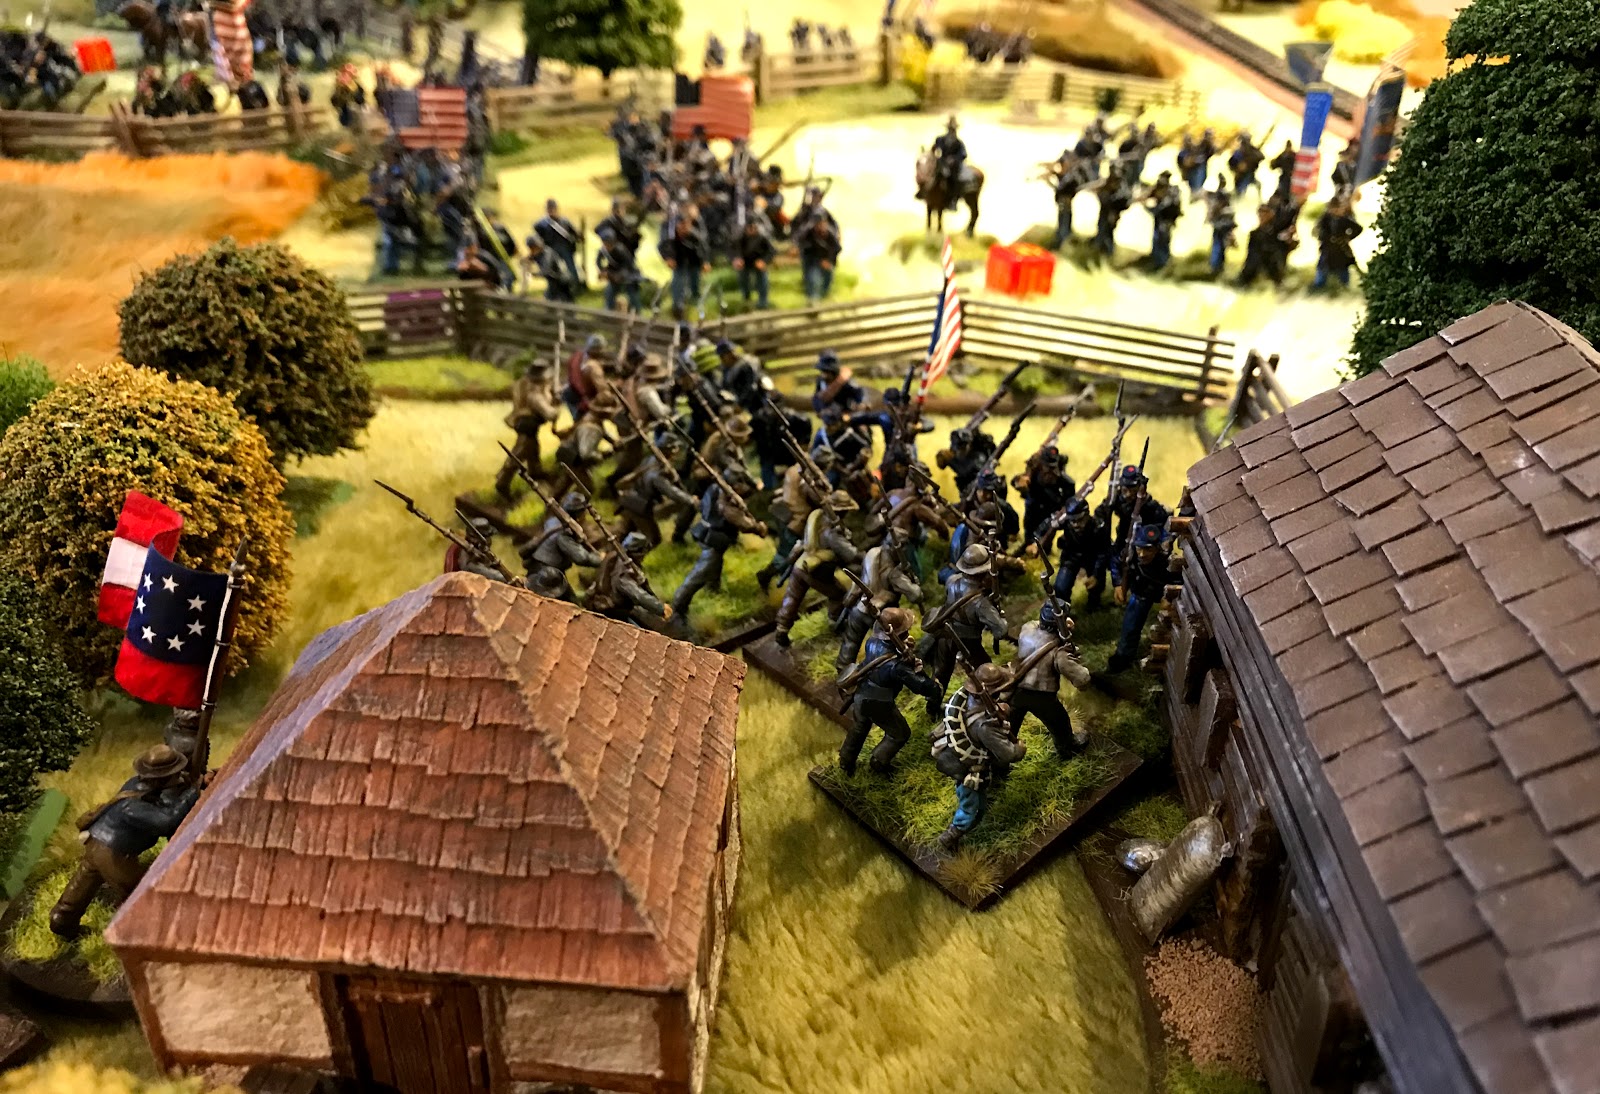
The union unit to the right have entered the barn on the McLean property only (random event dice) to find a stash of local whiskey, they promptly drink the lot and are so drunk they are unable to do much else

Ramseur’s Bde marches forward

A cannon accompanying Daniel’s Bde has set up on the low Ridge but has little real impact against the Union Forces on the ridge

The advance up the Mummasburg Pike is being stoutly defended

Formed up into line Iverson’s North Carolina Bde pivots left to assault the Ridge across the wheat fields

Marching to the sound of the guns Paul’s Union Bde arrives close to the McPherson Farm

Daniel’s Bde adavancing in support of the assault

North Carolina men advancing towards the Bender Farm

Supported by artillery O’Neal continues to push up the Mummasburg but is pinned back

Again the artillery attempts to support the advance but is mainly ineffective

Confederate confusion as the two brigades intermingle

Masses units now in place in the centre of the battlefield and the Union Forces are not yet in place

Parts of Daniel’s Bde have moved to the right to direct their attack at the thin line of defenders in front of the McPherson farm

A particularly funny moment when the drunken defenders from the barn receive another random event forcing them to rush out and assault the nearest unit, clearly Dutch courage it nearly works but they are turned back ! ( this was very appropriate as Martin had been suffering from a hank over all morning 😀)

The confederates definitely have numerical advantage in the centre but can’t currently make it count

A tantalising gap can be seen on the Ridge behind the Forney property but can it be exploited ?

Doles’s Brigade finally reaches the battlefield and advances on mass supported by some mobile artillery which unlimbers just over the Ford

The confused mass of rebel troops close to the Mummasburg Pike some advancing other retreating ? And the guns blocked !

Daniel’s Brigade of North Carolinians has captured the Bender Farm just as the Union reinforcements form up in the distance

The rebels swarm in amongst the buildings

Some of the confusion has been resolved in the rebel Brigades

A view of the advancing union reserves
Doles’s Brigade is pushing forward and the Union line is looking vulnerable to being rolled up along the ridge

Lots of exchanging fire in the centre but little sense of a break through

As individual rebel units are thrown into the attack others pull back
Things then get really serious as hand to hand fighting breaks out at the Bender Farm

Despite the limited depth of defence the Union right flank is holding...but only just

Still plenty of Rebels units pushing forward

Eye candy

The rebels are starting to break through on their left flank where they have the numbers to count

Ramseur’s Brigade has now forced its way up the Mummasburg Pike where the remnants of Baxter’s Brigade has now broken

In the centre the confederates still have numbers but are being held in the Wheatfield

The Union Forces have taken back the Bender Farm

The final position in the centre where the Union Forces have taken the advantage
At this point the battle came to an end (tea time having played for about 5-6 hours) we decided on a minor Confederate victory as Baxter’s Brigade had broken and a second was close to breaking, given time the rebels would possibly have rolled up the ridge. Having said that there are a lot of Union troops still holding and there is no chance of breaking through further along the line towards the McPherson Farm. Yet again a great game, the rules give a real sense of the period and it is hard to gain a decisive break through, but this is how it was at the time and accounts for the high casualty figures. In this case both forces would have plenty to fight another day. We will be back to the ACW soon 🙂
Splendid Sir, just splendid. I like the selective colour shot, very striking.
ReplyDeleteThanks Phil 🙂
DeleteWas a brilliant day. Loved how the terrain framed the units. It was very photogenic. The small units were a real nightmare and gave an extra dimension. Promise to be less hungover next time
ReplyDeleteNot sure I can hold you to that 🍺
DeleteWhat a lovely table, texture filled and just a joy to look at.
ReplyDeleteThanks Norm 🙂
DeleteYou really do put on a smashing game Matt, splendid stuff.
ReplyDeleteThanks Michael
DeleteWhat a fantastic game!
ReplyDeleteThanks M😀
DeleteA fine looking game!
ReplyDeleteThanks David who said ACW wasn’t colourful ?
DeleteGorgeous game, Matt! Your opening, labeled battle overview presentations are works of art. Calling this action a minor Confederate victory seems appropriate. Great stuff!
ReplyDeleteThanks Jonathan , the plans aren’t too hard just a photo with the background roughly coloured out and some txt , but thanks for commenting 🙂
DeleteGreat looking figures, terrain and table! Lovely photos!
ReplyDeleteBest Iain
Thanks Iain 🙂
DeleteSpectacular looking ACW game. Take more pictures because it’s indeed photogenic. Good call on activating brigades versus regiments.
ReplyDeleteEnjoyed the post immensely. 😀
Many thanks Stew, the tweet to the rules worked and got us a bit closer to a result which was good
DeleteA lovely looking and sounding game Matt...
ReplyDeleteAll the best. Aly
Thanks Aly 🙂
Delete