General Gage
Our forces as requested have searched the area around Concord, I can report a very successful engagement with the Rebels and a number of hidden weapons have been located and destroyed in the area around Barrett’s Farm. We also encountered a small skirmish force close to a Bridge having taught them a lesson we chose to retire in good order. We did suffer some minor casualties but there was no great significance in this combat. It does appear Sir the Rebels mean business but their discipline isn’t up to much. I will now conduct our column safely back to Boston and will await further orders. I think it is safe to say the rebellion has been crushed and the local trouble makers wont be any more trouble.
Yours sincerely
Lt Colonel Francis Smith
Well that is how it was supposed to work out, for our second battle in our “mini campaign” (who knows where this may end up). Jonathan had created a small battle to the south of Concord around the South Bridge. Here the Rebels had quickly built a ‘hasty’ entrenchment to prevent the British column moving further south. The British flushed from their success at Barretts Farm decided to sweep the Colonials from the field. We are again playing with Rebels and Patriots. A more detailed description can be found on Jonathans blog here : https://palousewargamingjournal.blogspot.com/
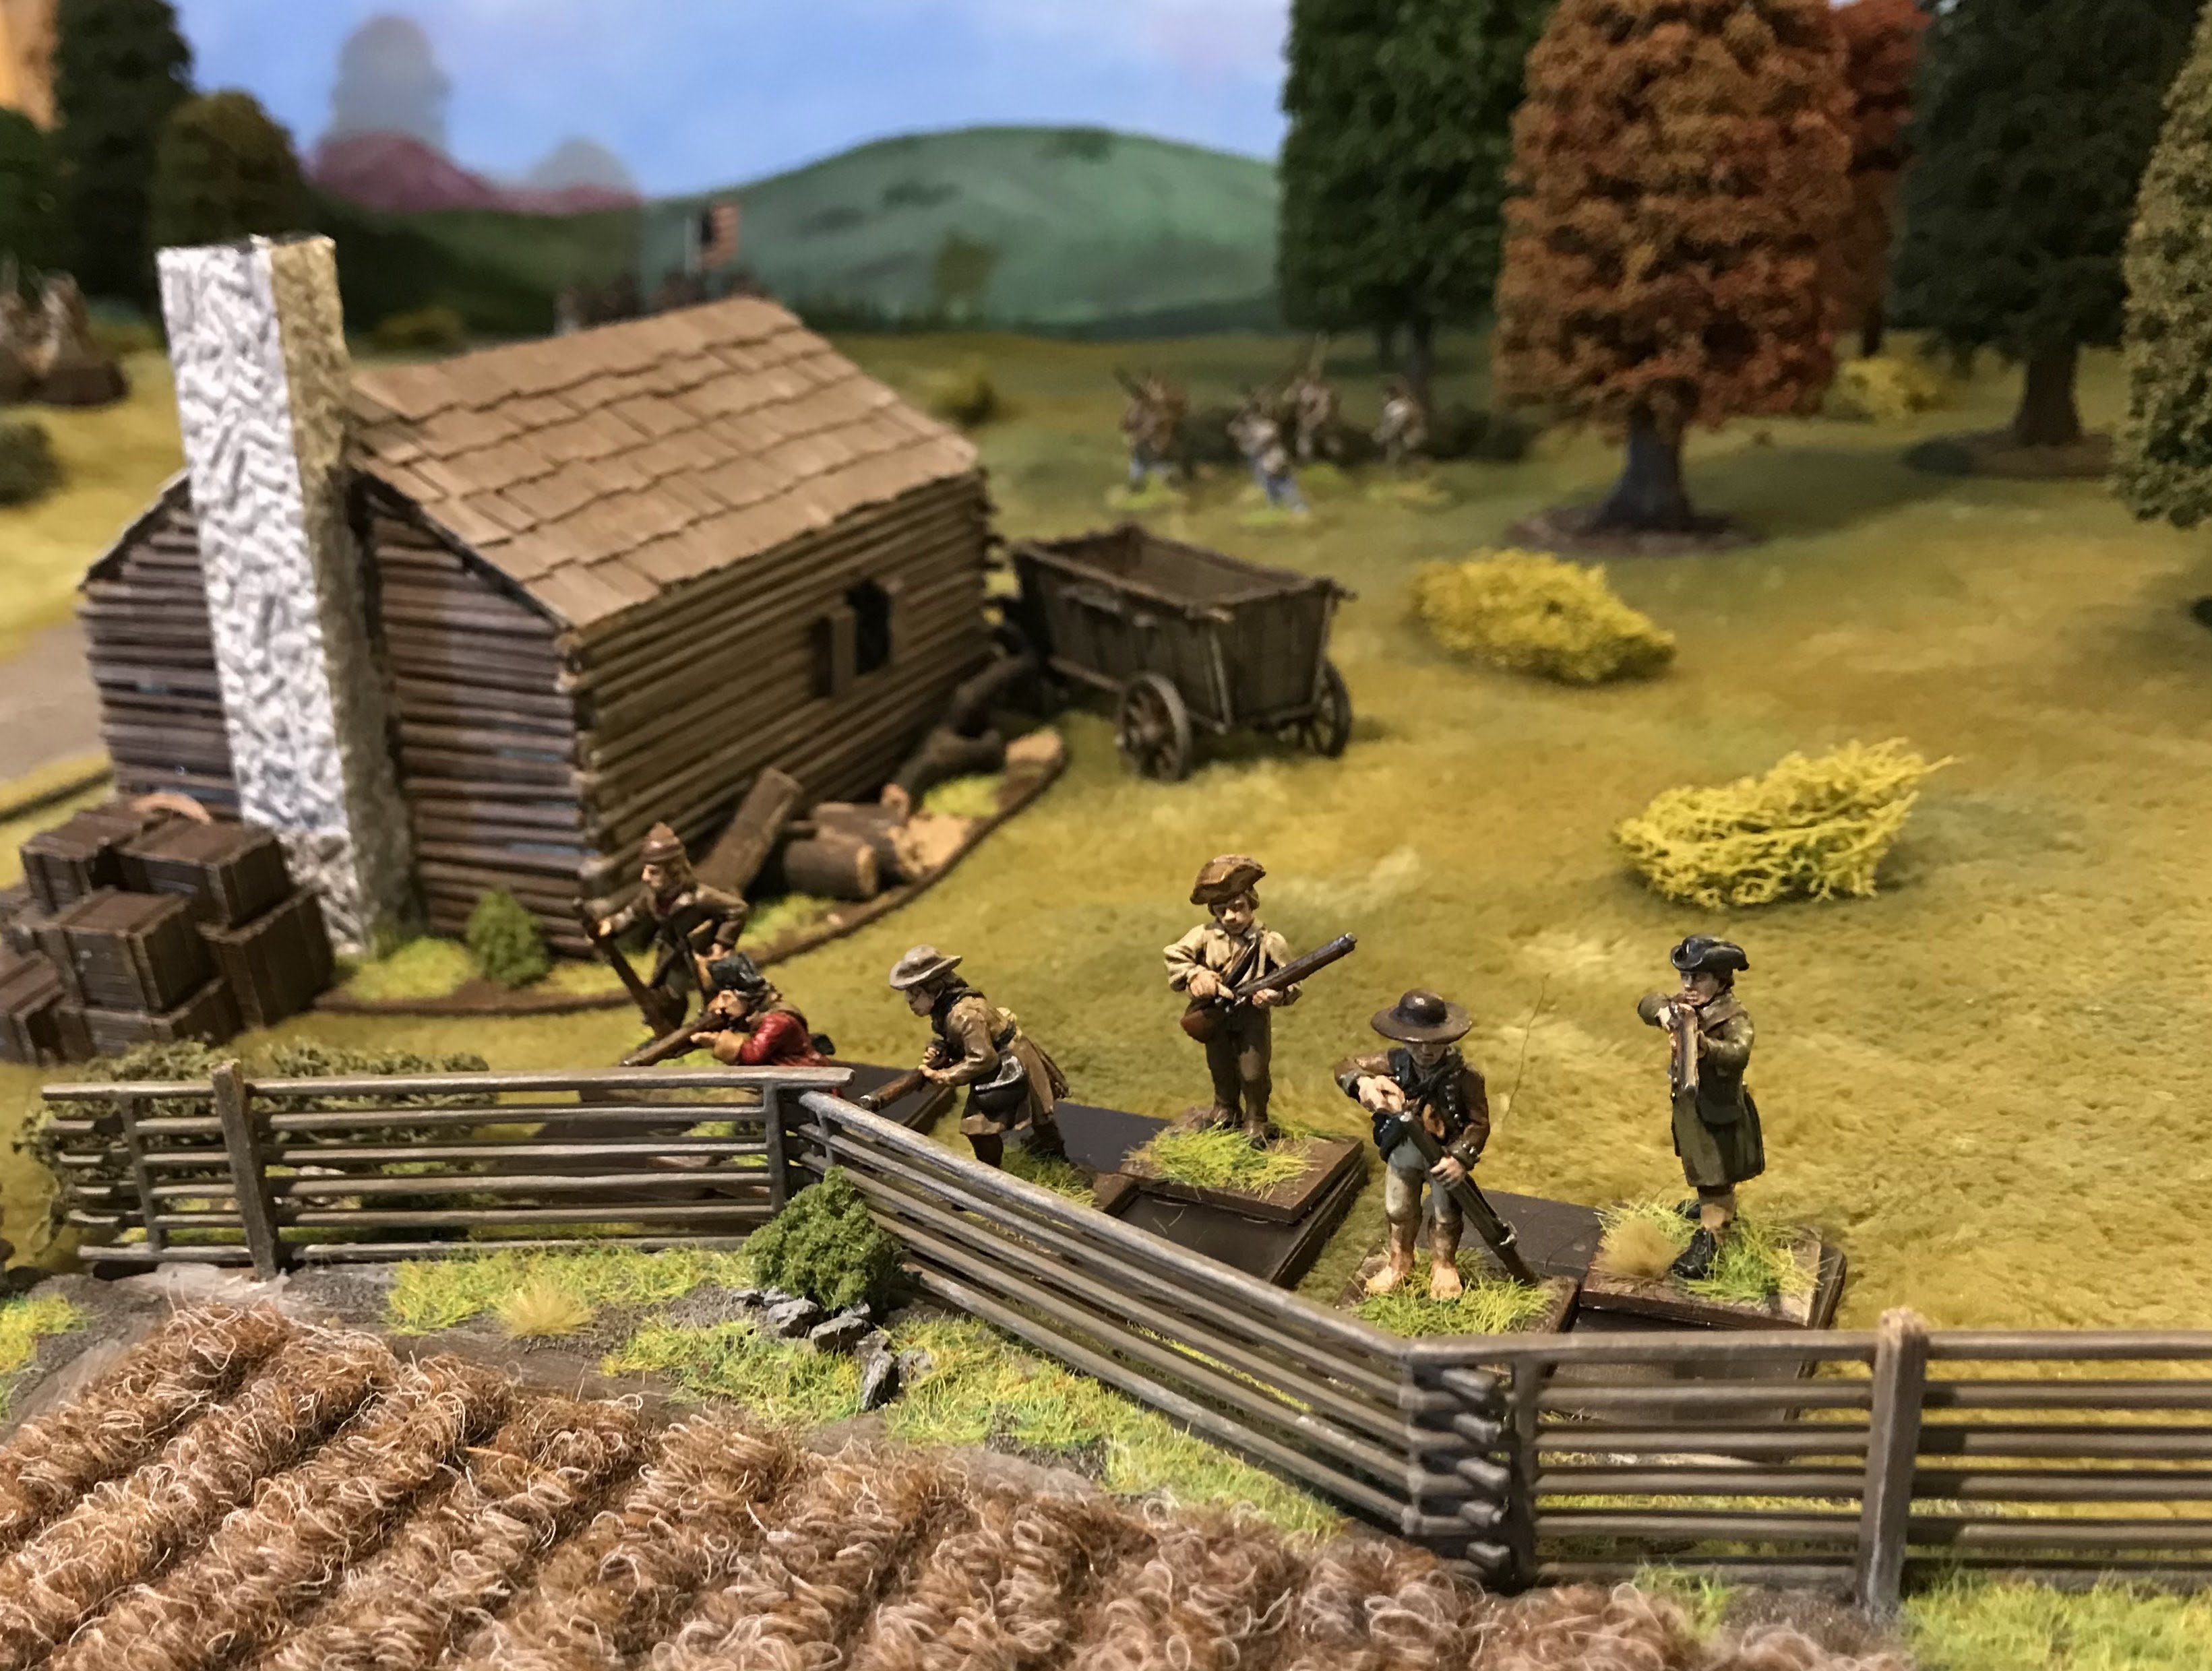
South Bridge Concord all quite at the moment
The British column advances, mainly veteran Redcoats a combined light infantry unit and Veteran Grenadiers, they immediately cross the bridge
But the local Militia have built a crude defence on nearby high ground and prepare to make a fight of it, looks like they have been hiding another cannon and this is the main objective of the British.
British skirmishers spread out and wade through the shallow stream
The Americans also have some skirmishers
...but they are quickly chased away, a false sense of invincibility and confidence takes hold of the British commander
A simple matter now “drive them away boys they won’t stand” the British redcoats duly march forward
On their flank some more skirmishers and some unfortunately Loyalist troops who feel the first ferocious fire from the Rebels.
.and then the Colonials open up fully !!!!
The Loyalists are the first to turn and run, the British skirmishers return fire
The British lights caught by the farm also exchange fire
One of the few successes the British chase off the rebel skirmishers
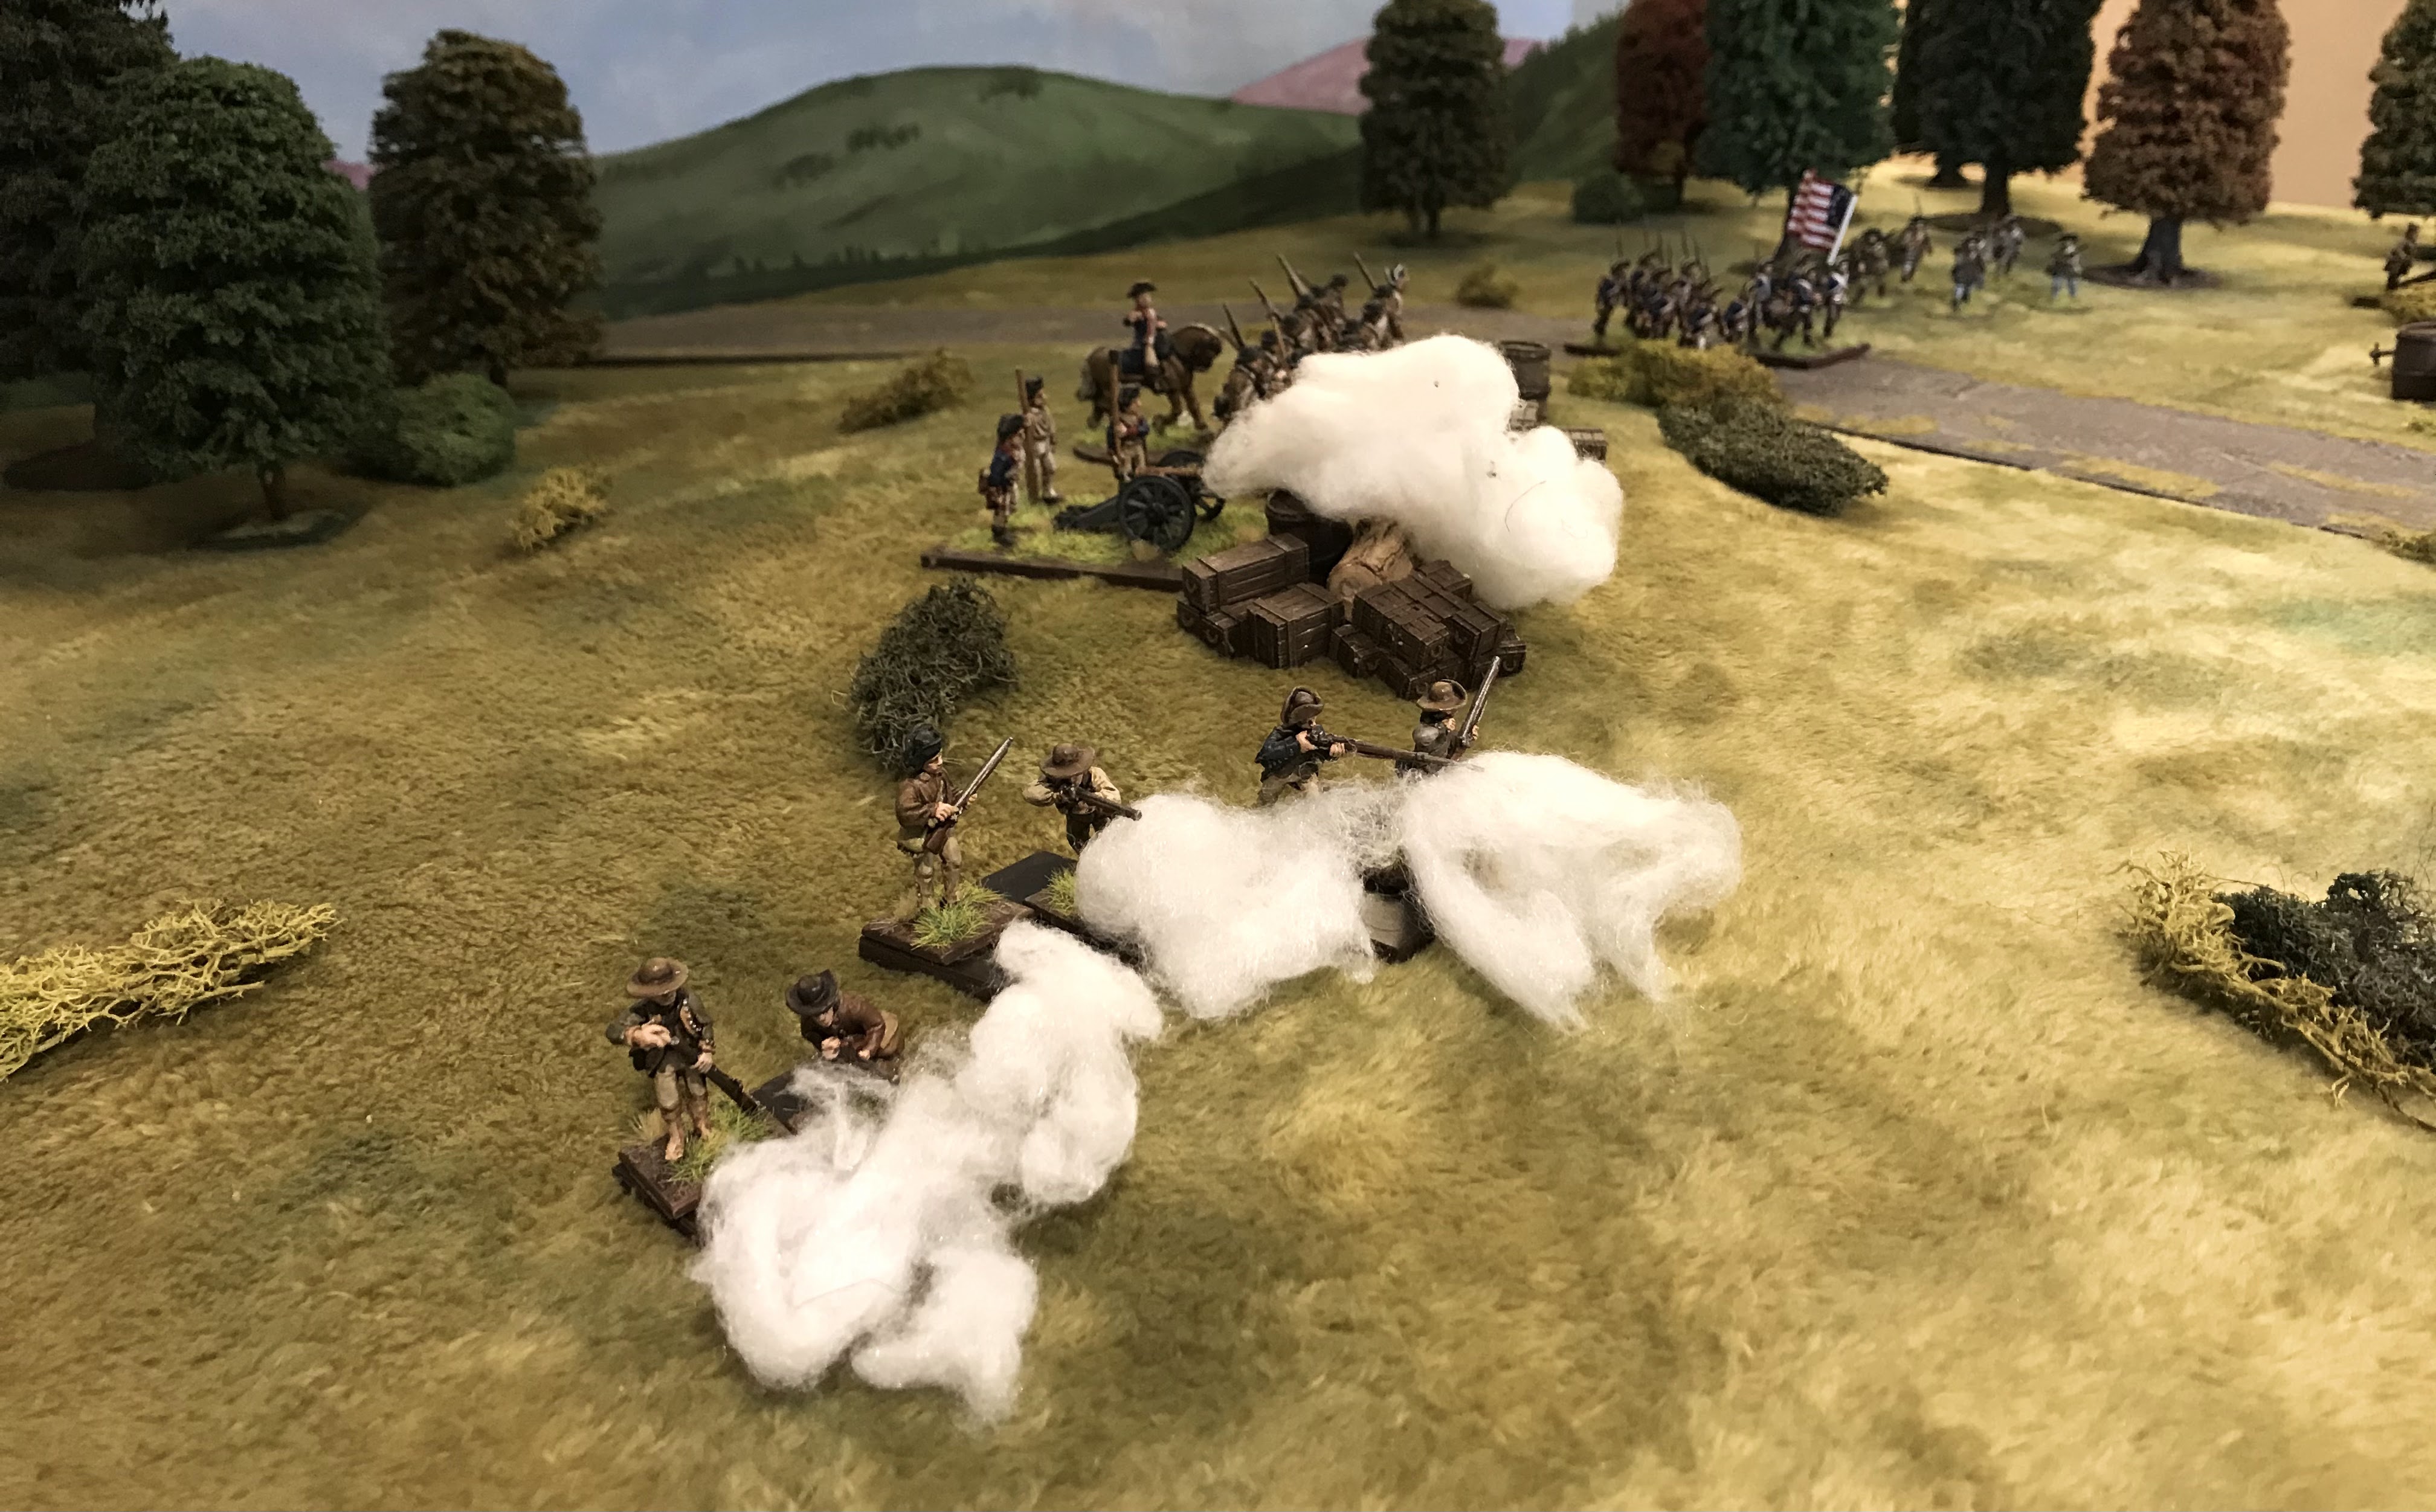
The grenadiers, however, having failed to advance despite being veterans have been decimated by cannon fire and volleys from the hill forcing them back
The British combined lights are the first to break
Quickly followed by the grenadiers !
The ignominy of it, the Americans let out a cheer and advance from the shelter of their defence
The British, bloody noses and reputation in tatters flee back across the bridge
The field is left in the hands of the Rebels
Full of confidence numerous despatch riders are sent out to local districts. The damned British have been beaten and taught a lesson .......the smoke hasn’t cleared from the battlefield but a plot is already hatching to ambush the British on their way back to Boston !
Now you know the truth, a real drubbing for the Redcoats, a couple of unlucky failed activations and I fear some poorly over ambitious tactics. The British should have avoided the hill altogether and focussed on mooing up the rebels by the farm where they would have easily won a victory....but where is the fun in that. Never had so much fun being thoroughly beaten. Enjoying these games......encouraging me to paint more and looking forward to the next. Hopefully we might see some larger games in the future.
Matt 😀 KBO


Great report, Matt! From the beginning dispatch, I expected a propaganda piece. I was wrong! Your battle account is much as the rebel Major recalls. You failed to mention your propensity for failing a few crucial morale tests. Superb photos and I have enjoyed these series of battles as well. They have been great fun.
ReplyDeleteThanks Jonathan another good battle and more to come 👍
DeleteAwesome report and pictures, Matt! Sounds like you and Jonathan are keeping the gaming spirit alive and well!
ReplyDeleteIn these challenging times we all need to keep gaming 👍
Deletelovely storyboard and photography.
ReplyDeleteThanks Norm 👍
DeleteBrilliant. Great looking game
ReplyDeleteThanks Neil 👍
DeleteGreat pictures Matt, beautiful figures and terrain, I do like the barricades and bridge!
ReplyDeleteThanks Phil, hoping to increase the size of our games soon 👍
DeletePoor show by the British forces! Let's hope it's put to rights in the coming games. As always, smashing pictures and AAR Matt
ReplyDeleteSadly very poor i put it down to poor generalship compounded by poor dice rolling never a great combination. More to come 👍
DeleteThe opening despatch made me smile this early morn! A beautiful looking game and good to see you had fun, despite taking a bit of a beating at the hands of the Rebels. I'm sure this is just part of a cunning plan to lure them into a trap as you 'retreat' to Boston;)
ReplyDeleteI was hoping other might have read Jon’s report 👍 at this rate I am not confident how many of the boys will get back to Boston !
DeleteSmashing looking game, pics and write up. Like the despatch at the beginning, one can imagine the British commander glibly writing it up before the action ready to send afterwards🙂
ReplyDeleteThanks Phil after all these rebel upstarts surely can’t put up much of a fight can they ?
DeleteTo enjoy a hard won game is fun. To enjoy a hard fought loss is even better. It shows both players mettle to the better. Great looking table and figures. BTW, around Concord there are enough rock walls in the fields the rebels hardly need to stack boxes.
ReplyDeleteThank you for looking and commenting sir. Interesting feedback on the walls we keep this in mind 👍
DeleteBeware of hubris, nice battle
ReplyDeleteThanks Martin 👍
DeleteYou and JF are certainly having a great time. Thanks for sharing. 😀
ReplyDeleteWe’re keeping busy when this hobby of ours is important to keep us sane !
DeleteThat's a great looking table and minis, Matt, and a great game, to boot! I just came from Jonathan's blog, you guys are killing it, I love the collaboration. I really need to get some stuff painted up for Rebels and Patriots.
ReplyDeleteV/R,
Jack
Many thanks these games are fun and it is really keeping my interest going, it’s a good rule set for my money and we plan to test it to distruction trying a larger battle in the future !
DeleteLovely looking game, sounds like tons of fun and the missive is great fun!
ReplyDeleteBest Iain
Thanks Iain glad people enjoyed it as much as we did planning and playing 🙂
DeleteA fine tale, beautifully retold in pictures. You even have the small details looking great. I really like your use of 'smoke' and you have it down to a fine art. I haven't yet quite got it right.
ReplyDeleteRegards, James
Thanks James......I have found the fluff which comes with Perry miniatures is perfect for the smoke effect , another good reason to order some more 👍
DeleteAwesome!!!
ReplyDeleteWhere did you get those trees? I’ve been after that style for a long time, reminds me of old world war hammer fantasy trees
Thanks !!
Thanks Brian, not sure where or if the trees are made anymore. I picked them up mainly second hand as a very lucky bring and buy find. I’m embarrassed to say how much they were.😬 hidden at the back are a couple of the GW versions.
ReplyDelete