The troops involved in the battle are quite complex as it involves brigades from multiple different Divisions on both sides and became very disorganised during the battle. As usual Brad has a detailed run down of the troops involved so I won’t list them here and the setup map below. As this is a pretty large engagement and we would be playing with our normal Bolt Action House Rules I made a few tweaks, mainly the basic unit size for morale purposes is reduced from 5 down to 4 bases, this allowed me to stretch my collection to cover the majority of the brigades but I have reduced the overall number of regiments proportionally for both sides.


The set up at Dawn on the 17th

Converted to an 8x5 table to represent the key part of the battle. The Union reinforcements have been placed on the table (as I didn’t have enough space elsewhere) but their arrival is phased over a number of turns.

Confederate forces to the East of the Dunker church, Walker, Douglass and Ripley’s Brigades

Some confederate reserves which again have been placed in the woods but won’t arrive until later based on a D6

Seymours’s Brigade in and amongst the East Woods

The rest of the Union Divisions ready to arrive

Anderson’s brigade looking south past the Miller Farm
BG Truman Seymour leads the advance with his Pennsylvania Reserves

The rest of the 3rd Division are ordered forward

The Rebels wait !

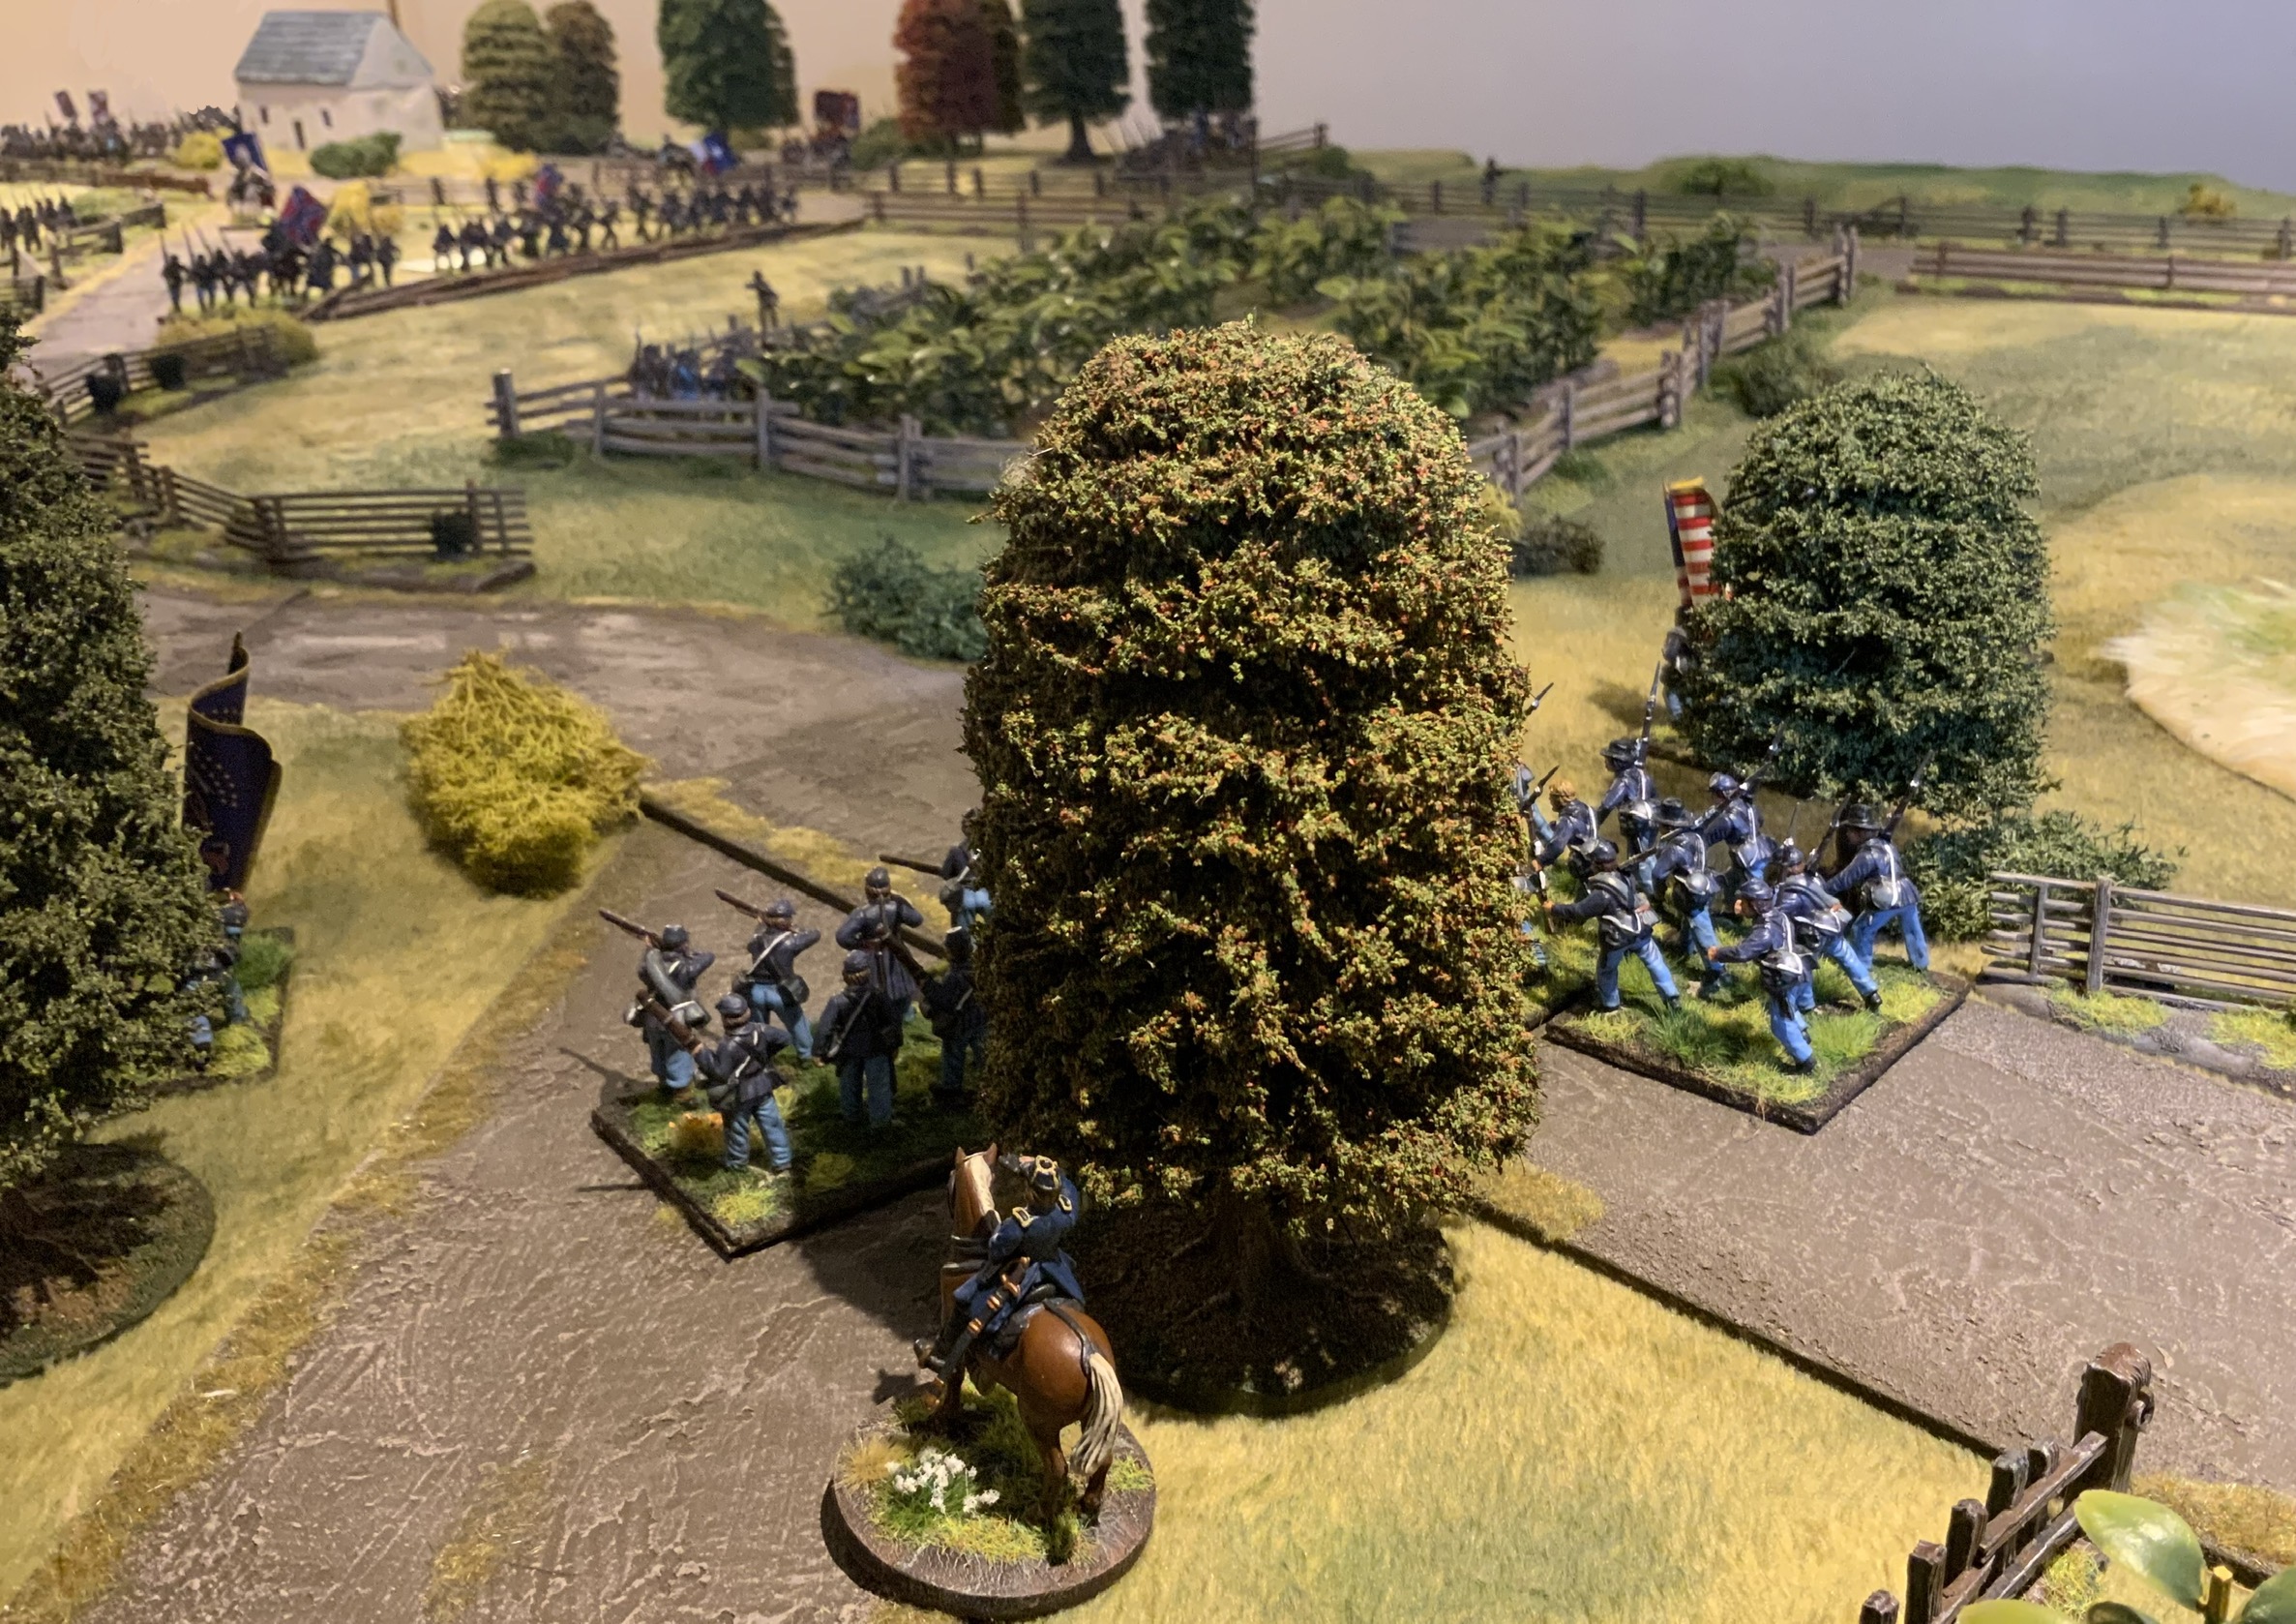
The small unit of 31st Georgia Regiment hearing the advance moves into contest the cornfield

Seymour’s Brigade moves round the flank

The advance past the Miller farm towards the cornfield

Musket fire begins around the edge of the cornfield

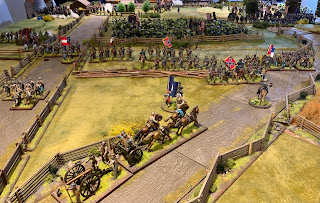
and the confederate guns open up from the high ground

The Georgians have had to give up the cornfield and now Union flags can be seen advancing through the corn

The confederate line begins to open fire

Hood’s Division begins to arrive from the SW

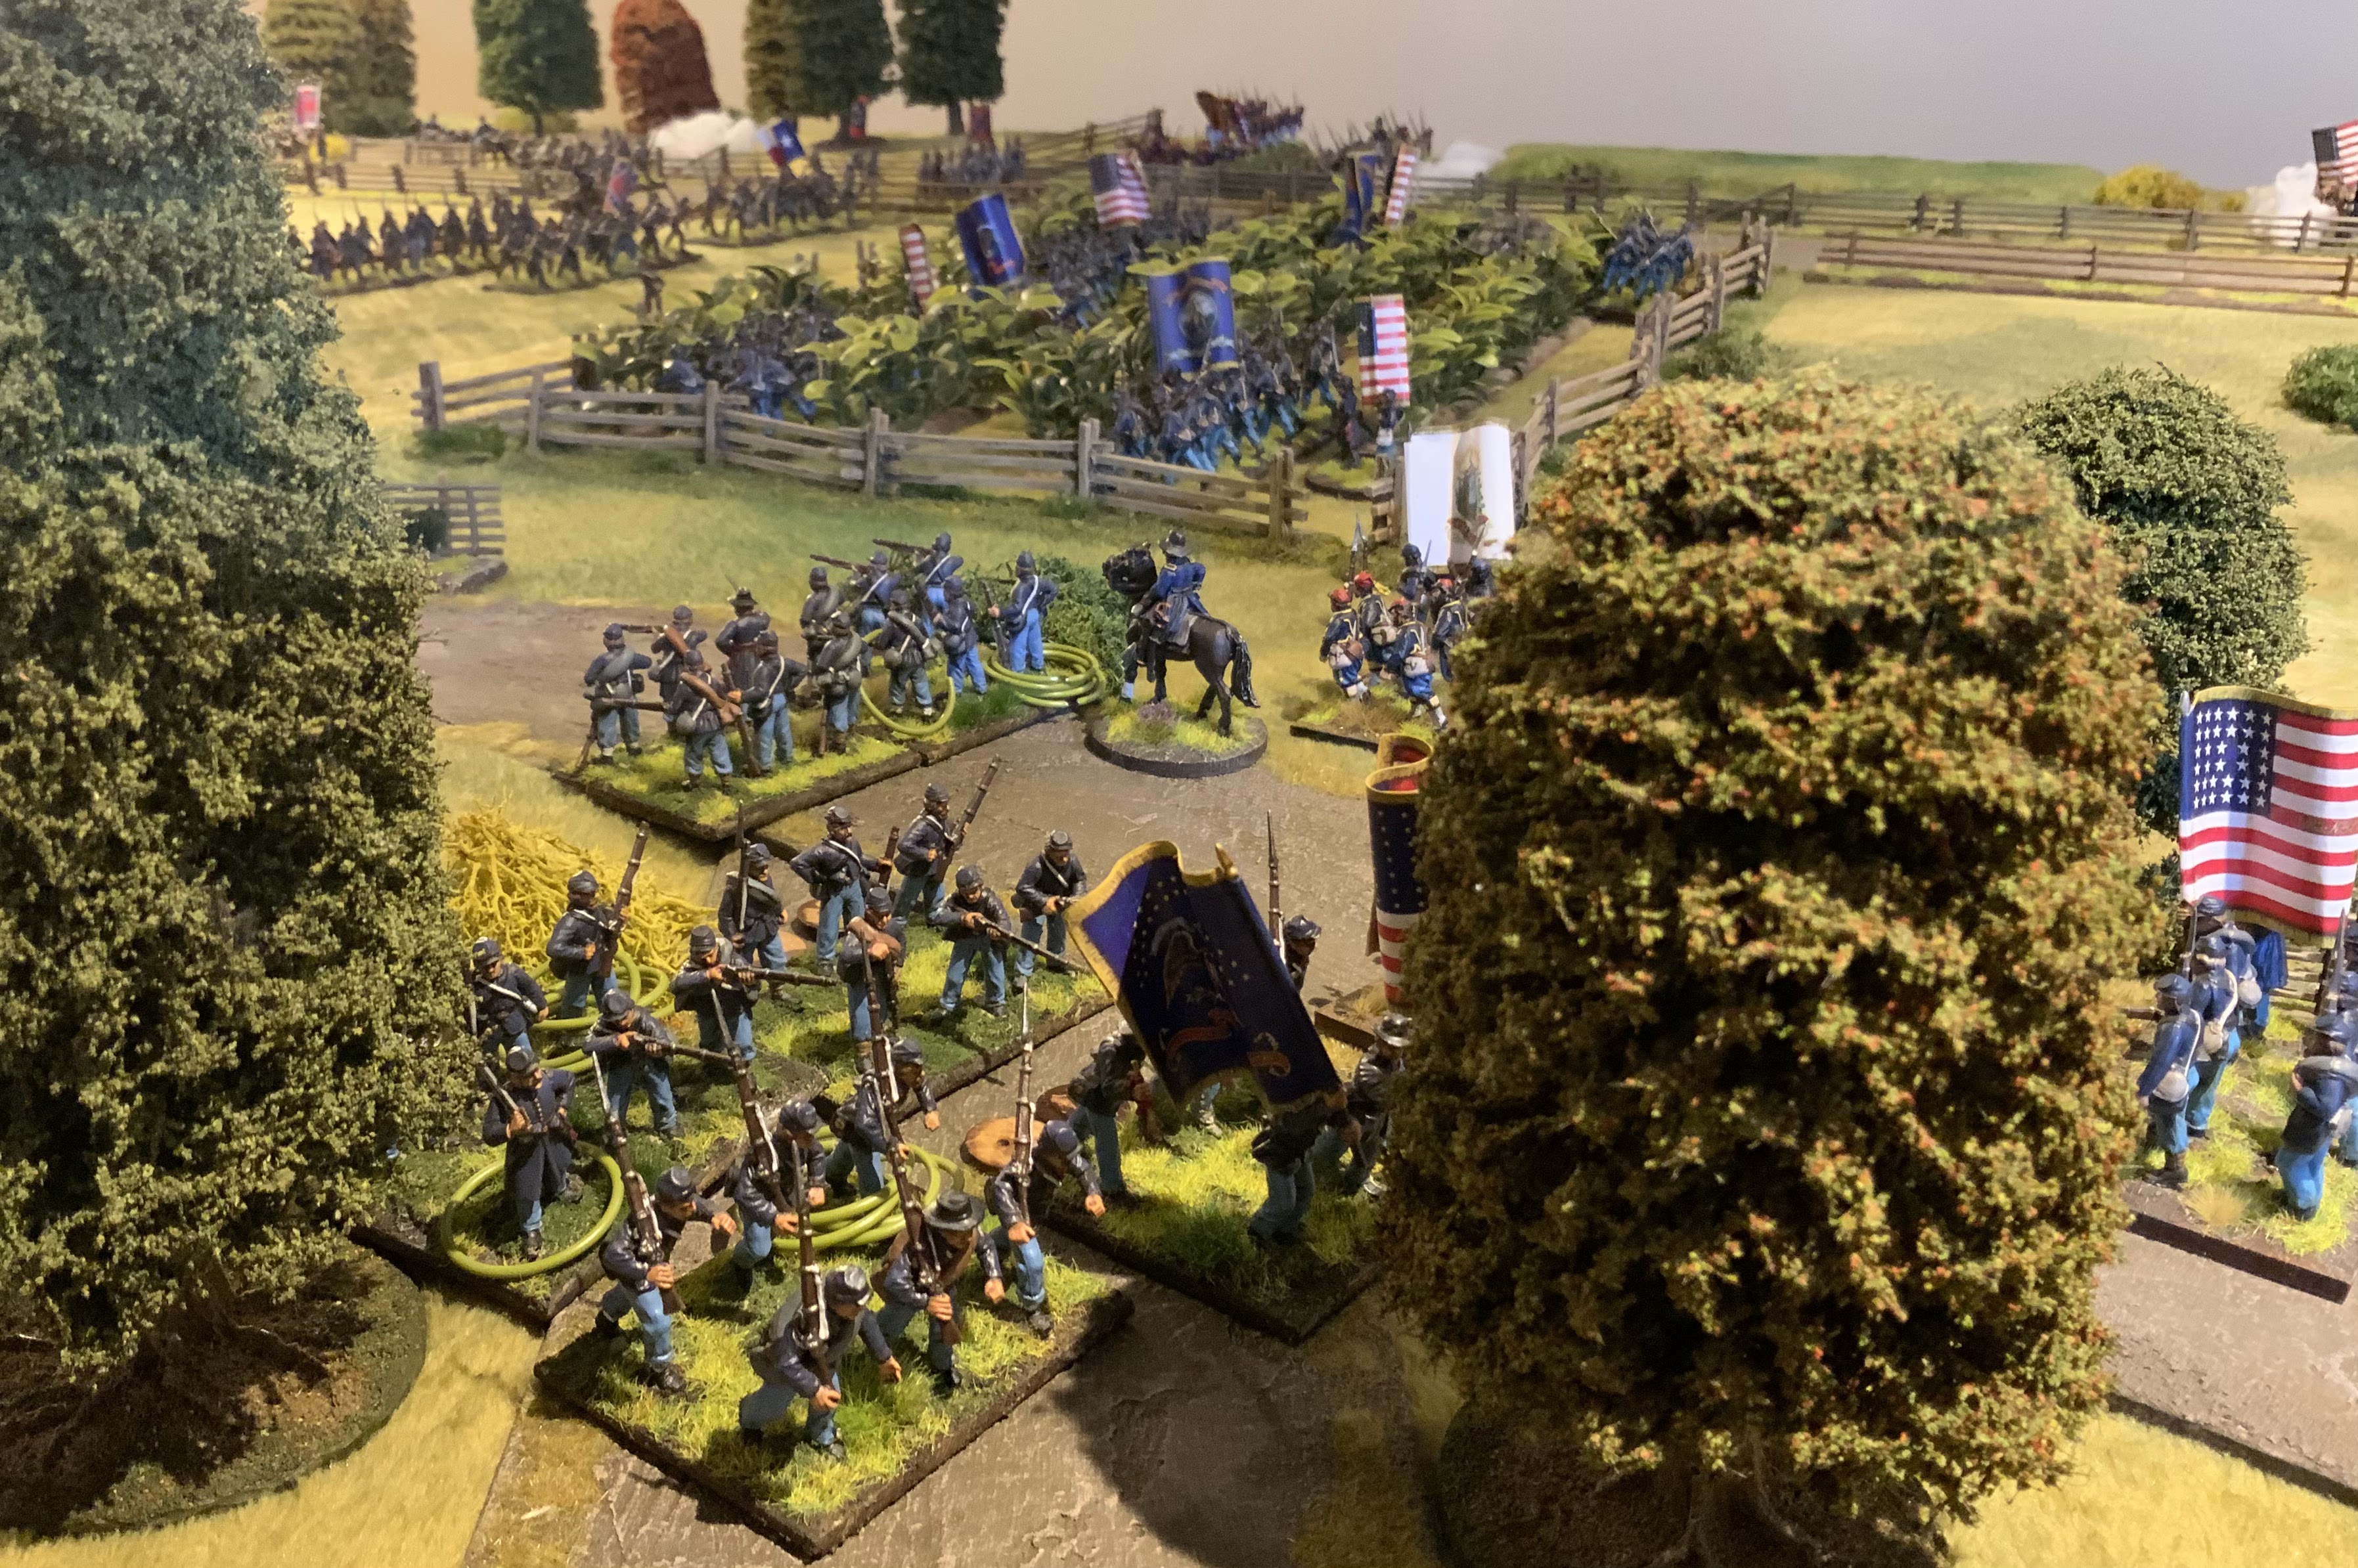
More Union troops are being pushed forward into the cornfield

2nd Division under Duryee, Christian and Hartsuff arrive and advance along the Smoketown road

A Union battery by the Miller Farm

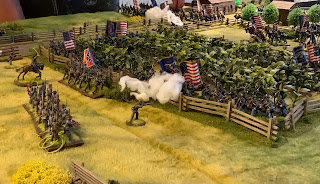
A strong defensive line awaits the advancing Union forces
View towards the cornfield from the East woods

Douglass’s men are pushing forward to contest the cornfield

But they are met by stiff resistance

Furious fighting and exchange of fire at the boundary of the cornfield

Several Confederate units are pushed back

But Colonel Douglass has pulled a battery into the line which can blast into the cornfield

A lot of confederate forces are being pushed back

The confederate artillery continues to fire from the high ground

View from the north

Some of the Union reserves are being sent to the right to try and flank the cornfield

This could be key two Union regiments blunder in the same turn, visibility is poor and confusion causes one of them to fire at their own troops causing them to flee !

Union troops now flanking the cornfield on their left

The bulk of the Union forces are in place for a final push

Too many confederate units are being pushed back and the rebel line is thinning out

Finally the last rebel reserves arrive but is it too late ?

Fierce fighting at the edge of the cornfield continues but the Union troops have regained their composure and push forward out of the cornfield

More rebels units pulling back

A final shot looking towards the cornfield as the Union forces break through

The fight in the west woods continues and is stalemate
At this point we called it a victory for the Union. We had set the victory conditions for the Union as getting troops beyond the cornfield which they had done, although in small numbers, a victory for the Confederates would have seen them take and hold the cornfield. The later was always going to be tough as the rebels are outnumbered. A splendid game using my own house Bolt action rules. We did have some special rules about visibility in the cornfield which made it tough fighting, and the first two turns were in darkness. I think we gamed for most of the day but it was an absorbing battle.
Finally a bit more local history we had a trip out a few weeks ago to Bowes Castle, not a lot remaining but an impressive Norman keep, built once again on an existing Roman fort, although this is really not easy to see on the ground.

Bowes castle looking over the corner of the Roman fort ditch

The interpretation panel needs some TLC
Thanks for popping by Matt 😀
What an absolutely splendind game there Matt; a real visual feast and great to see a Union victory. An interesting choice of rules as I don't think I've seen BA used for this sized game before, but it obviously works well for you which is all that matters. Now I'm tempted once again to get some 10mm ACW forces, even though I have some mdf ones waiting in the wings!
ReplyDeleteThanks Steve, we have gradually adapted the BA rules and they work for us, giving tactical control but but also allowing some randomness to enter the battle. ACW is always a fine spectacle whatever the scale and would look great in 10mm
DeleteMatt, splendid. I have been looking forward to this. Great table and am totally intrigued by your cornfield.
ReplyDeleteThanks Norm, I did do a post about the cornfield some time ago it is made using plastic plants from eBay. It doesn’t really look like a cornfield but it kind of works🤔
Deletethis looks like an amazing battle
ReplyDeleteThanks Martin Shiloh to blog next 👍
DeleteThat table is stunning Matt and the photos carry the narrative along in fine style too.
ReplyDeleteThanks Phil 👍 even though we were gaming much of the day the action rattled along
DeleteI enjoyed this. The scenes are brought to life by the vignettes. Have you an older post that tells us more about your Rapid Fire adaptations for ACW? They sound intriguing. With so many ACW rulesets, it's interesting that you have taken your own course in this way. Thanks
ReplyDeleteStephen
Thanks Stephen. I adapted Bolt Action some years ago for ACW and although I have the rules written down I’m not sure I have blogged them up in detail. That is perhaps something I should do. They work best for medium battles say 2 or perhaps 3 Brigades per side. But we have adapted them gradually to work for larger battles as well. I keep meaning work some rules up for ancient battle as well , perhaps now I have retired I’ll get round to it ?
DeleteA fine looking table there Matt! I just cannot square Bolt Action with mass ACW battles though...
ReplyDeleteThanks David….trust me it works 😀
DeleteThanks George 👍 nice to get most of my collection on the table at once
ReplyDeleteGreat looking game Matt!
ReplyDeleteThanks Michal 👍
DeleteMatt, you present another superb, Wargaming spectacle. If anyone is in search of Wargaming inspiration, they can stop looking once they see this. Great job! Who was your opponent and which side did you command?
ReplyDeleteThanks Jon very kind, this was against Steve and I sadly played the Rebels 😢
DeleteWonderful …
ReplyDeleteThanks Dave 👍
DeleteNow that is a wallop of juicy ACW goodness. Splendid looking table and troops. I love scenarios of Antietam and have played several based on the cornfield. They’re always really big and take forever but a lot of fun. 😀
ReplyDeleteThanks Stew some ACW goodness as you say, lots of fun 👍
DeleteSuperb! Stunning looking game 😎
ReplyDeleteCheers
Matt
Many thanks Matt 👍
DeleteA beautiful game as usual Matt. I too initially wondered if Bolt Action was a typo, so was interested in your responses above.
ReplyDeleteThanks Lawrence clearly I need to do a fuller blog on the rules at some point 🤔
DeleteA splendid looking and sounding game…
ReplyDeleteI have to admit that Bolt Action for American Civil War seems counter intuitive… but looking at your games it certainly seems to work…
I would be interested to see how you have altered the rules.
All the best. Aly
Thanks Aly, as above I probably need to write up the rules somehow ?
DeleteThat was a great looking game Matt in all senses...absorbing battle with challenges for both side, a lovely table and beautiful troops.
ReplyDeleteThanks Keith another ACW battle to post soon
Delete