
The Battle takes place just to the north of the previous battle so those with a keen eye can compare the edge of the village which I have recreated from the previous battle.

To make this a different and interesting scenario the following. The two forces were made up only of units or vehicles which survived the previous battle, but I balanced them to 12 each side. The British who are pulling back have a random setup as shown above, each unit placed on the battlefield at the start, we rolled a D6 for which quadrant they were in but then could be placed as required. The red dots indicate the dispersed location of the British forces as a result of this setup. The Germans would come on in 2 waves with the first only being the faster moving vehicles. All German forces would again have a random entry point on a D6. This creating the fog of war and the rapid redeployment of both forces after the first battle.

The Beaverette and Bren carrier have ended up deployed far over to the west.

The British are still holding the small petrol station, the Matilda tank pushes forward along the small river Nail Borne

The first German tank arrives down the main road Pz III which immediately starts to engage the British tanks to the right

The PzII arrives on the west, not ideal ! But it can chase the two British light vehicles away

The Pzjager risks driving down the main road to take up a central position

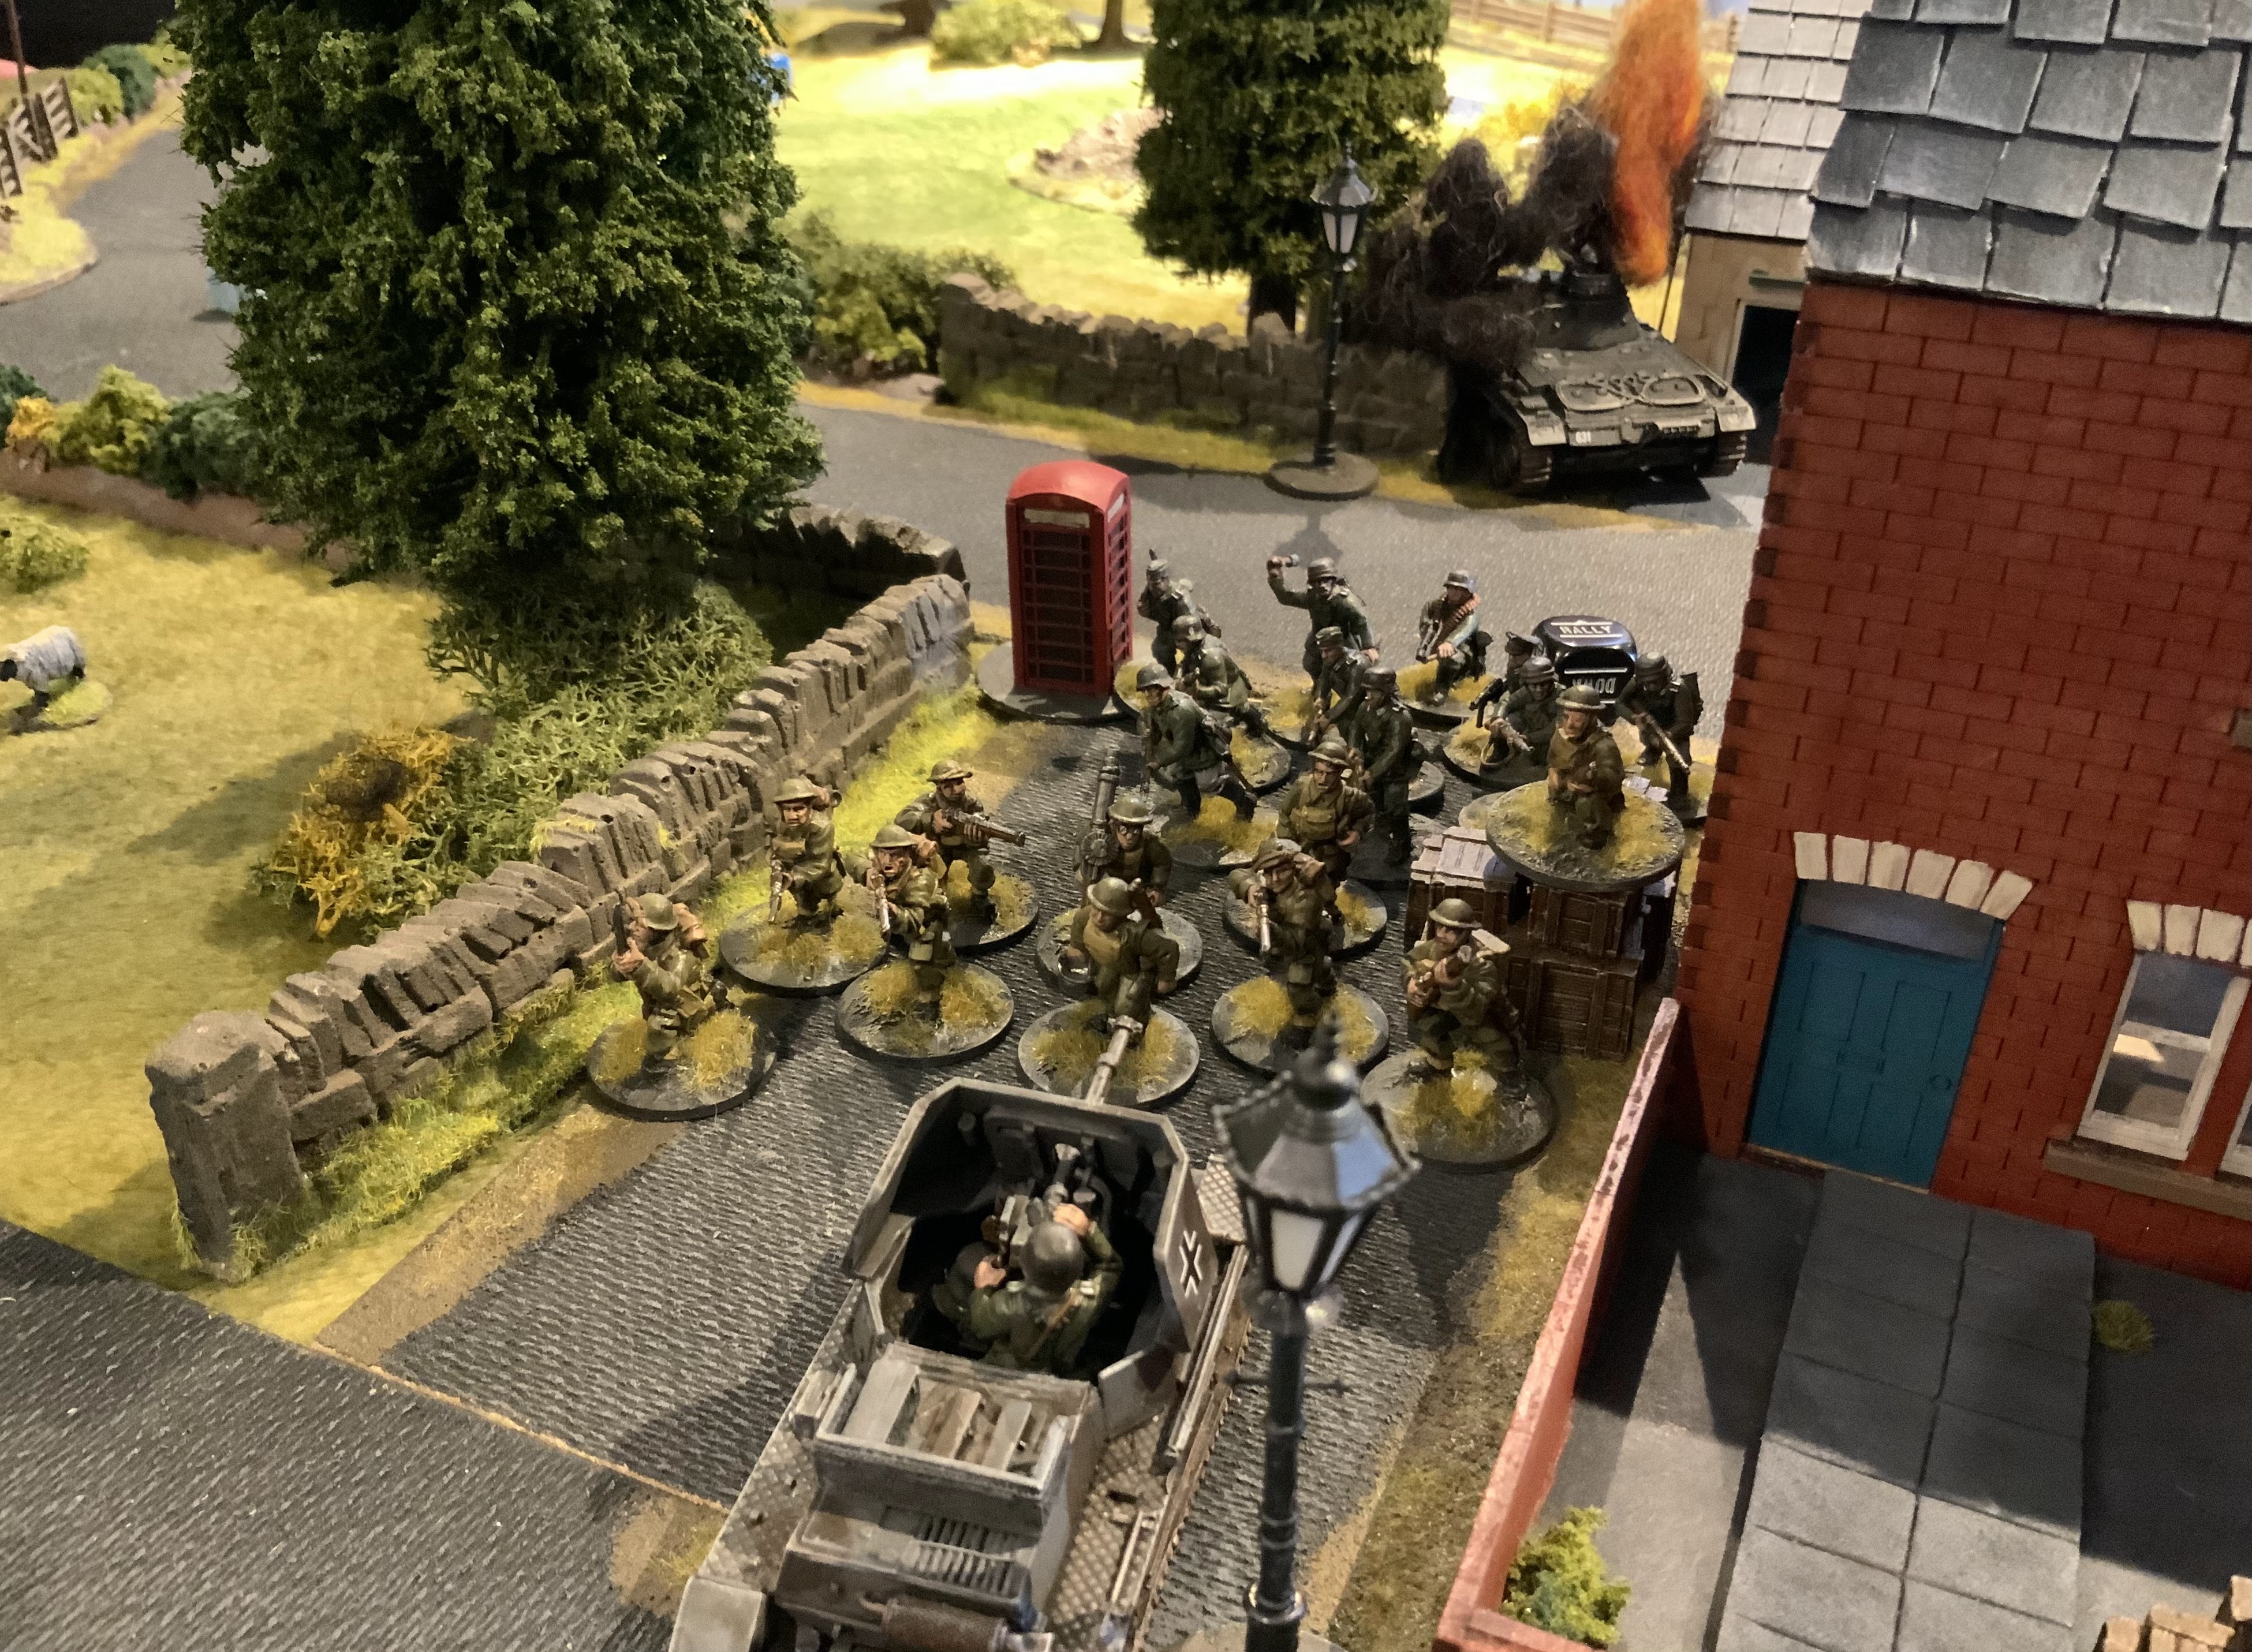
The German second wave arrives and the German infantry immediately assault the petrol station forcing the British defenders out.

More German infantry run down the road

The British defenders choose to attack rather than defend and a squad assaults the PzJ , unfortunately for them they fail and are pushed back

The Pak 34 arrives but again on the far left

Armoured vehicles exchange shots on the right but with little effect
The British unit are now assaulted and caught in the rear by a German unit, it doesn’t end well for the British

Meanwhile the PzIII has taken a direct hit and is in flames

Whilst the armour continues to blast away at each other the German infantry have now pushed all the British infantry back and are breaking across the open ground towards the road junction

The Bren Carrier has been knocked out by the Pak 34

The centre of the village has now been cleared of British and the Germans are regrouping to drive towards their objectives

Their final objective is the lone house, the British are dug in here and come under extremely heavy fire, they survive the initial assault

German infantry in the distance have knocked out the British antitank gun which had been dug in by the damaged bus

As a final (literally) roll of the dice the Only German unit within range of the final British defenders is the German officer, he gallantly (foolishly) assaults the building but they fail to push the British out.
An excellent and fun battle with hot fighting right from the start. In the end we called this a draw, almost all the British had been wiped out apart from those holding the building and the Matilda , but the British were holding this last house.
More to come soon 👍
A most fabulous table and setting.
ReplyDeleteThanks Norm very kind ☺️
DeleteGrand stuff as usual Matt, one awaits on edge of seat for the next instalment.
ReplyDeleteThanks Phil not sure where the campaign might be going next ?
DeleteMatt, your urban and rural fights are works of art. You have so many interesting bits and pieces strewn all over the place.
ReplyDeleteThanks Jon very kind a few more burning British tanks would have been nice 🤓
DeleteLovely table Matt! Splendid AAR, but, it's time the Hun were despatched back across the channel.
ReplyDeleteThanks David….that just isn’t going to happen anytime soon, I may even open another front sometime 😀
DeleteI suspect that the Matilda would have been a tough nut to crack, but can understand why the British quickly vacated the petrol station. Not a building I'd want to be stuck when the bullets start flying.
ReplyDeleteThe Matilda is as you say Lawrence a really hard nut, I did hit it a couple of time but failed to penetrate its armour. The Germans were pretty ruthless in this battle and the British didn’t have much of a chance. Although they did hold on to that last building.
DeleteGreat looking scenario!
ReplyDeleteLovely minis and terrains too.
Warm regards
Thanks Michal 👍
Deleteexcellent battle,lots of chaos
ReplyDeleteCheers a hard fought battle !
DeleteAnother lovely looking table and game Matt...I think the result was somewhat generous for the Brits. If you play game three, starting from the same positions game two ended at, I don't think they would hold out much longer?
ReplyDeleteThanks and you may be right Keith, the British took a real hammering in this game, but the German armour somehow failed to knock out the British tanks which was very frustrating😢
DeleteMore cracking stuff Matt…
ReplyDeleteSurely the Germans must see that British pluck will win the day…
Hopefully 😁
Thanks Aly, not sure what the word for ‘pluck’ is in German but they are having none of it , the Germans are pushing hard !
DeleteAnother wonderful game you've put on Matt, with lovely details once again, such as the petrol pumps and paraphenalia and the street light too. The Brits put up a good fight but hard to see how they can carry on with their reduced strength, but maybe some stiff upper lip attitude and a bit of pluck will see them through...
ReplyDeleteThanks Steve glad you liked the lo9 if not the outcome. Stiff upper lip only goes so far against Panzers ! Likely to be less terrain on show this weekend 👍
DeleteLooking forward to the next installment
ReplyDelete