Our journey through the AWI resumes in April 1777 with the small battle of Ridgefield. Surprisingly for a fairly small engagement there is quite a bit of information on the internet about the series of skirmishes which took place in or close to Ridgefield in Connecticut on the 27th April. In part I think as the town appears to have a very active Historical Society. In short the British under General Tryon landed troops on the coast of Fairfield County. Having marched inland and torched part of the Town of Danbury to destroy rebels supplies stored there. The Rebels under General Wooster and Benedict Arnold looked to ambush the British on their march back south. Several small indecisive skirmishes took place on the road back south. These culminated at Ridgefield where the Americans had blocked the road.
Map of the overall raid into Connecticut
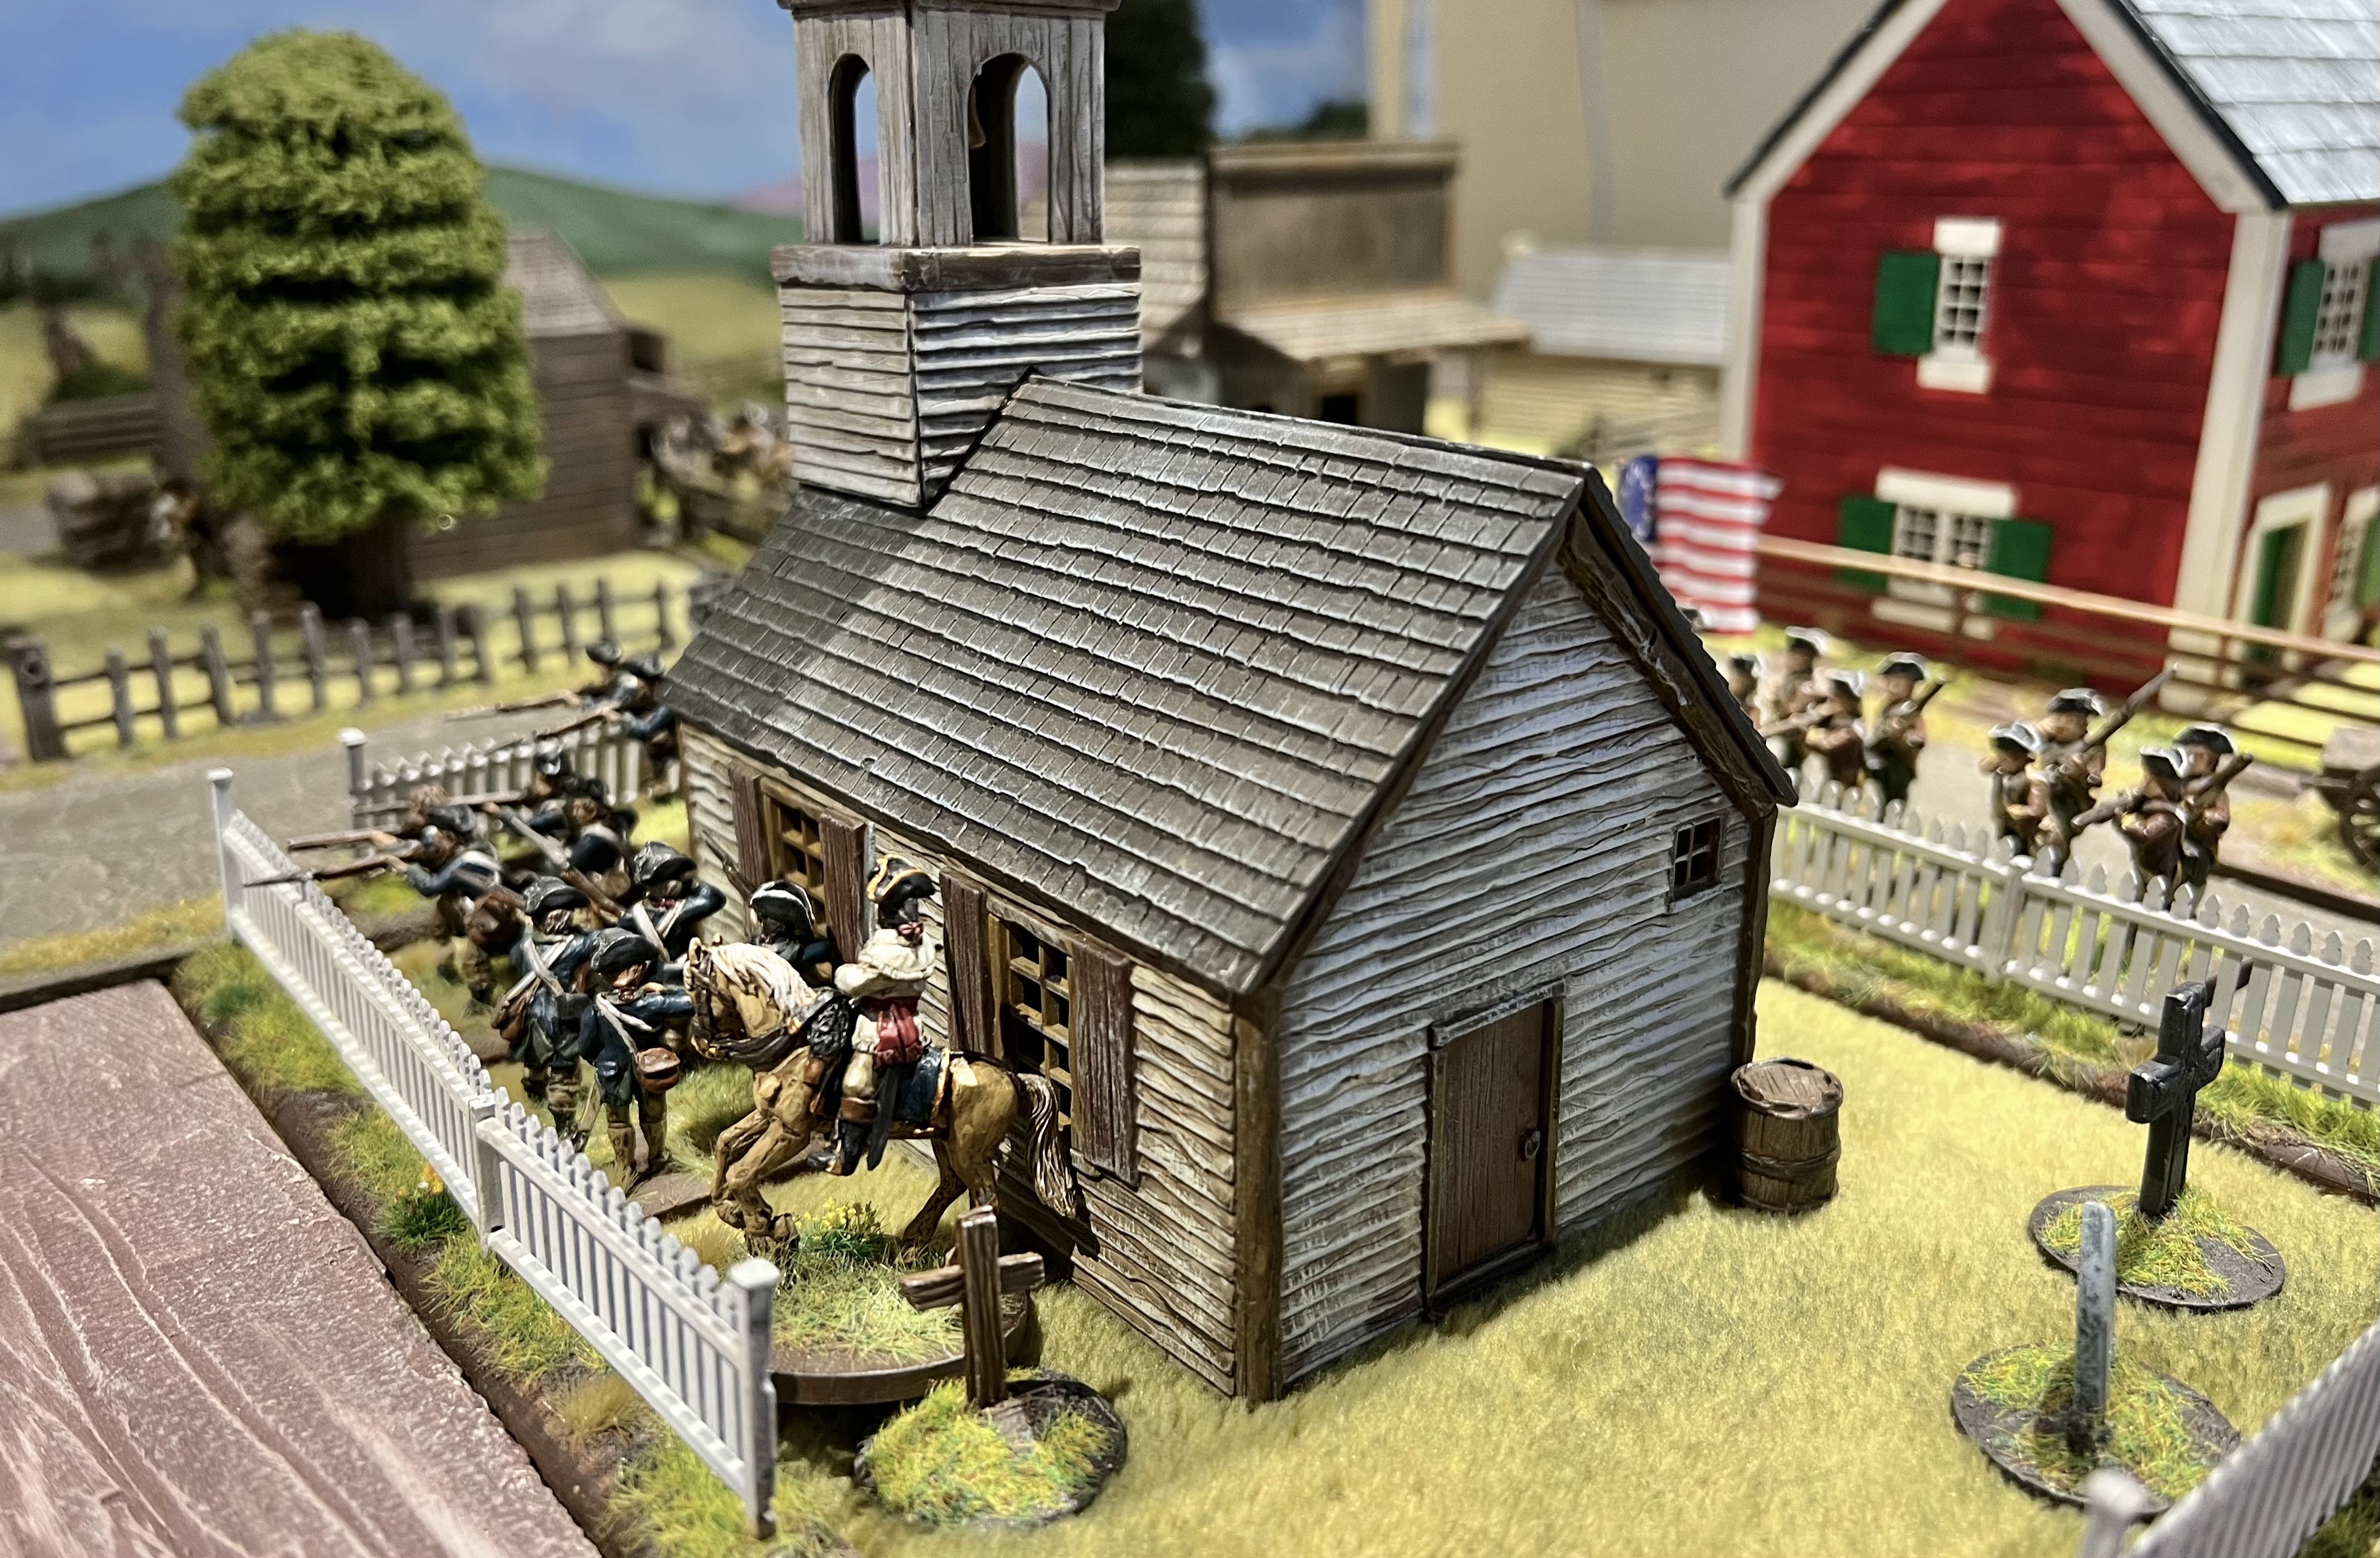
The Rebels prepare to defend Ridgefield
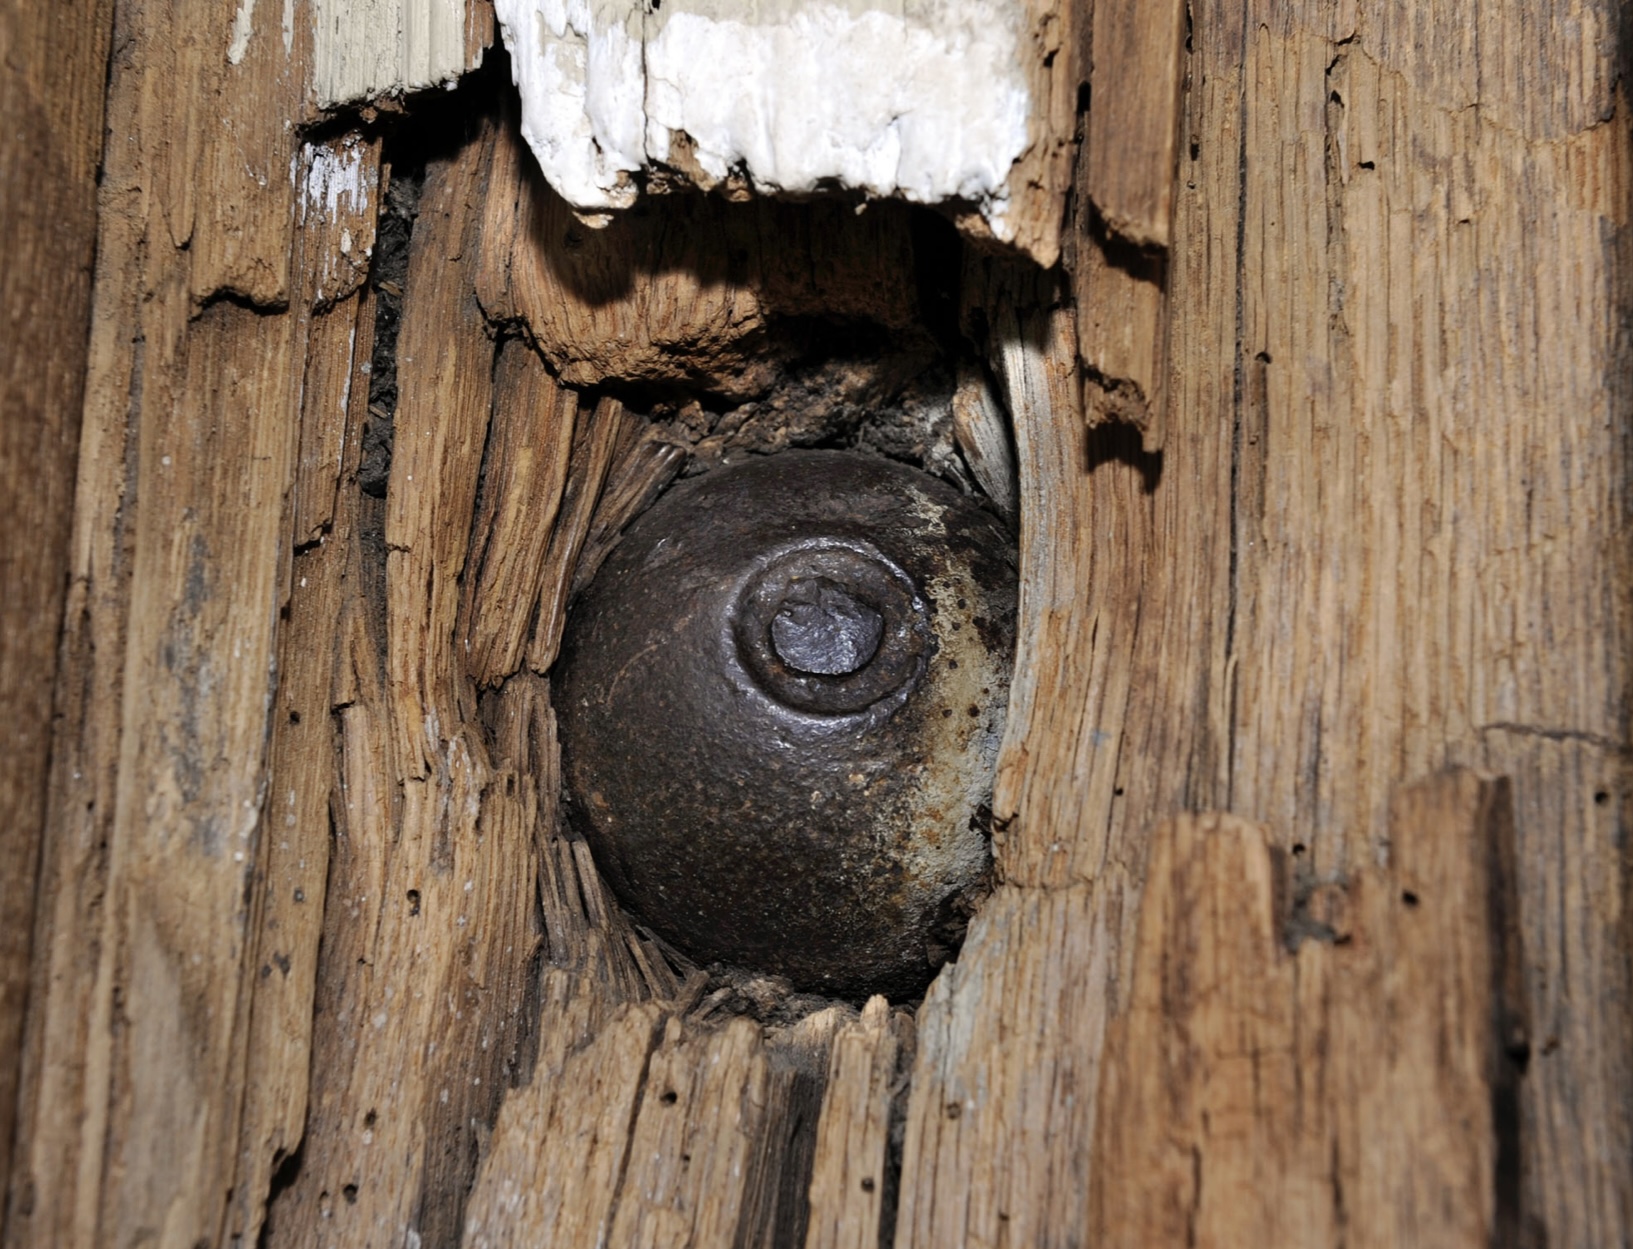
Some of the history of the battle has been preserved in the town and a museum still displays one of the British cannon balls fired during the fight in the wall of the building.
Given the size of the engagement a useful map of the situation.
Obviously I had to scale this down to something we could run as a game. Above the main elements of Ridgefield, the British would be attacking from this end. The roadblock , waiting to be outflanked on Main Street.
I thought we would try a slightly different scenario to the usual frontal assault. So the British represented by three regiments the 23rd, 27th and 64th Foot and supported by artillery will try to capture the town. The Americans who must setup on the line of the barricade must attempt to escape the table. The British will gain points for each sector of the town captured, the Americans for each British unit killed or for each American unit off the table after 10 turns. The table is 5 x4 feet, points wise using Rebels and Patriots the British have 54 points the Americans 30. The 2 British cannons only have a range of 36” so will become ineffective at long range. So onto the action 🙂
The British at their start point
And the rebels manning the barricade
The American forces are a mix of regulars and irregular with skirmishers, some have been placed right at the each of town to delay the British advance
The rest are massed along the line of the barricade
As soon as the broths start their advance the Americans open up
On the right the British immediately falter and the lead company is pushed back !
…but the Americans know they can’t hold the town so start to pull back
Forcing the rebels away from the barricade the way is open ?
British make better progress down the left , but still they are suffering poor morale (a number of early failed activation rolls !)
The attack moves towards the left
Finally the cannons start to have an impact and the rebels on the right pull back
Benedict Arnold supports his troops close to the church
by now the British have forced their way down the left knocking out several skirmish units
A view form above shows the position, but the Americans are still holding the church
Much of the fighting is hand to hand where the British clear out buildings where the rebels are hiding
The fighting was intense but the British are struggling to capture the church
General Arnold chooses to escape the battlefield and fight another day rather than get captured
The American hero’s of the day ! Who held the church till the end
They are now surrounded but at the end of turn ten they are still holding on
A final shot, the rest of the rebels have escaped the town !
A very enjoyable battle, the British yet again hampered by some incredibly bad activation rolls early on things improved but it was too late to catch the Americans who gave some well directed fire then promptly moved off through the town and the British couldn’t catch them. Fun to play a different scenario we gave the victory to the Americans who did what they needed to do, the British had their chances but the Americans frustratingly passed their tests when they needed to. The British cannons also failed a number of activations ! Technically I think the Americans scored about 20 points the British 12 for the sectors captured.
As always thanks for checking in….some more painting next and a massive LOTR battle
Matt


That's a smashing little game Matt. As ever, your table is a joy to behold.
ReplyDeleteThanks David…fun to play even if the British couldn’t quite knock the stuffing out of the rebels 🙂
DeleteSuperb game
ReplyDeleteThanks Neil 👍
DeleteGreat looking game sir!
ReplyDeleteMiniatures and terrains are beautiful :)
Thanks Michal 👍 more of the same in a few weeks
DeleteRidgefield was another fine scenario design and fight, Matt. Very close result. In the end, there were many more Rebels in the Dead Pile than the British.
ReplyDeleteGreat fun played on a stunning table.
Thanks Jon a fine battle fought in fine spirit. We killed as many as we could but too many of those rebels got away 😢
DeleteLooked a great scenario
ReplyDeleteThanks Martin, worked out well 👍
DeleteThat's certainly a very pretty table Matt, the buildings, particularly the church, look wonderful. It's always nice to have a scenario where the two sides have different objectives and it's not simply a case of "kill all the enemy "!
ReplyDeleteNo comment about the British ALWAYS losing???
DeleteThanks Keith, the scenario worked out ok although we didn’t keep a very close tally of the points. I was keen to get away from a frontal assault 🙂
DeleteAnother beautiful table Matt and a great scenario. I do find myself scanning down in these AWI AARs to the part where the British have a series of bad rolls. There must surely be a game coming up where the British will roll and pass everything.
ReplyDeleteDon't believe everything you read, Lawrence. Poor die rolling effects both. The Rebels had two units fail morale checks and disperse. Maybe it was three? Bad die rolling was tipped in Matt's favor, though.
DeleteThanks Lawrence Jon has said it all, as ‘good’ wargamers we take the good and bad dice as they come. I’m looking forward to that game where the British pass all their tests too 👍
DeleteI do admire your tables Matt.
ReplyDeleteThanks George 👍
DeleteAnother cracking game from you Matt, ably assisted by Jon of course. Once again those failed activiation rolls early on seem to have hampered the British. Great to see a rather different scenario to the norm. A massed LotR battle? Should be good to see!
ReplyDeleteThanks Steve a fun game, the British right flank certain failed a couple of activations early on which hampered their advance. I can confirm the LOTR was fairly epic 👍
DeleteThe AWI stuff looks great on the table. Also nice job on the scenario. 😀
ReplyDeleteThanks Stew 👍
DeleteMatt, I know the year is early, but I would have to put this as my favourite post of the year in terms of subject, visuals, game size and report presentation - love that photo of the cannonball embedded in the planking.
ReplyDeleteThanks Norm I’ll take that accolade, I may not hold it for long though 🙂
DeleteWell done! Very good representation of the battlefield. Ridgefield is close by to us, and the raid spoken of makes a great mini campaign. The R&P rules certainly seem to run hot or cold for activation, but in small actions it rings true. The map is a great find.
ReplyDeleteThanks Joe interesting you live ‘nearby’ would be interested to know what the town museum is like where the cannon ball is on display ? Yes R&P works well for this size of battle
DeleteAnother quality piece Matt.
ReplyDeleteThanks Phil 👍
DeleteA lovely looking and sounding game Matt.
ReplyDeleteAWI is always a very tempting period.
All the best. Aly
Thanks Aly …the period works well as a skirmish game , but you knew that anyway 🤔
DeleteWonderful stuff Matt, slippery rebels and so the rebellion continues :-)
ReplyDeleteCheers
Stu
Thanks , and yes the rebellion definitely not squashed on this day !
DeleteLovely looking table. I'm envious of your wonderful collection of AWI buildings!
ReplyDeleteThanks Allan, you will see many of this buildings in other set ups, as they are mainly barns, it’s all a trick of the eye really 👍
ReplyDeleteI like your love for detail. Great mix of photos and map. It's a joy to check out your blog even if the AWI is not my first choice of gaming period. But the table is looking very real.
ReplyDeleteThanks for taking the time to check in and comment, glad you at least like the look of the AWI a really fun period to game 👍
Delete