Having packed away the Bunker Hill game and whilst ruminating on what next I came up with the foolish idea that as I gradually increase my AWI collection we could continue to play skirmishes and battles in some sort of historical sequence. The internet is a bonus here as there are several quite detailed timelines. Now the intention right from the start is not to play every small skirmish but pick those skirmishes which have some interesting twist or novelty. Some of the larger battles will by necessity be tackled in bite sized chunks, and like all good plans we may change things and not go in absolutely date order. We’ll see ?
So you ask what did the timeline come up with the Battle of Kemp’s Landing was a small engagement ideal for a small skirmish game. I won’t run through the whole history which is adequately covered on wiki. But in summary in October 1775 John Murray Lord Dunmore landed in Virginia to flush out potential rebels. Thomas Gage had dispatched a number of the 14th Foot to support Dunmore in his actions. Having searched with and without success he led his small force north towards Kemp’s Landing. The local Princess Anne County Militia were called out by one Joseph Hutchings and Anthony Lawson a prominent local landowner. Their intention was to set an ambush for the British. The action took place on the 15th November. Historically the Americans were poorly led and the ambush launched too early, the regular British infantry fired one volley and the rebels fled, bring chased through the difficult swampy ground. The British capturing Hutchings and Lawson a few days later.

A map from the time annoyingly North to the bottom !
A search on the net also turned up this commemorative plaque of the engagement
So I thought this would make an interesting scenario with the British ambushed but the essence of the scenario is the American forces attempting to escape thought the difficult terrain away from the British. Well that was the plan.
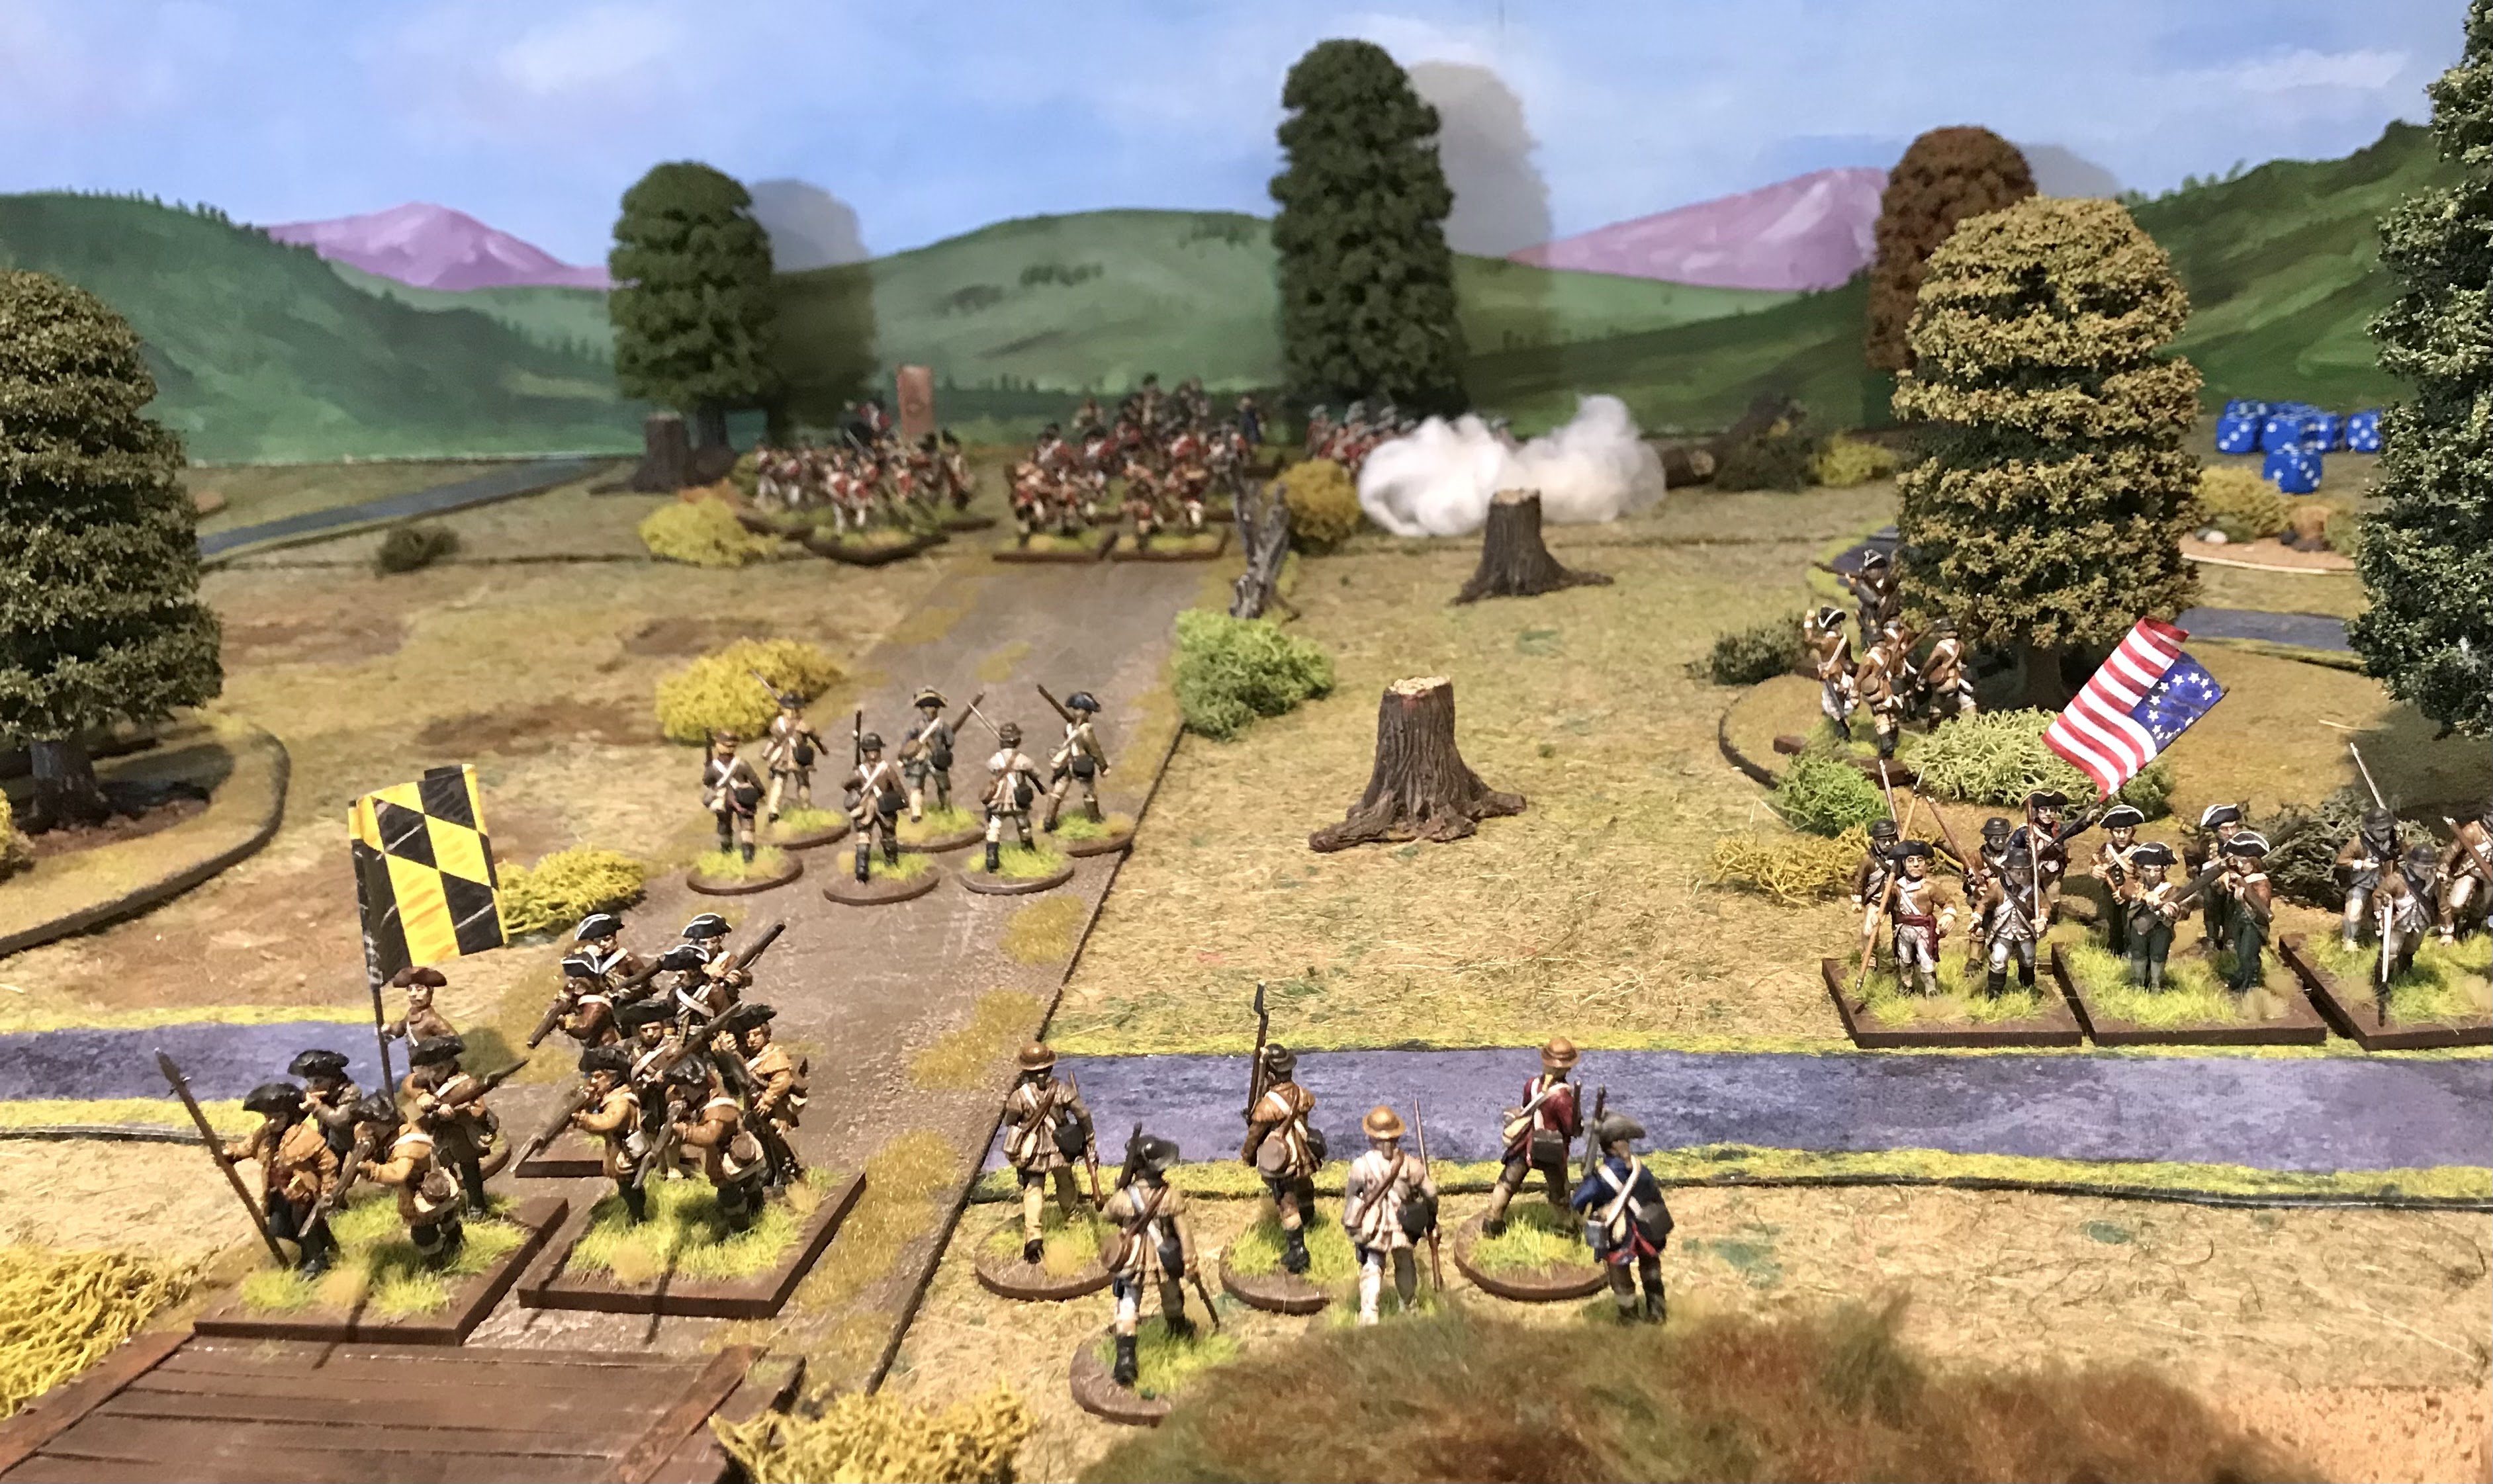
The battlefield as set up, the American ambushes are set up in the woods, the fateful first shots have already been fired. The small stream slows movement, the Elizabeth river itself is only crossable at the bridge. To reflect the port leadership the American who have both Lawson and Hutchings can’t use their leadership. The British are supported by one unit of Loyalists but they are ‘green’ and may be uncomfortable fighting their neighbours.
Lord Dunmore leading the column forward, light company to the front regulars behind.
The Rebels should have waited but have fired alerting the British, rather than stand the Americans must flee for their lives. Victory conditions are based on the number of units who escape in the 8-14 turns. The British get a bonus if they can capture or kill Lawson or Hutchings.
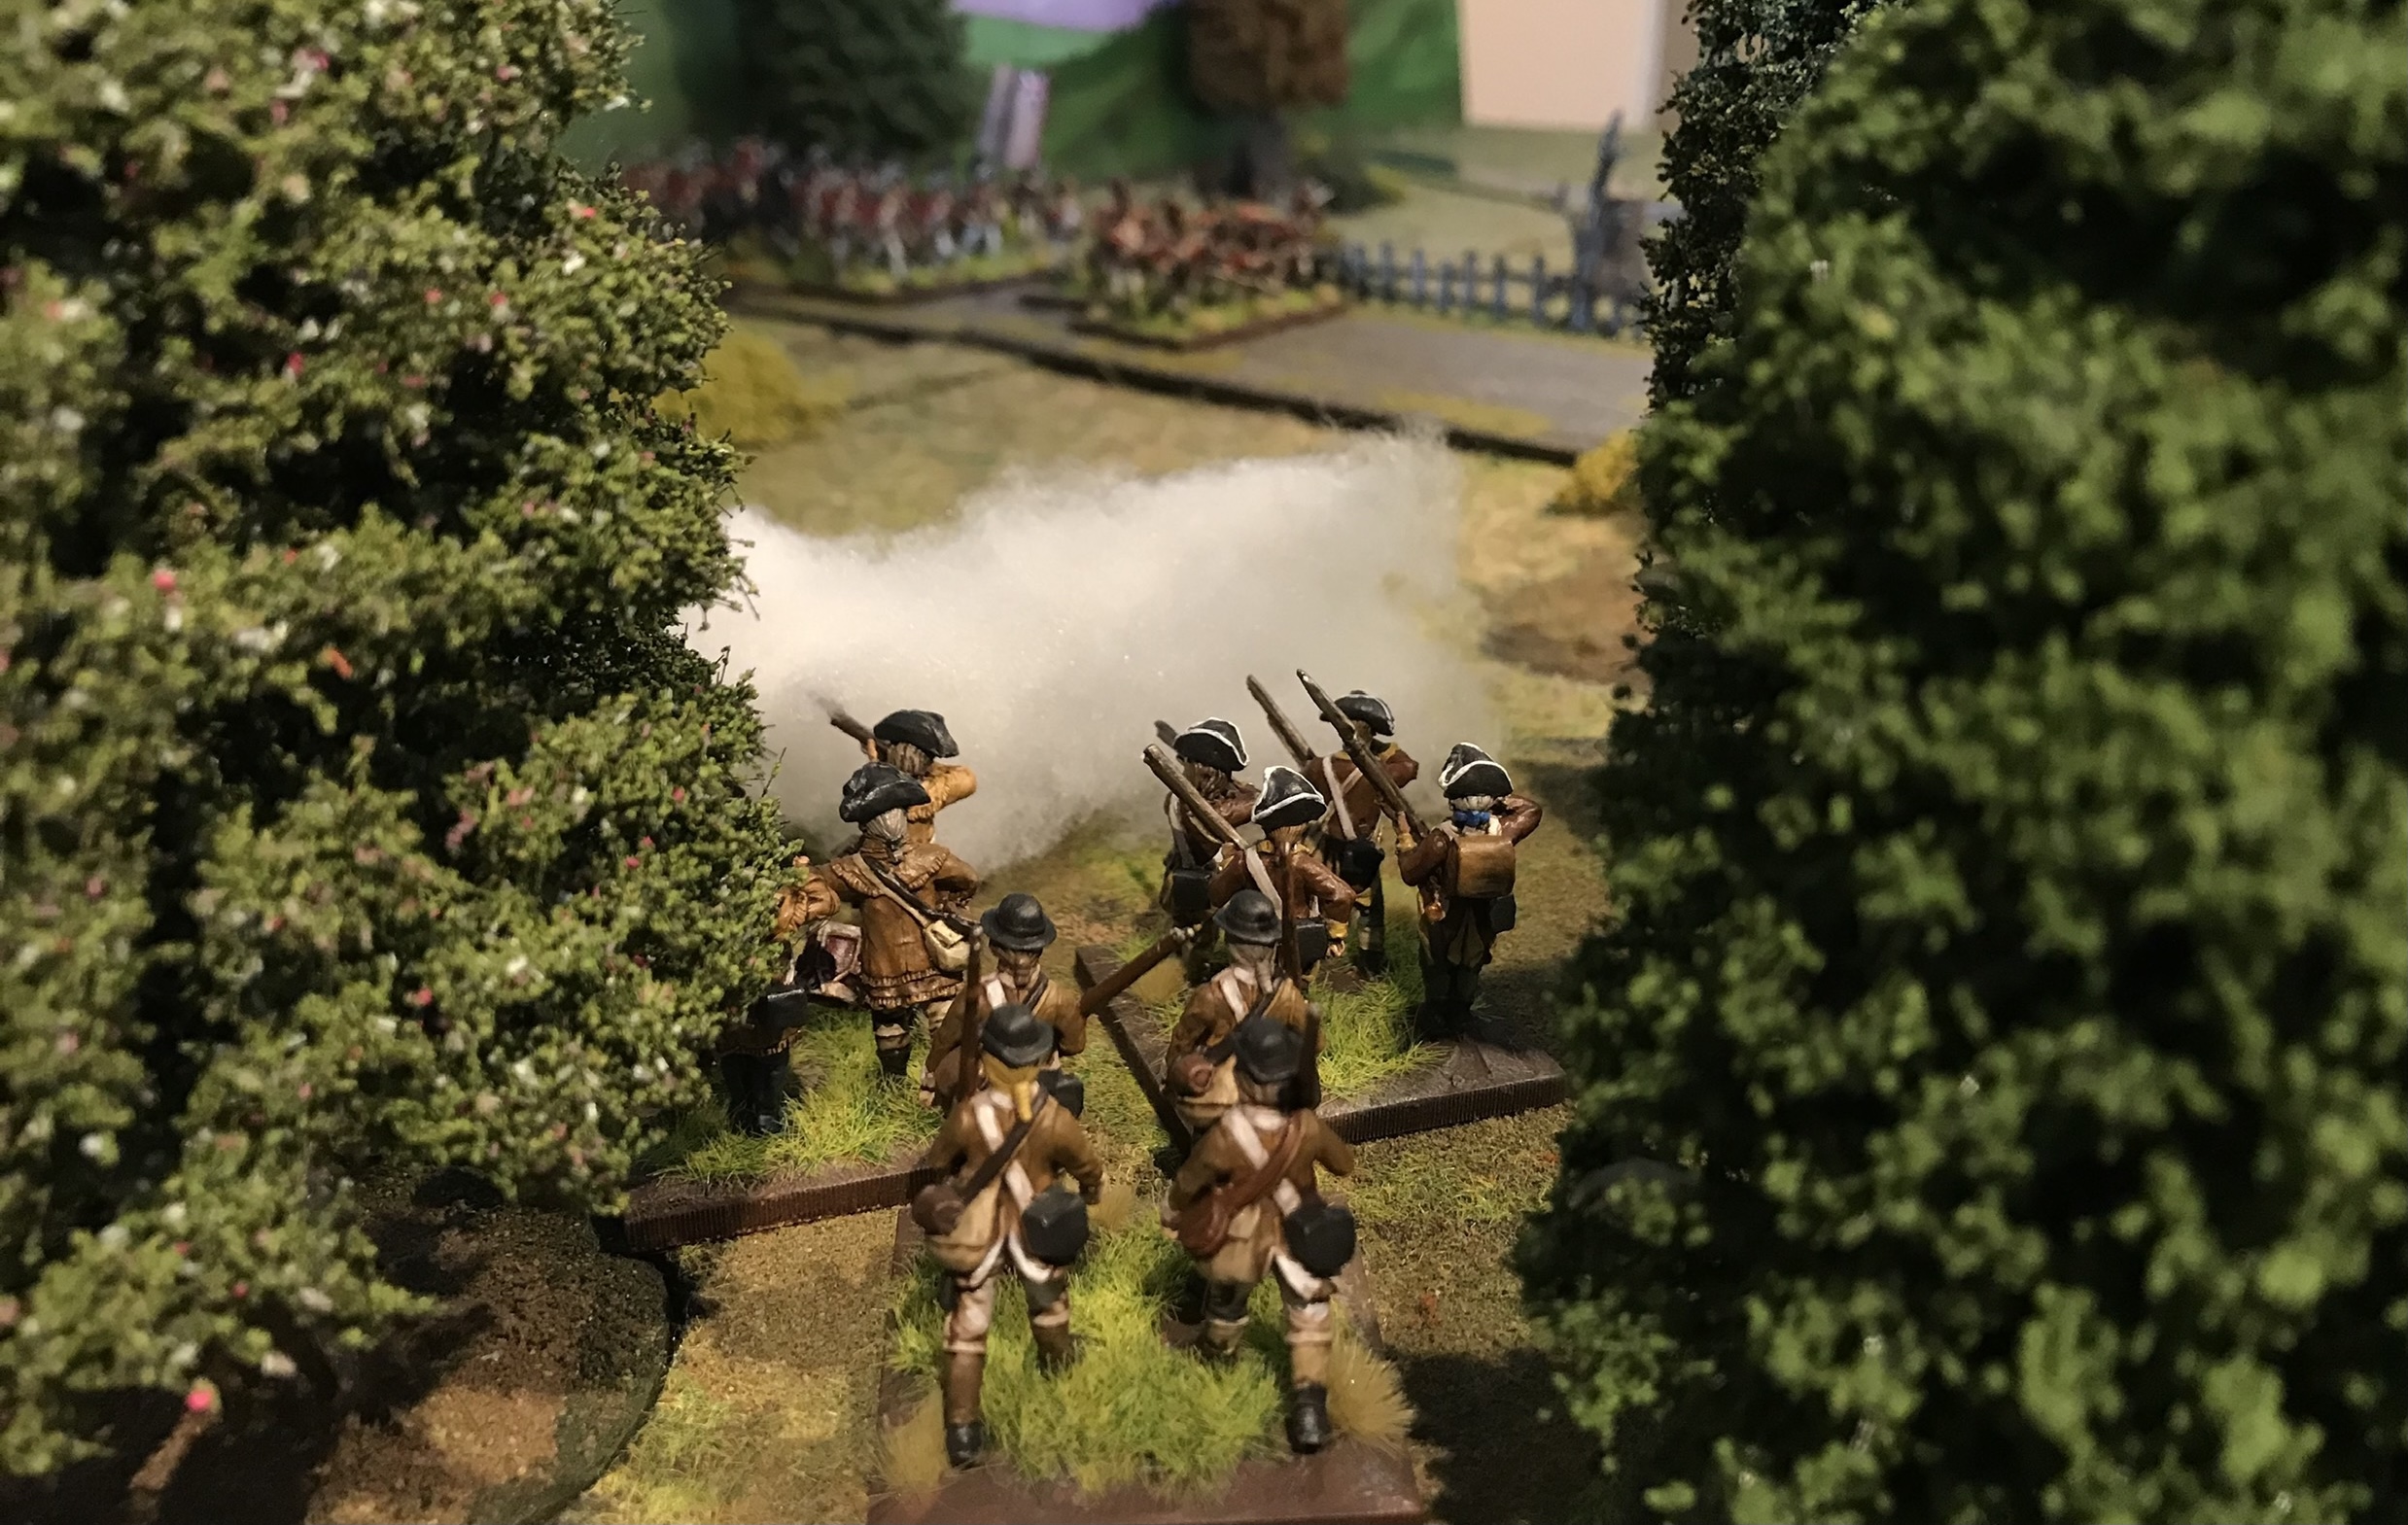
The Princess Anne County Militia in the woods
They do have some skirmishers spread out and although good shots they have the usual short 12” range.
Activating quickly some of the militia immediately start to pull back, the streams require a turn to Wade through
The Rebels continue to fire.....but shouldn’t they be fleeing ?
..............that’s better they are starting to pull
The rebels put up a fierce volley and the leading British light infantry are forced back down the road, (shameful to say they failed a rally test and left the field of battle !)
From bad to worse the British loyalists arrive and promptly fail an activation with a double 1, rather than advancing they choose to shoot into the rear of the British company nearest to them !!!!!!!!!!!! Luckily they don’t kill anybody but being fired on form behind clearly had a negative impact on the British morale.
Putting the rebels to the bayonet......cold British steel, but again the British fail to make an impact and are pushed back.
Rather than running away the rebels are putting up a stiff fight
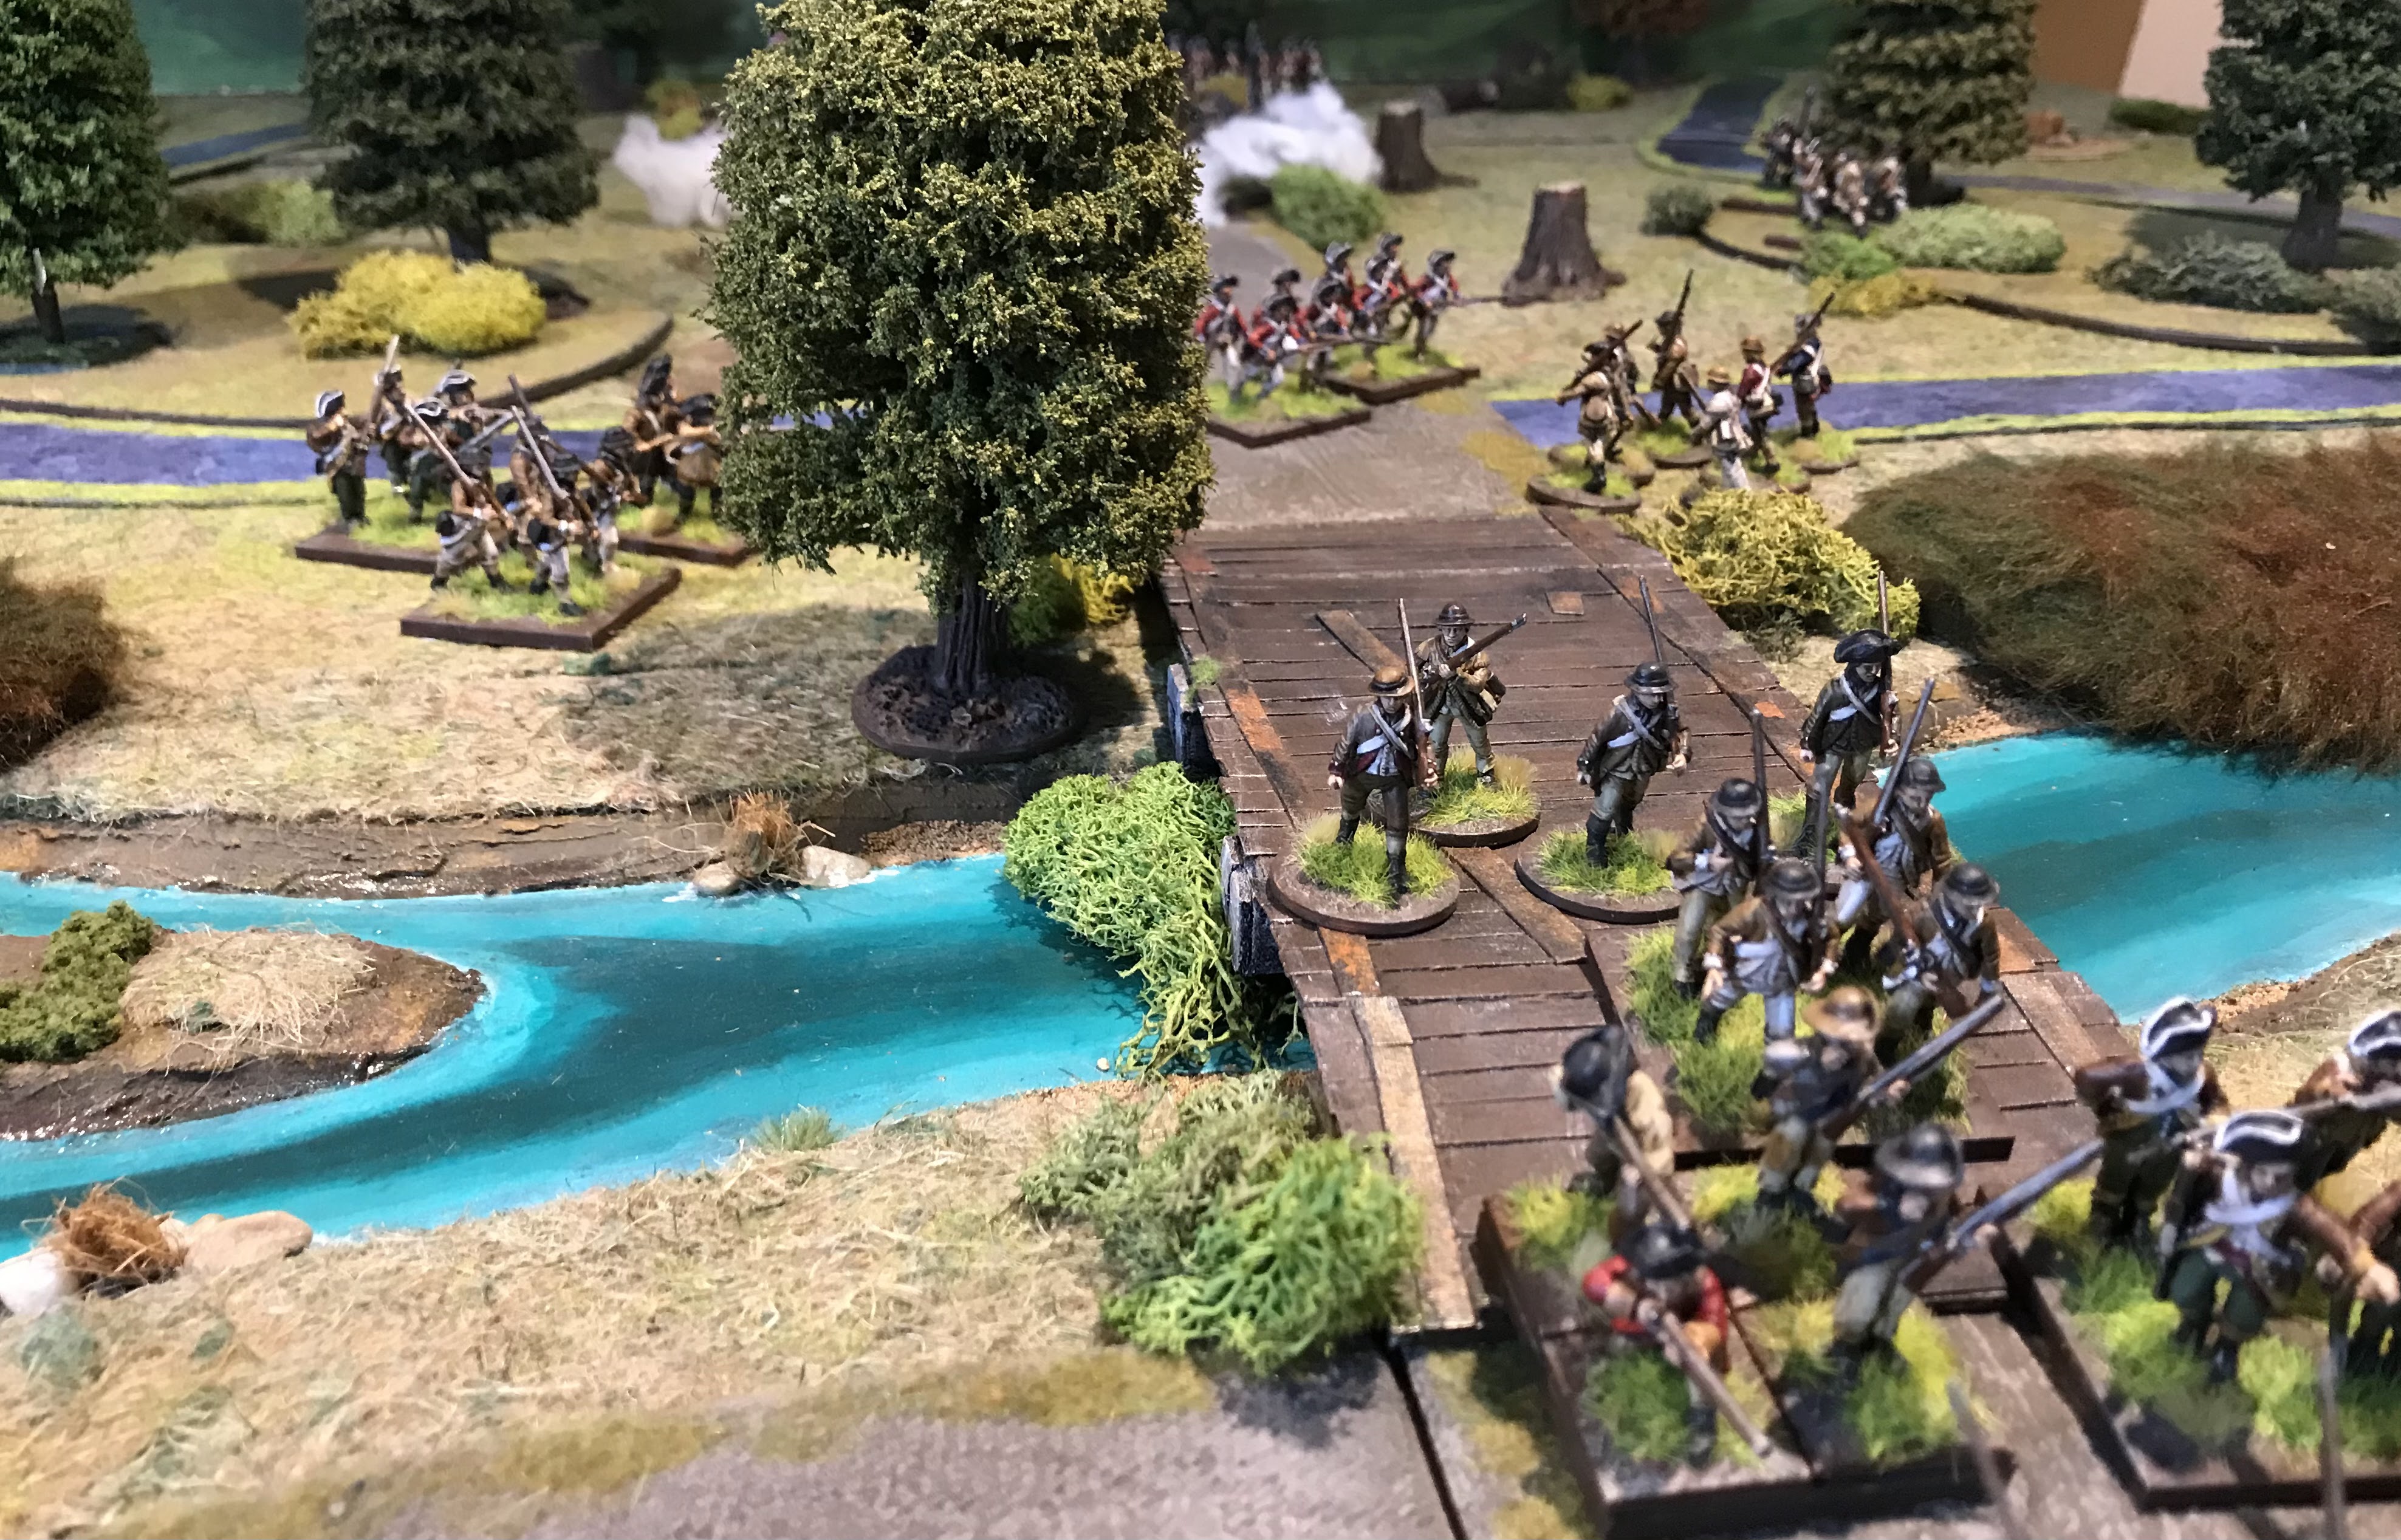
Lawson is getting away across the bridge back to Princess Anne Church
The British are bogged down on the road, an infuriated Dunmore can see the leading protagonists getting away, curse them !
Hutchings is getting across the bridge too
What ? Having fought the rebels in the woods another dire morale roll sees another British company flee the field ! Shameful behaviour, likely they will be flogged
The bridge acts as a difficult bottleneck but the British can’t get enough troops to ‘cork the bottle’ and more rebels slip away
You can almost hear them whistling Yankee Doodle as they march away a good days work.
A few British soldiers do make it close to the bridge but they are outnumbered and ineffective in stopping the flow.
In the final turn of the battle the loyalists have at least start to fire at the Rebels but the units are exchanging fire and enough of the rebels have already got away.
The final count had three units escaped and none destroyed a strong American victory , historically the British only suffered a single minor casualty so these County militia were much tougher than their historical counterparts. A fun game, on reflection we came to the conclusion that Rebels and Patriots is particularly hard for the attacking side as the activation to move or shoot means the defenders have an advantage. However, the British again failed some key morale tests despite the majority of them being veterans. Lord Dunmore will regroup !
Next up another skirmish and then we might try another larger battle 😀 I need to get some Hessians painted quick as the enter the conflict soon !
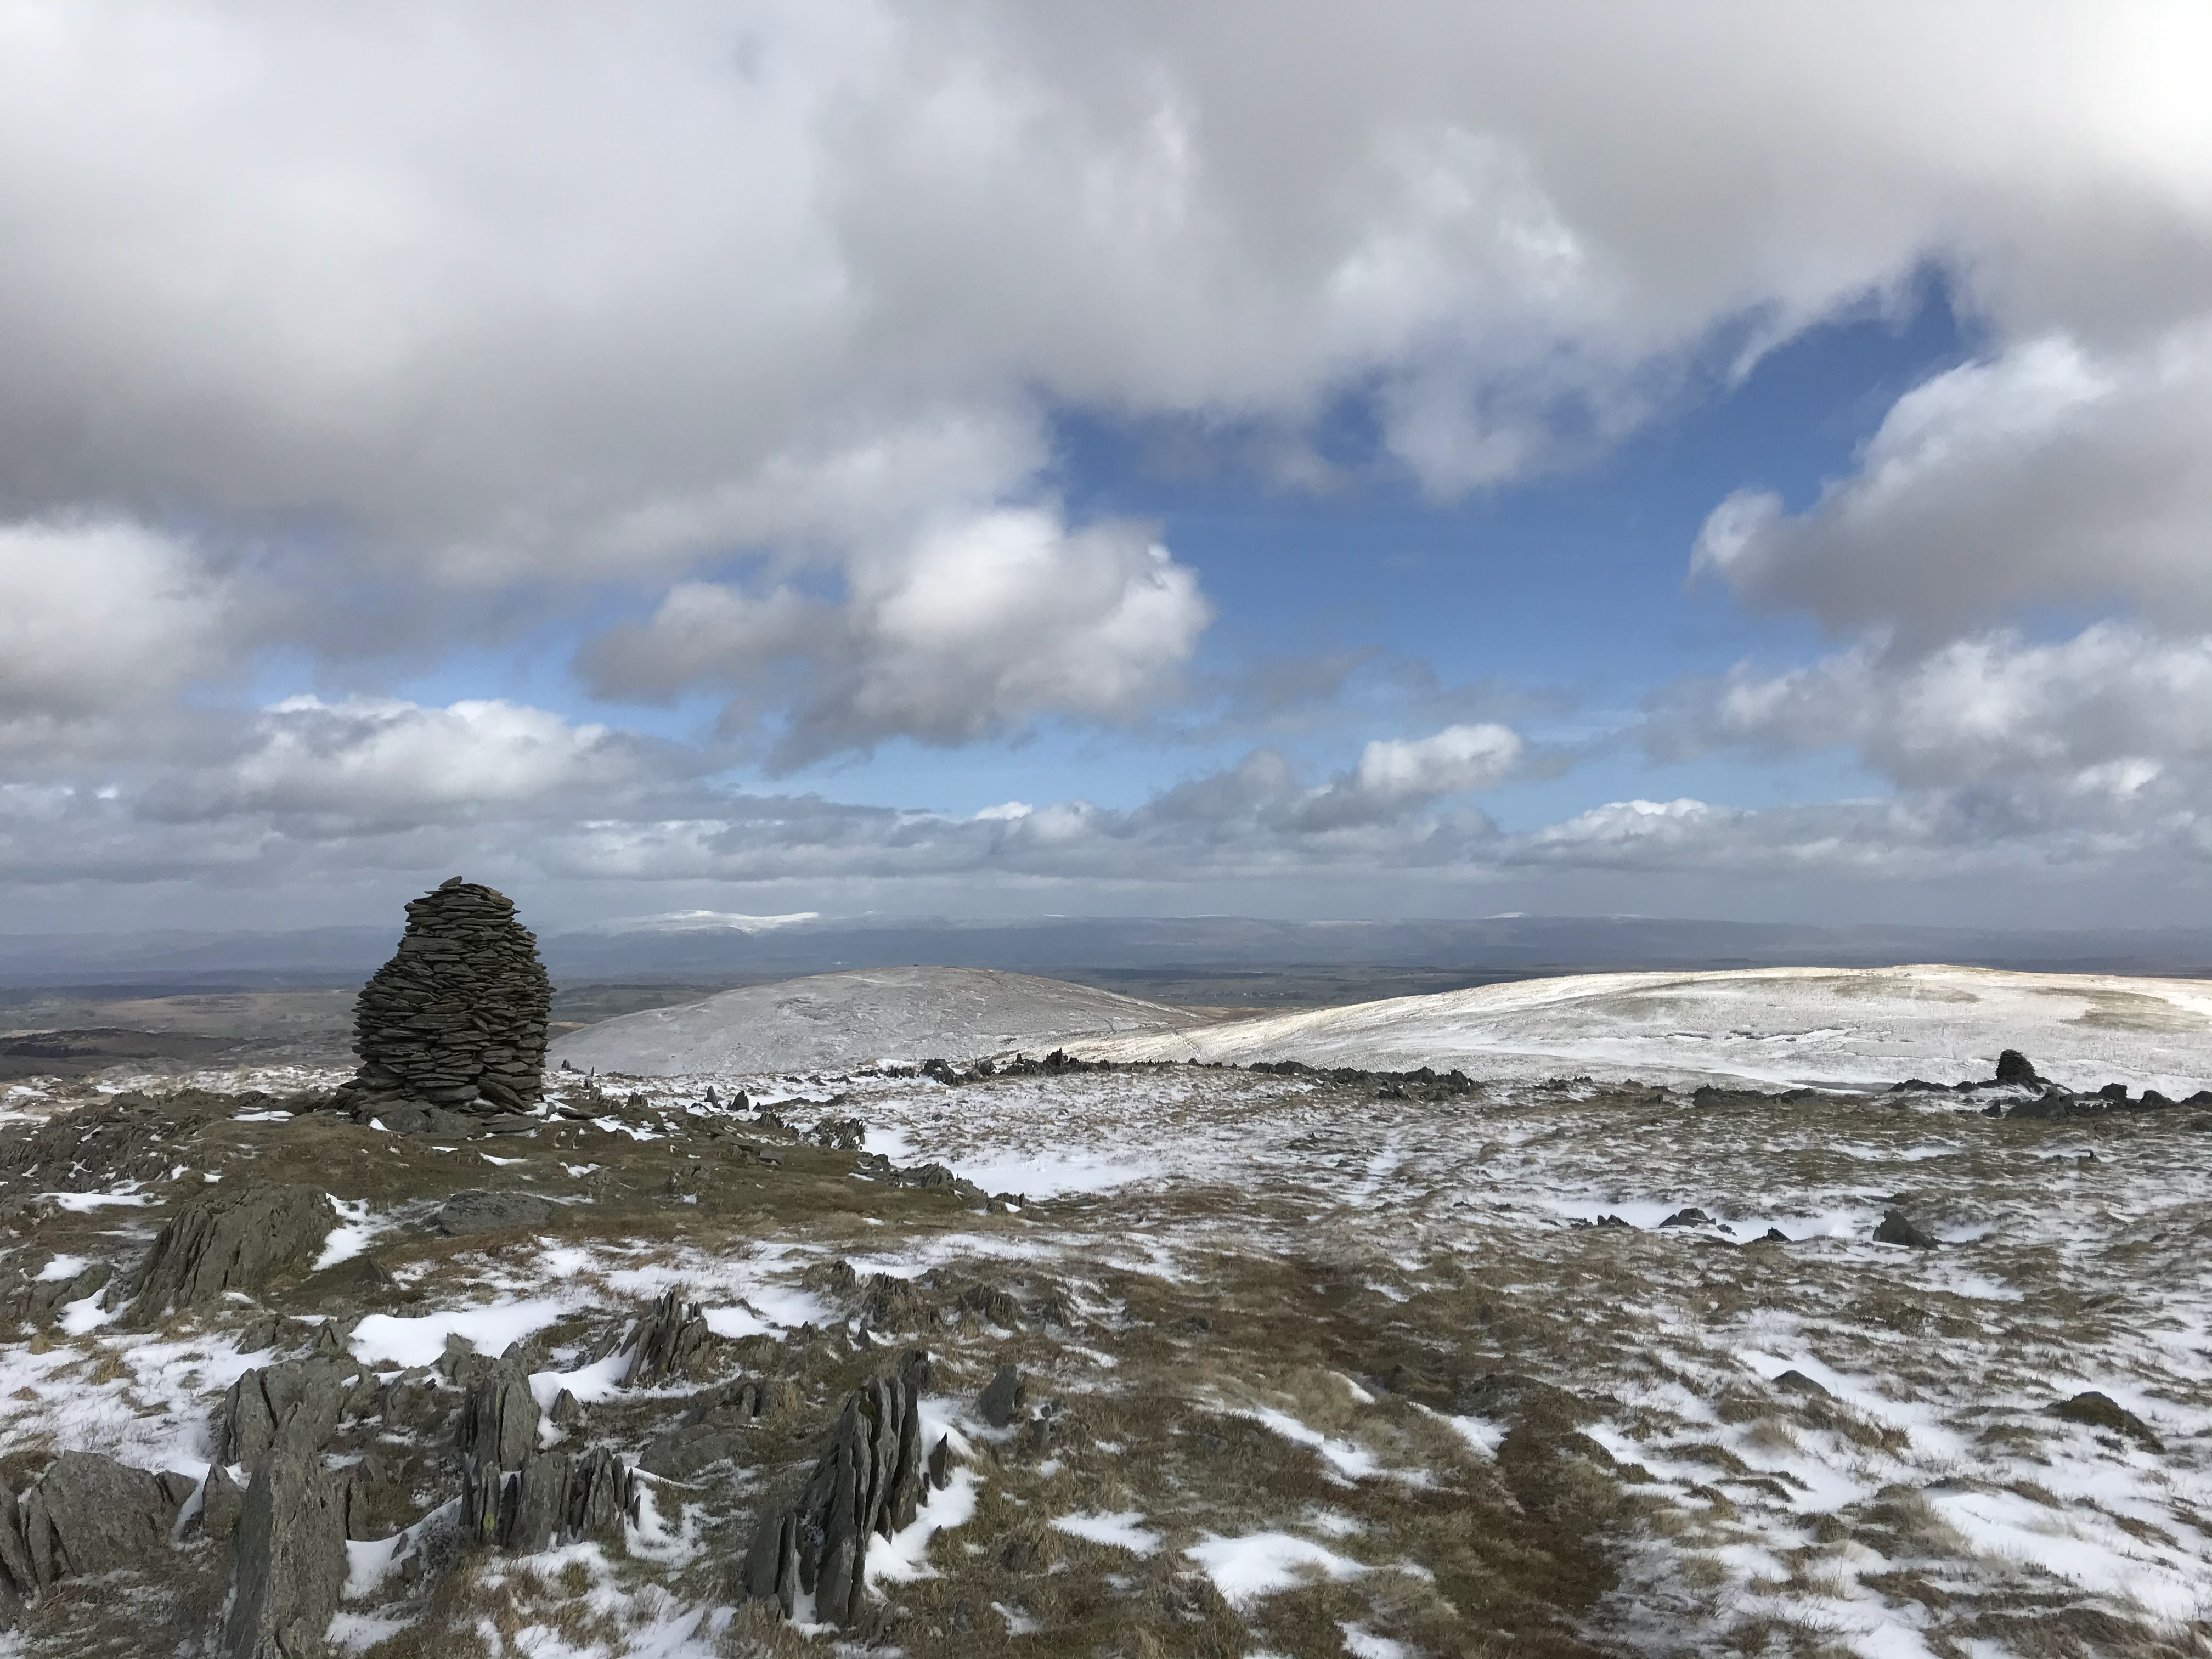
Managed to get out for a walk this weekend, and despite the winter weather the Lake District was beautiful
Looking North towards High Street
Later in the walk looking East


Great looking game
ReplyDeleteThanks Neil.... might have looked even better if we had caught the rebels 🤔
DeleteAnother very fine contest, Matt! As always, table looked divine.
ReplyDeleteAs commander of the PAC militia, I did not feel the pressure that I expected before the battle began. I thought there was a good chance that the British might seal the colonials off before they could reach the bridge. Not to be!
I wonder if these historical scenarios ought to focus more on OBs and relative troop quality rather than on R&P Point Equality? I didn't sense that the PAC militia was on the brink of skedaddling at any point in the contest. Attacking is not easy in R&P and very hazardous when attacking over open ground as your troops discovered.
Lovely snow-covered landscapes.
Thanks Jon...as we discussed at the start these ‘chase’ scenarios are always hard to balance. I want to create scenarios and battle where both sides have a reasonable chance to victory, rather than a direct historical There were several factors which worked against the British. The early demise of the light infantry was unlucky. I hadn’t anticipated the woods giving you such a good defensive position and finally some poor morale rolls. I think any tweaks run the danger of unbalancing the other way ? Ultimately it felt like a close battle, three units got away giving the Americans victory. I do agree the move vs shoot mechanism makes attacking hard so in future with attack scenarios I will give the attacker a slight numerical advantage ?
DeleteExtra points for the attacker seems reasonable.
DeleteHmmm, another poor showing by the Brits, in contrast to the Rebels who were made of sterner stuff! I agree that it is tough for the attacking force in R&P's, for the reasons mentioned. Lovely photos of the Lake District too:)
ReplyDeleteGeneral Gage will not be happy ....and as for the King ! The challenge is getting the balance just right and a tweek either way can often make a big difference. Certainly defending seems in general terms easier....if we get to Yorktown it will be fine 🤔
DeleteNice research and scenario design. Was this game further evidence of a system being hard on the attacker or was it a dice thing?
ReplyDeleteI side with the former although Matt was a bit unlucky with a couple of morale tests.
DeleteAgreed we sense the attacker faces a difficult challenge especially with British troops where ideally you want to form up and fire but this takes time and the enemy seem very effective at firing back at the moment
DeleteBrilliant looking game Matt.
ReplyDeleteThanks Ray 👍
DeleteFantastic looking game as always!
ReplyDeleteGreat look game
ReplyDeleteThanks Dave not a bad run out for virtual gaming certainly better than nothing
DeleteA fine looking set to again Matt, but those British troops🙄, well shipping to the Indies would be in order I think🙂
ReplyDeleteI have packed them off already after a good flogging !
DeleteVery nice looking game. Though I can’t but help notice the lack of British victories....😀
ReplyDeleteI do love the idea of playing along with history by using a time line.
On lack of British victories: Perhaps this is one reason we won the war?
DeleteThanks stew......I had noticed the lack of British victories too !!!!! Luckily I have a soft spot for those Rebels 👍
DeleteA great looking game Matt...
ReplyDeleteThe dice gods appear to have turned their kind gaze away from you... a feeling I know all too well...
All the best. Aly
Thanks Aly......yes I have in the past been accused of never failing a test and being really lucky this hasn’t been the case in recent games average or slightly lower I feel, although I don’t keep a record.
DeleteAnother visually pleasing game Matt, but for me trumped by the landscape photos!
ReplyDeleteThanks David the Eastern Fells are very beautiful in their own way 👍
DeleteYet more engaging AWI action Matt...but those British regulars don't seem to like fighting the Americans do they? I agree with Jon...if you would like some semblance of recreating what actually happened, you need to adjust some of the rule setting, otherwise, Regulars are likely to only be on grade above militia, whereas in reality, I think the difference was often much greater.... A couple of nice shots of your local countryside too.
ReplyDeleteThanks Keith, the difficulty as I am sure we have all experienced is developing a scenario based on historical events but giving both sides a reasonable chance of victory. Historically the ambush era fired once and missed. The British fired one volley and the militia fled to be chased down, shot in the back etc...I need to turn this into something a little more equal. So we started from the point that the British had fired the first volley and the victory conditions were for the rebels to escape. The points per side were equal and at the start I think we both thought it would be hard to get the rebels off. Now in fact with three units off the game would have been quickly drawn if one of the units with a leader had been knocked out. The British were just pretty unlucky with their shooting. And a couple of early very poor morale checks. I toyed with the idea of the rebels being green ie two grades different but this gave the rebels at least two more units. In hindsight this might have been better giving a real sense of them running away. The Lake District is of course beautiful 🙂
DeleteGreat looking AWI gaming, with excellently painted figures and good looking terrain, Matt! Love the scenery too. Alas, my Warlord Games AWI order is still in limbo - I emailed them several times with no response back to date. I'm hoping they'll get my order shipped out soon.
ReplyDeleteThanks Dean normally warlord are pretty reliable certainly I have never had any issues. Interesting to see what you do with the figures as I have decided to stick with Perry/foundry as the best range in my view.
DeleteGreat AAR and the usual excellent standard of figures and terrain is maintained!
ReplyDeleteI must get the Rebel & Patriots Rules.
Thank you Sir, they work for us and are good across a number of scaled games👍
DeleteLovely looking game,another unfortunate result, I think the rebels should have been green, even if there were more of them, Jonathan wouldn't have been able to be quite so confident in their ability which surely reflects history better?
ReplyDeleteBest Iain
Thanks Iain I suspect you might be right, my only defence was not trying to unbalance the numbers too much 🤔
DeleteExellent AAR !
ReplyDeleteThank you Michael 😀
Delete