The events of 1066 are perhaps the most famous in early British History and really need little introduction. As my Dark age collection has grown over the last few years I have been looking to present our version of the battles and after some last minute painting we were able to give them our best shot.
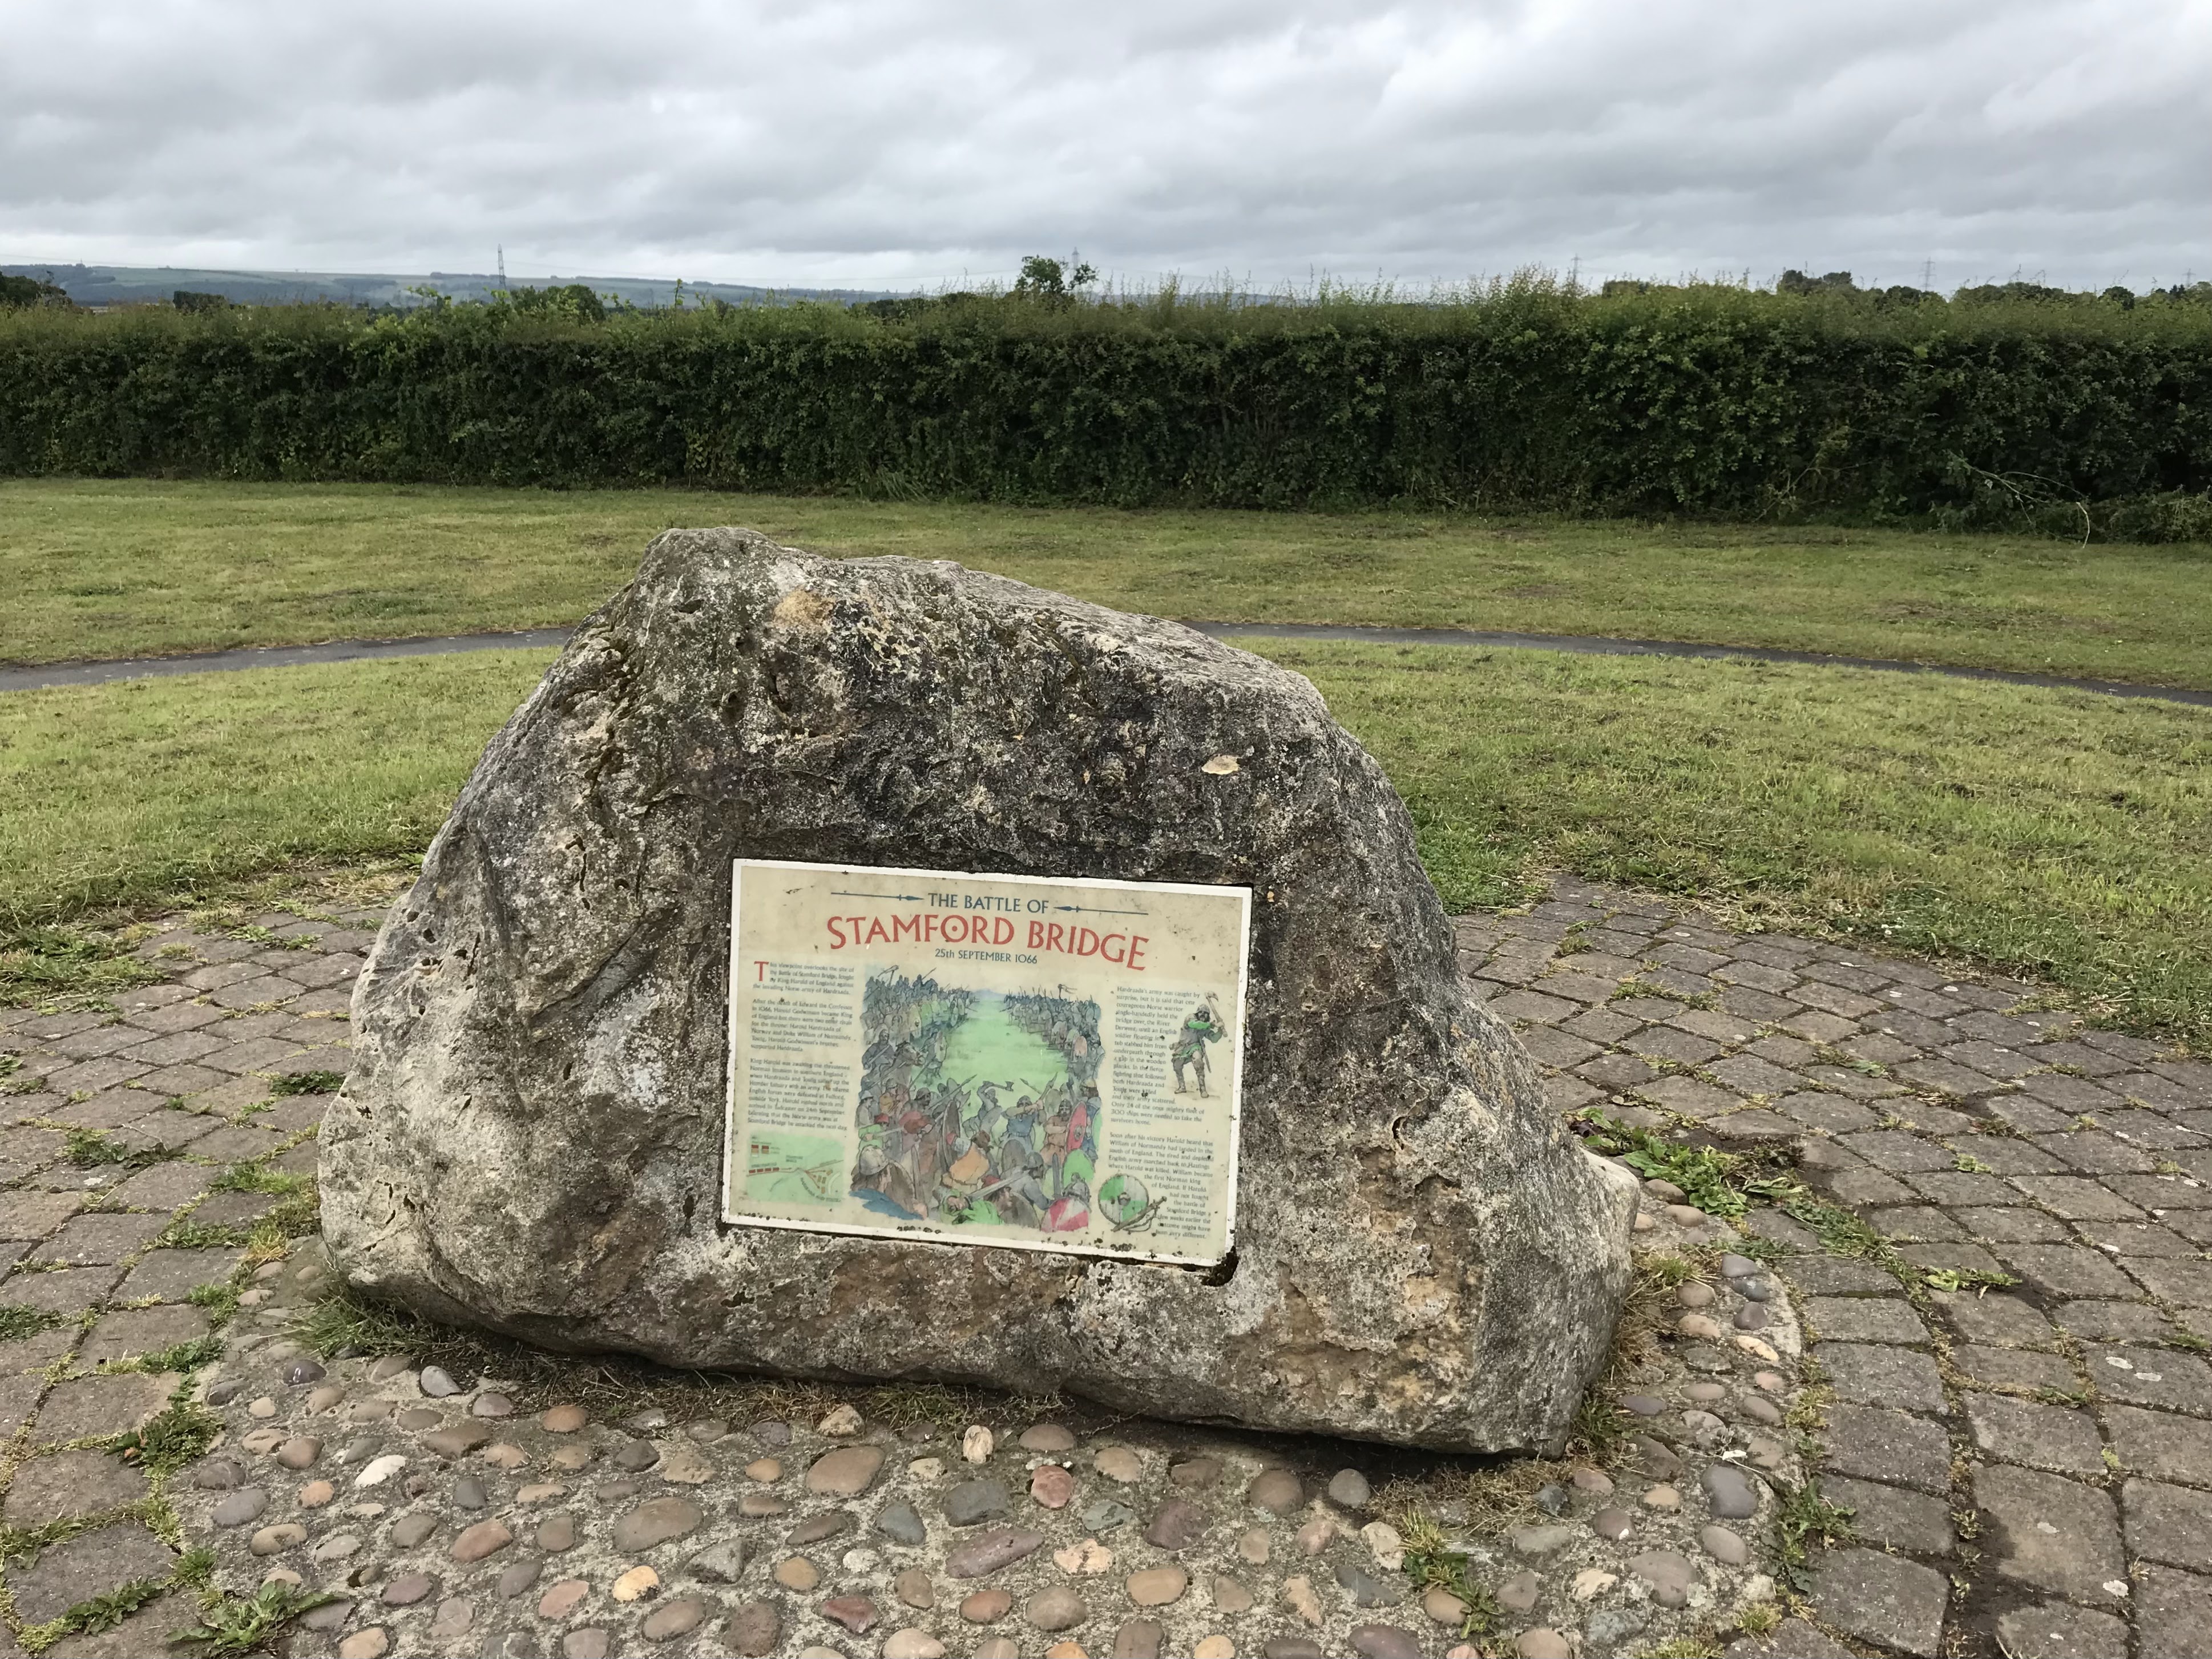
So first up Stamford Bridge 25 September 1066. Harold having waited on the south coast has marched North catching the Viking army under Harold Hardrada and his traitorous brother Tostig unprepared. (Anybody who doesn’t know the history I can recommend a BBC three part documentary available on iPlayer). Those with a keen memory will know we visited the battlefield earlier this year in the summer. This stone sits on the edge of the area known as Battle Flats and is likely the line of the Saxon army the Vikings a few hundred yard over the modern hedge.
There are a number of key elements of the battle we wanted to incorporate although I think many of these can be taken with some licence as the documentation for all these battles is limited
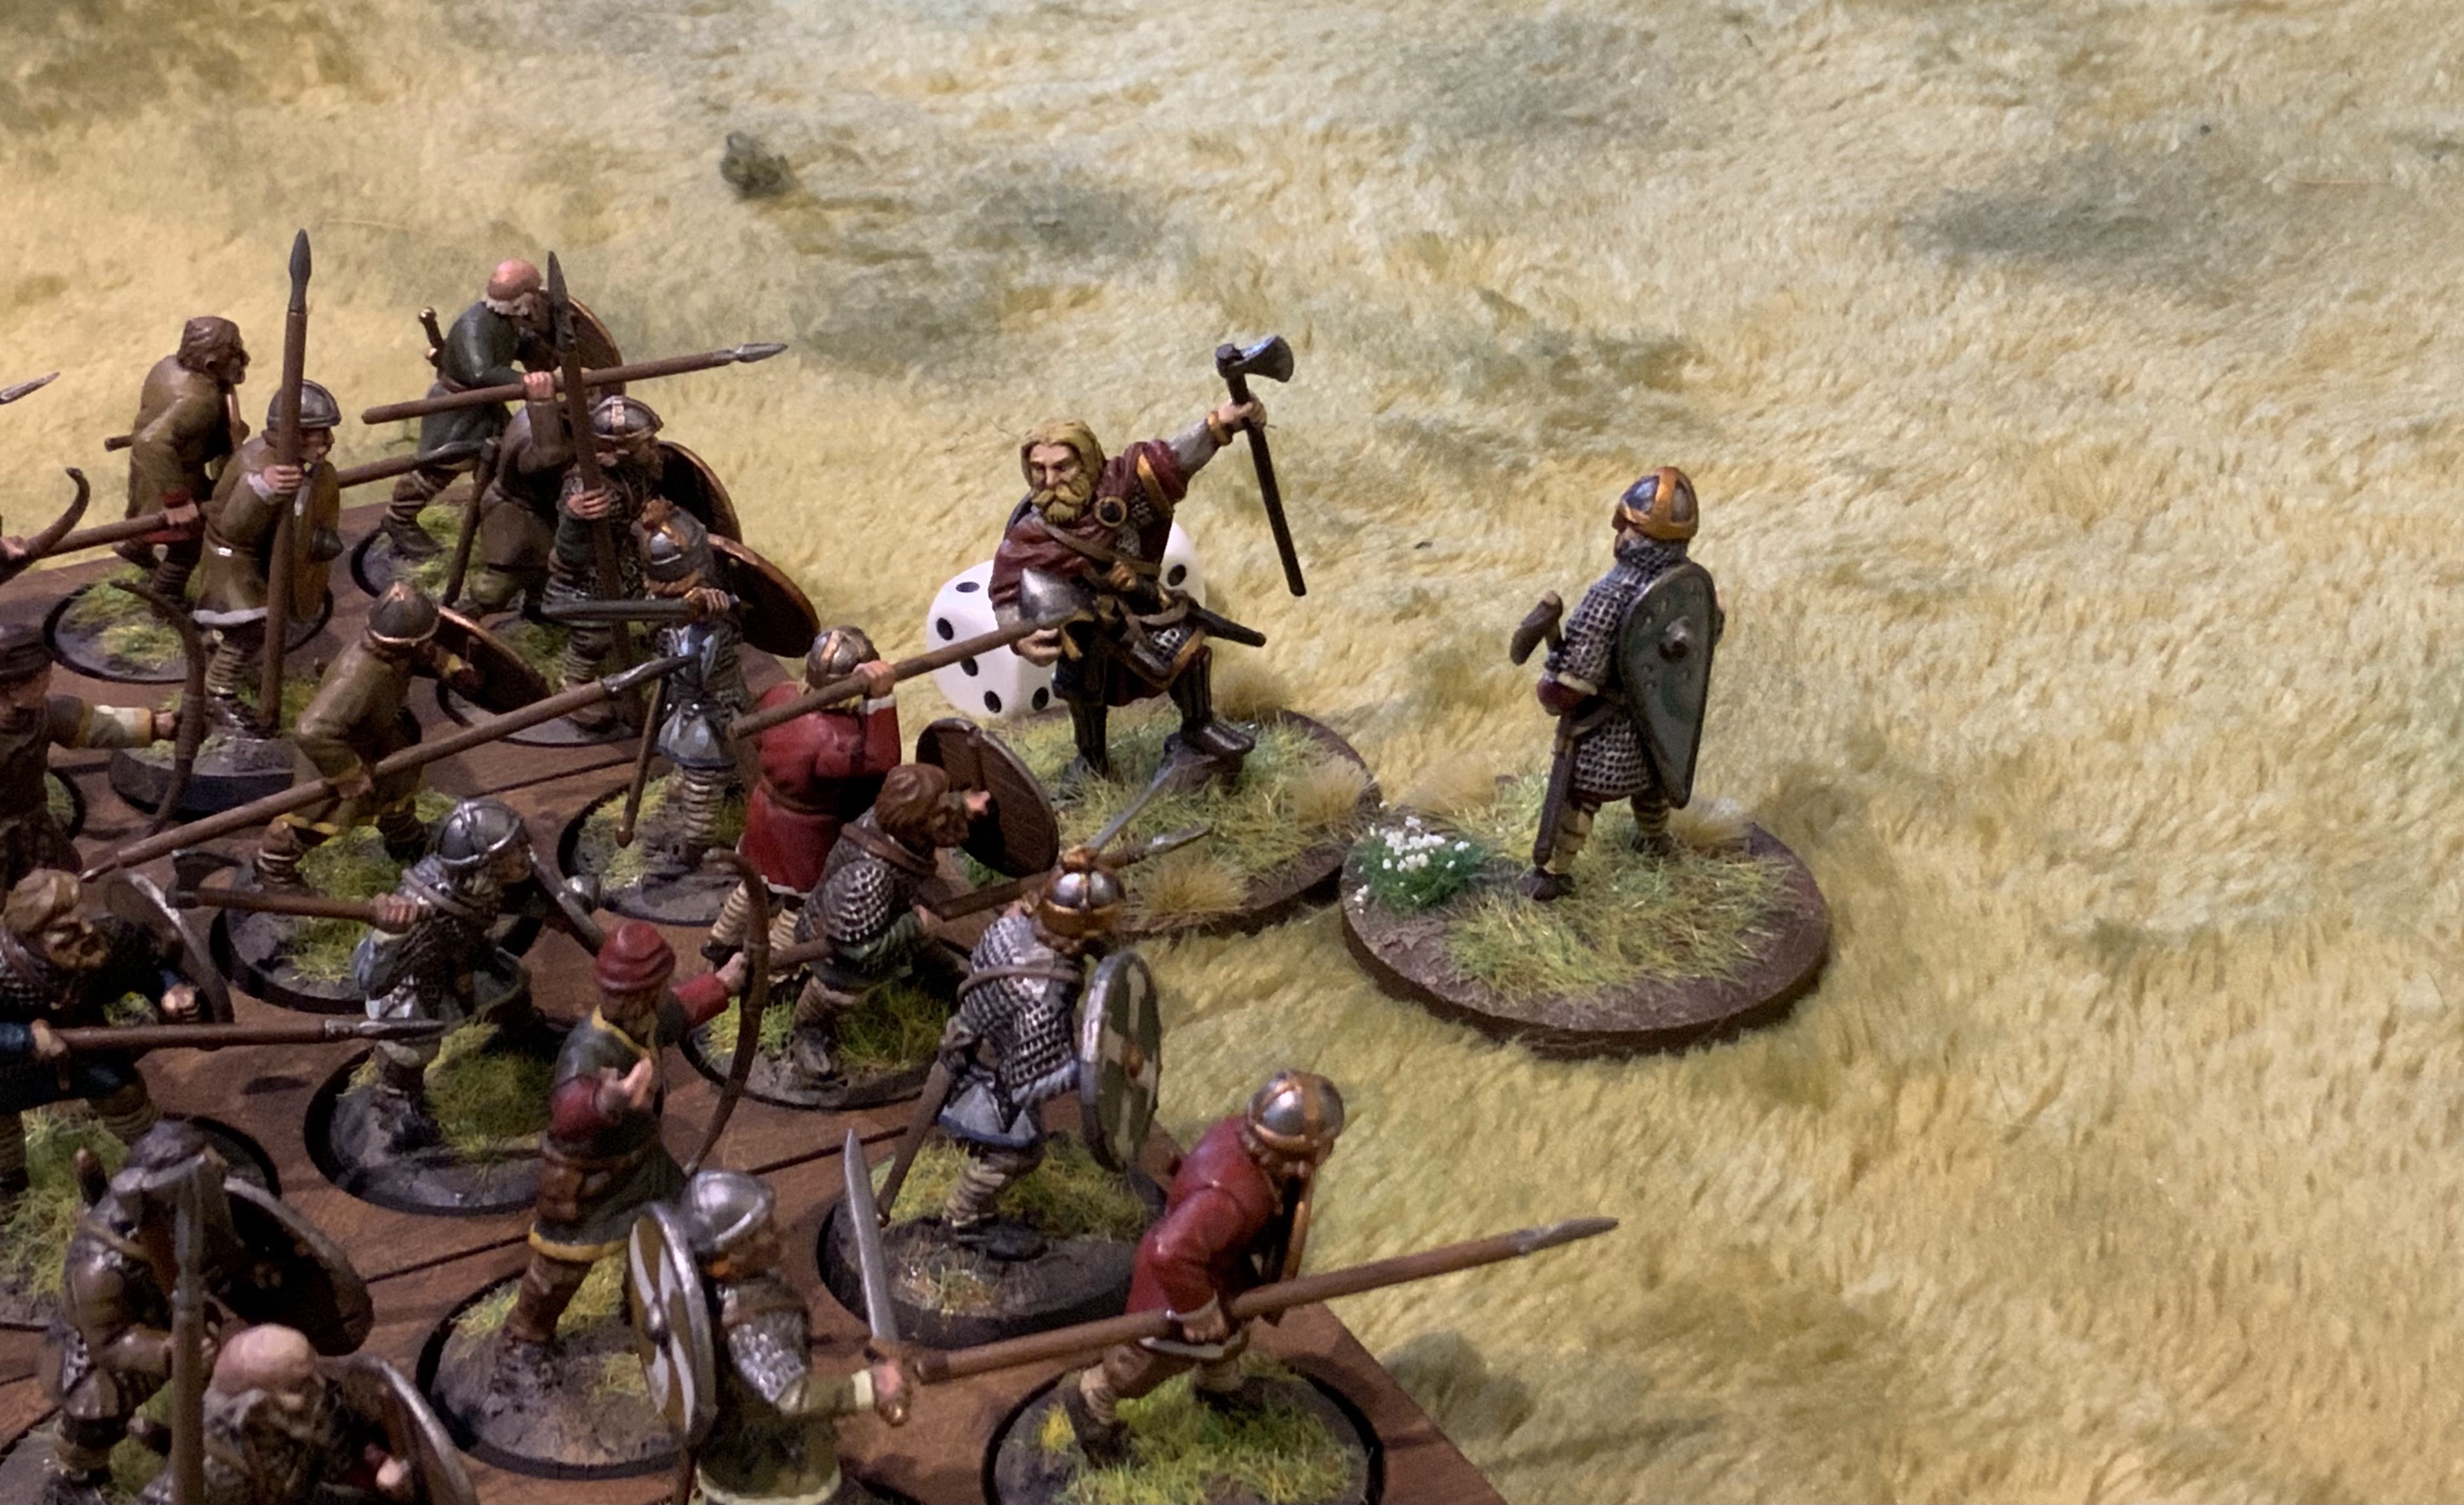
The initial setup for the battle, the Vikings have been caught off guard but have hastily formed a defensive position, Harold the true King of England has crossed the river and potentially a ford which is mentioned in some histories. Wether or not a single Viking held up the Saxon army it is too good an opportunity to miss. The Vikings receive reinforcements later in the battle under Eystein Orre who had been with the boats to the west, they arrived fully armoured but tired. We managed to build all these elements into the battle.

The initial part of the battle then sees the Saxon army held up to represent the lone defence of the bridge, after the full army was set up across the river a unit had to take on a single Viking on the bridge. Luckily there are rules for this individual in Kings of war so we played him straight from the book. Units which he was able to defeat would be removed from the battle and for each turn he survived we would randomly select a Saxon unit which would then be replaced back over the bridge. This seemed to work really well.
The first unit was destroyed and 3 further units pushed back over the bridge.
But eventually the inevitable happens and the lone Viking is killed allowing the rest of the battle to begin
The two armies are equal in size although Hardrada and Tostig are waiting for the reinforcements, to balance the odds. Grabbing the initiative Harold throws his army forward into the attack
Those units caught on the wrong side of the bridge must move fast to get into the action.
The clash of the two lines
The pack of soldiers and men means not everybody can get into combat immediately, if there was enough space we allowed the Saxon archers to fire over the mass of men onto the rear ranks.
Wounds begin to build up on both sides
as units push forward and backward
Then holes begin to appear in both the Viking and Saxon line
Tostig leads the way forward in a counter attack, whilst in the distance Harold Godwinson throws down a challenge to the Viking King
Just as things are looking bleak for the Northmen Orre arrives from Ricall with extra men, this might tip the scales
Tostig is wounded but somehow survives 😢
Worn down by combat the main Saxon army has been able to wipe out the bulk of the Viking army but they are now assailed from their flank
Armoured Vikings and berserkers charge in from the right.
The battlefield has now broken down into two battles
The Saxons holding the central area but the fresh Norsemen are pushing forward
The berserkers make short work, of the fatigued Saxons on the right
Finally Harold is able to get into combat with Hardrada and with the help of his men
The great Viking king is killed
Harold is unable to catch his brother who manages to escape again !
At this point we called the battle overall a draw. With barely two infantry blocks apiece the two armies have fought each other to a standstill. Hardrada is dead so the immediate threat to the crown and invasion has gone. Many have died on both sides but Harold Godwinson is declared the victor of the day. Least that is what the history books will say.
A splendid battle, we managed a balanced scenario which felt close and ended very close. Only the death of Hardrada really separating the armies. The rules (Kings of War Historical) work well for the Dark ages where there isn’t much subtlety but they represent blocks of men crashing shield walls and the push back and forward of this type of combat. My only regret was The escape of Tostig who as a traitorous dog should have lost his head (which he did historically on the battlefield)
Rather than three weeks Harold now had barely 12 hours to regroup, rebuild his army and March them south to fight the Normans.
😀


very cool, and the follow battle was great, you can have the honour of posting
ReplyDeleteThanks will try and get Hastings up in the next couple of days
DeleteAh, one of my favourite battle! Love the motive of lonely viking berserk on bridge :)
ReplyDeleteThanks Michal ….the lone Viking did pretty well even if it was a forlorn hope
DeleteAbsolutely splendid! I love it!
ReplyDeleteGreat job incorporating the lone warrior at the bride holding up the army. That was a good idea. Many great pics in this post. Gonna go look at them again. 😀
Thanks Stew, very kind, the lone warrior worked surprisingly well holding the Saxons back but not quite enough
DeleteThat's a lovely looking game Matt and I love the rules for the lone Viking on the bridge:)
ReplyDeleteThanks Steve 👍
DeleteGreat looking game of an iconic battle - sadly taking a back seat to Hastings historically.
ReplyDeleteThanks Dean will post Hastings in a couple of days 👍
DeleteGreat looking game, looks like the Kings of War fits the battle well. The lone warrior on the bridge is an interesting aspect to this battle as the text as it stands, with Harold having to take on the lone warrior with warriors, by implication suggests that Harold’s army did not have archers immediately on hand.
ReplyDeleteThanks Norm, kings of war certainly works for larger dark age battles but it can be too brutal in smaller engagements. I can’t quite remember now but in my reading and researching I found one clear mention of the Saxons having archers at Stamford Bridge. Hence their inclusion. Whereas I could find no mention of cavalry sadly 😢
DeleteThe Icelandic poet Snorri Sturluson, writing in the 1200’s seems to be the most referenced source for Harolds army having ‘cavalry’ as a fighting arm (not just transport), though he seems to be mostly discounted by historians.
DeleteThanks Norm if we refight I think I might grab that as the source. I know the records are generally poor but I suspect if cavalry was in any way a significant part of the Saxon force at either battle it would be mentioned. Personally speaking if you haven’t trained extensively on horseback to fight in that way you would be a complete liability so it is unlikely the Saxons were sweeping about on horse back ?
DeleteA grand looking set to Matt, the madman holding the bridge is brilliant.
ReplyDeleteThanks Phil fun to play 👍
DeleteA super set to there Matt.
ReplyDeleteThanks David 😀
DeleteGreat battle report and superb armies
ReplyDeleteLooked a like a pretty evenly balanced fight Matt - much more so than the one sided set up our mate Julian presented us with at Tarawera a few years back when we refought both battles in one day, using TtS rules. (He had the Vikings pread oyut all over the place, virtually picknicking, when the Saxons hove into view!) - see here for our version https://1808534.blogspot.com/2016/11/so-on-to-our-second-full-day-of-gaming.html - we even managed to incorporate the lone axeman and infuriatingly for the Saxons, I think he may even have survived the battle - he certainly held up their advance for quite a while!
ReplyDeleteThanks Keith and thanks for sharing the link interesting to see other people’s approach. I am sure when we all set up these scenarios we attempt the perfect balance and sometimes it doesn’t work. I had thought about greater dispersal for the Vikings bu the reference do seem to say they formed a reasonable shield wall, it certainly wasn’t a rout and the battle lasted a significant time. The hard thing for us was getting the reinforcements to arrive where they have the ability to 8mpact the result but not overpower the Saxon flank. In the end whilst I had planned a D6 random entry we ended up just agreeing the right time which was when the Vikings were starting to struggle.
DeleteGreat looking game. I have Harold's army and William's...and you've inspired me to get Hardraada's to rpund out the trinity. Great BATREP...and I am going to try Kings of War now too!
ReplyDeleteThanks John it would be a shame not to have a few Vikings. ? When I post Hastings you will see a few Vikings hiding amongst the Saxons. I reasoned they had picked up some of the armour before heading south. Kings of war historical works well for larger battles but beware for smaller engagements it is too brutal as unit can disappear very quickly this is great for bigger battles where you want to reach some form of conclusion. The mechanics work well for the dark ages 👍
DeleteMatt, this is a superb looking action. The pre-battle action at the bridge sets an interesting narrative to the big battle. Great stuff!
ReplyDeleteThanks Jon it all worked out well , gave a close and balanced battle which have the feel of a grime dark age battle and the push and shove of shield walls.👍
DeleteLovely looking game Matt. I always felt very sorry for Harold as it must have been an exhausting couple of days. It's hard enough driving it let alone having to march that far, and he wouldn't have had the Little Chefs back then. I have often wondered how Hastings would have turned out without Stamford Bridge and the long march down to the south coast.
ReplyDeleteThanks Lawrence, from what I have read it was probably only a fairly small group of men who actually made both battles those effectively with horses who could ride the distance so perhaps his Hurscarls ? They were probably tougher in those days as well. The what if’s of history it seems reasonable to suggest that had Harold been able to bring to Hastings an overwhelming force he would have won, after all it was reasonably close anyway. Who know then perhaps we would all have cool names like Ethelbert and Aelthing ? William would be the equivalent of Adolf
DeleteAnother lovely looking and sounding game Matt…
ReplyDeleteAll the best. Aly
Thanks Aly, not sure shiny works with the Dark ages ?
DeleteLovely looking battle, I like the lone fighter at the bridge, close seems about right,it's really Anglo Danish versus Vikings by this time isn't it?
ReplyDeleteBest Iain
This comment has been removed by a blog administrator.
ReplyDeleteWhat a mighty tussle! Loved the cameo by the viking on the bridge too...
ReplyDeleteRegards, James