
The battlefield before the advance of both forces, railway cutting in the foreground. Germans will be advancing from Folkestone as a simple scenario we have three objectives, the railway bridge, the cross roads and a telephone box providing the ability to communicate back to HQ, these are marked above as yellow dots.

The British advance from the north a Vickers armoured with a light autocannon, it may struggle if the Germans have managed to get any heavy armour up this far

Wouldn’t you just believe it the local Homeguard have a beaverette Armoured Car but it is immediately targeted by a german Panzer and blown to pieces !

To the west the British have managed to get a Matilda II up in support this will be a more formidable foe for any Panzer

Advancing from the south the Wehrmacht a 38t Panzer with infantry and Pak36 antitank gun head for the village

Further west a second Panzer this time a 35t heads for the phone box

Using the cutting as cover a unit of British Regulars are trying to get to the bridge

The Matilda moves slowly towards the phone box objective scarring the german Panzer away

A unit of Fallschirmjager dash through the back gardens and with no targets available the gun crew begin to wheel their gun forward

A shot west along the road, a small Panzer I has advanced through the woods to try and capture the railway bridge, in the distance an armadillo truck which had advanced to the cross roads is in flames, with no real armour it was a second easy target for the 38t Panzer

A unit of RAF reserves who have arrived from Hawkinge have managed to catch a German unit our in the open (an incredibly lucky roll saw me wipe out an entire german unit in one turn) as they followed the Panzer to capture the bridge

Things are going better to the west of the village where a unit of Germans are pinned down behind the black shed reluctant to advance towards the British heavy tank.

“Vhere are zey” shouts the german tank commander, this is no way to capture the objective but the British unit is at least safe for a while under the bridge

The Vickers light tank has been duelling with the Panzer I in the woods

....and eventually gets the better of the combat...but is then immobilised by the Panzer on the bridge !

Exchanging fire across the road..

The Matilda is now pushing through the hedges by the road, but can’t find a suitable target

Running past the burning Vickers another British unit attempting to capture the bridge is pinned down

Germans have now captured the cross roads, but are hit by mortar fire and then caught in the open by the last active infantry unit and wiped out

Close now to the end of the battle and the Panzer resolutely holds the bridge ( what you can’t see and I didn’t photograph is a british unit running no sneaking onto the bridge from behind to contest the bridge)

They take fire from the Fallschirmjager but just enough survive, the British commander urges the RAF lads forward but all they can do is take pot shots at the Germans from behind the hedge.
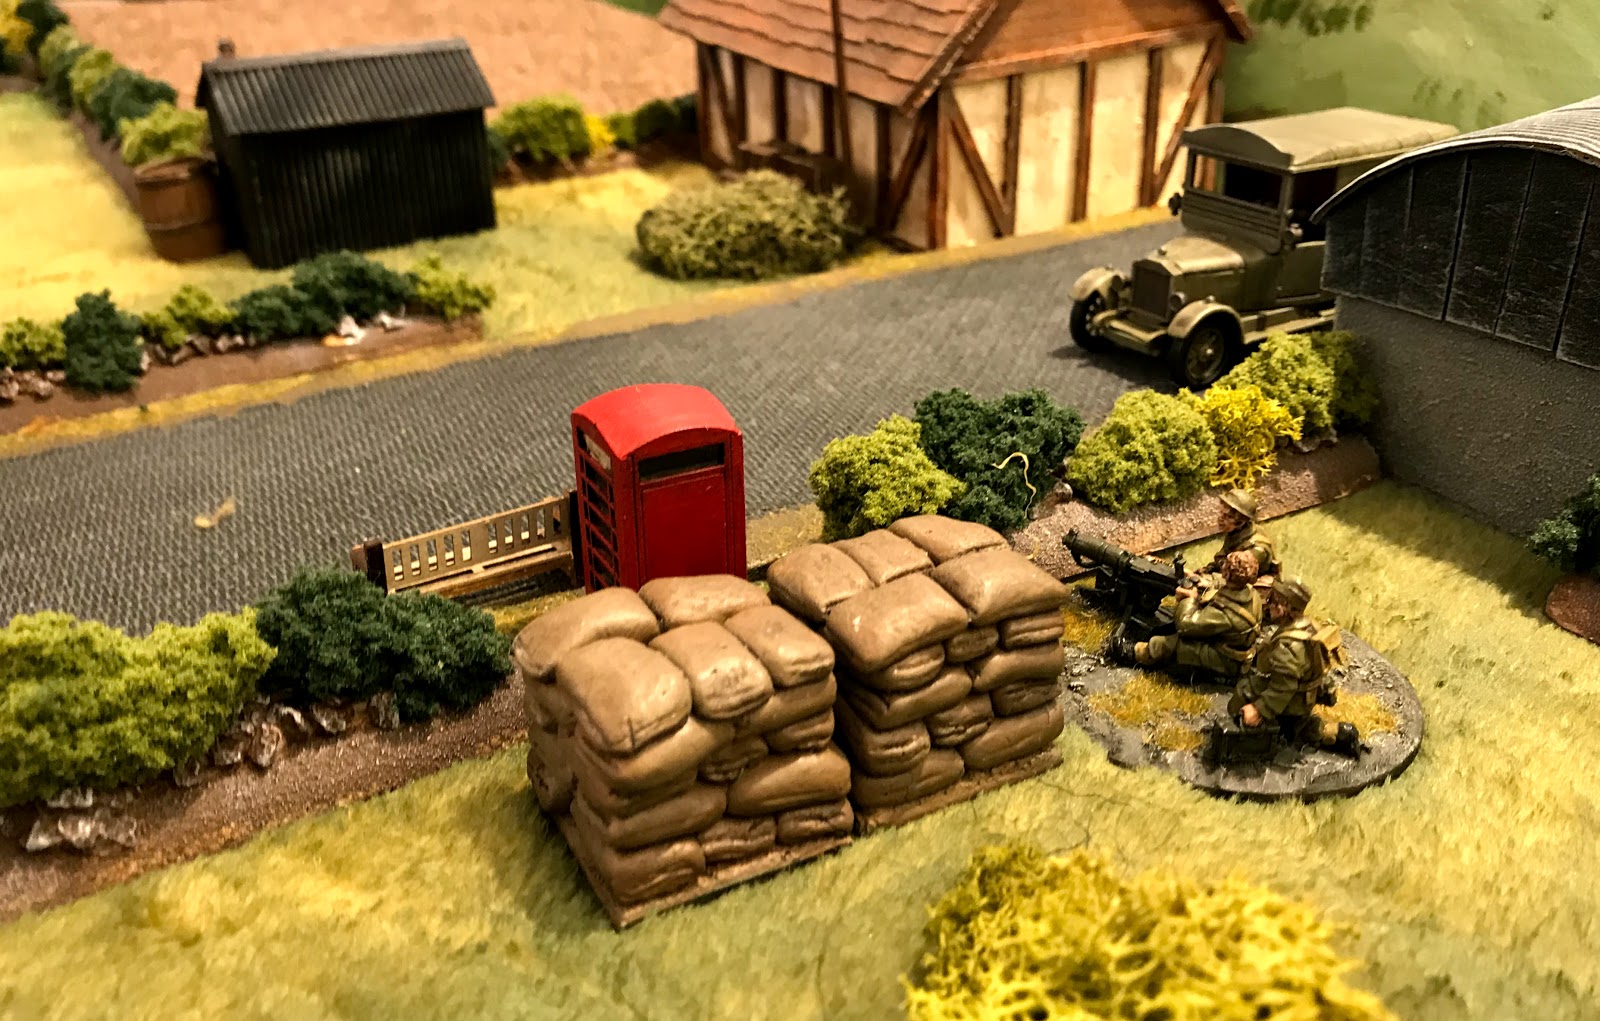
...as the sun sinks the phone box is safely in British hands the machine gun crew able to phone back to HQ on the position of the Germans advance

At the cross roads an unlikely finish the remaining two British infantry have run out of time to assault the german commander who seems oblivious to the danger, so this objective is also contested at the close.
So in the finally telling after the allotted six turns technically two objectives are contested with only the phonebox being held outright by the British so. A minor British victory ? .......well to be honest I think closer to a draw as the railway bridge is rightfully in the hands of the German Panzer.
A fun game, hard fought........and a welcome return to my Sealion Campaign🙂
Fab story, fab scene, fab everything. I like the visual of the dual rail track / bridge / embankment.
ReplyDeleteThanks Norm...never easy to make a railway embankment look reasonable 🤔
DeleteSuperb! What a wonderful looking game!
ReplyDeleteThan sure Phil
DeleteA fine return to the campaign, great read and view as ever. See that the new toys didn't live too long.
ReplyDeleteThanks Phil....both new vehicles blew up pretty much immediately, the armadillo did get one shot off but missed 😀
DeleteFantastic looking game Matt, great again and sounds like an amazing campaign. Come on the Brits, with armour like this we deserve to win, if not just for being brave enough to take the field in them.
ReplyDeleteThanks John we can hope 😀
DeleteSo sad! Your two new armored vehicles, just off the workbench, got potted in their first encounter. Super looking game and I really enjoyed seeing your landscape backdrop incorporated into the photos. Great stuff!
ReplyDeleteThanks Jonathan......hopefully they will be back soon. I keep planning another backdrop but never get round to sorting it out ?
DeleteGreat to see the Sea lion campaign back in the dungeon, always a favourite.
ReplyDeleteThanks Michael.......think the campaign will be runnnig for a while yet !
DeleteCracking battle. Thank god the British armour was good
ReplyDeleteThanks ......eventually if the campaign reaches 1942 they may get some American support !
DeleteWatching it is a pleasure!
ReplyDeleteThanks michal
DeleteAnother lovely looking game, your new British armour did as well as could be expected!
ReplyDeleteBest Iain
Thanks Iain....sadly the new vehicles were less than impressive 😢
DeleteGreat looking game Matt!
ReplyDeleteThanks James 🙂
DeleteSuperb photos of a truly beautiful game, Matt. The figures, vehicles and terrain are wonders to behold.
ReplyDeleteThanks Dean you are very kind 😀
DeleteWell done another great AAR thanks!
ReplyDeleteGame looks good and seemed to play well.
The new British vehicles had a dubious debut.
Surely armour by itself can not secure an objective you need legs on the ground,the bridge would not be in German control at the end...🤔
Thanks.......as to claiming the objective as we wanted to limit ourselves to 12 units (bolt action) we effectively only had four infantry units each so we agreed at the start that objectives could be held by any units. I certainly couldn’t say it was safely in British hands with a Panzer parked on it 🙂
DeleteWhat a wonderful set too! New toy syndrome in full cry I see. Always enjoy your Operation Zeelowe games, bring on the next asap!
ReplyDeleteThanks David.....yes the new armour blew up really quickly but to be honest they are pretty thinly armoured ! More to come soon I hope 😀
Delete